
Connect & sync a franchise
This guide walks through linking your store to a franchise — either when you sign up or later from Settings — and syncing the catalog whenever the franchisor updates it. For what a connection gives you in the first place — the preset, shared suppliers, and franchisor reporting — see Joining a franchise.
Connect when you sign up
The simplest way to join a brand is to create your account through the franchisor's signup link — an ordinary BuddyStall sign-up page with the brand already attached:
https://buddystall.com/signup?franchise=sunrise-coffee-4b1e7d09
Ask the franchisor for that link; there is nothing for you to type in or pick. Opening it shows the sign-up form with a banner naming the brand — "You're joining Sunrise Coffee" — so you can see the connection is in place before you start. Create your account from that screen, with Google or with your email and a password. Both keep the connection.
The preset of the franchise is applied in one step: right after you create the account a short Setting up your franchise menu… screen loads the brand's menu, recipes, inventory, and expense items, and you land on the dashboard ready to name your store and start selling.
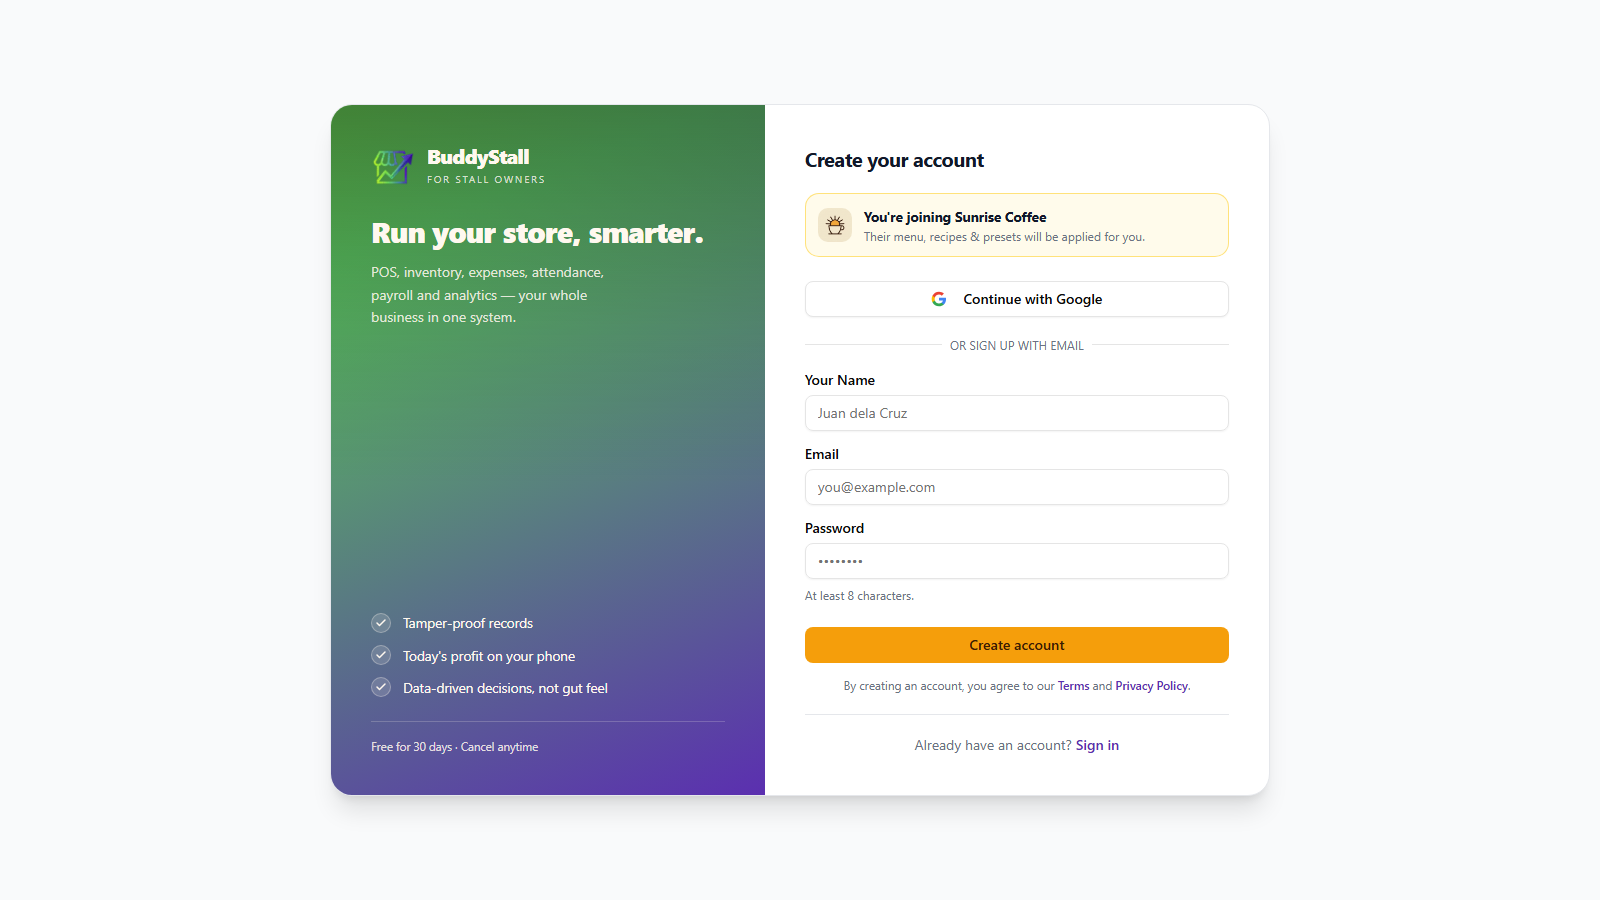
The sign-up screen has no franchise list — the brand comes from the link alone. If you sign up from the plain sign-up page, or the link no longer resolves (a franchisor can switch it off, and the page then says The specified franchise was not found), your account simply starts unconnected. Nothing is lost: you can still connect from Settings at any time.
If you signed up without the link
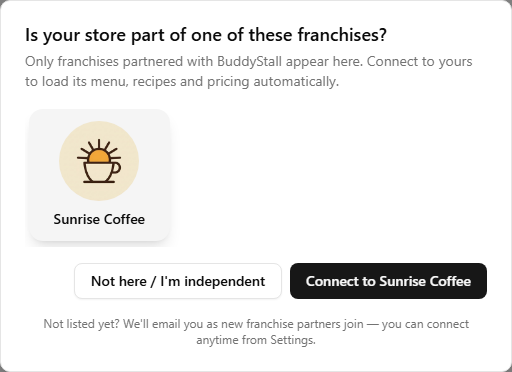
Once you reach your dashboard for the first time — after naming your store — BuddyStall asks you once whether your store belongs to one of its partner brands. Pick yours, confirm with the Connect button, and the preset loads exactly as it would have at signup: your catalog is still empty, so there is nothing to review. Choose Not here / I'm independent to carry on unconnected.
The question is asked only this once, whichever way you answer, and only for a brand-new account. After that, connecting is a Settings job — see the next section.
Connect an existing store
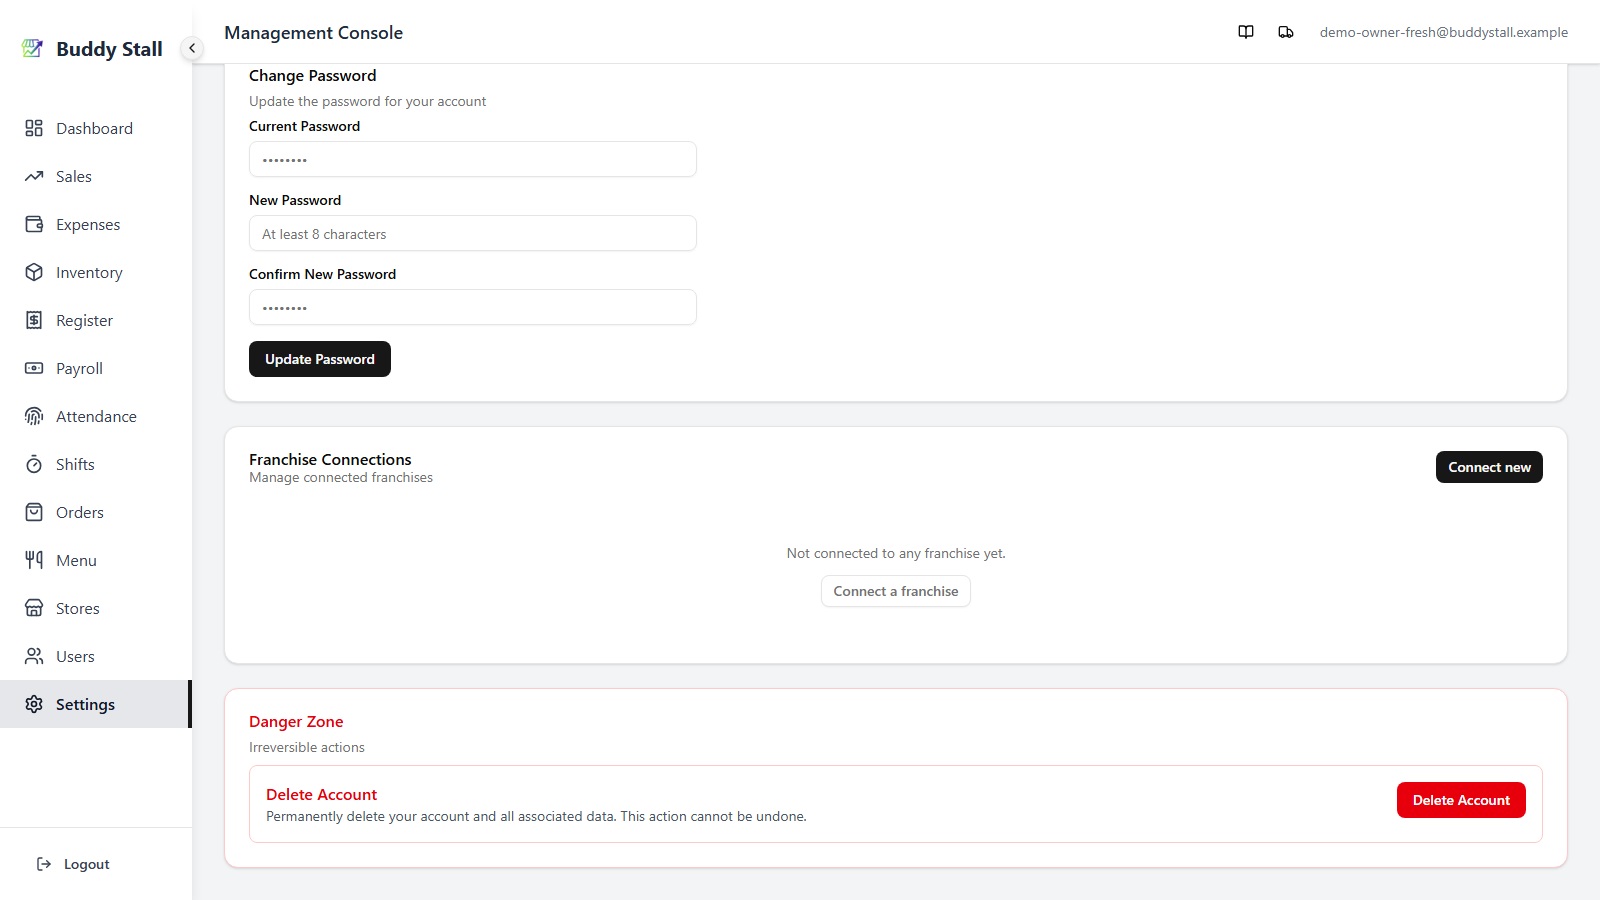
Already running and want to join a brand? Connect from Settings:
- Open Settings → Franchise Connections and click Connect new.
- Pick the franchise from the list. The app compares the brand's preset against your current master data and opens a review dialog — see Review what loads below.
- Review the changes and click Start load. A Connection completed message confirms the catalog has been loaded into your master menu, inventory, and recipes.
Review what loads
When you connect an existing store — or sync updates later — the review dialog shows exactly what will change before anything is written.
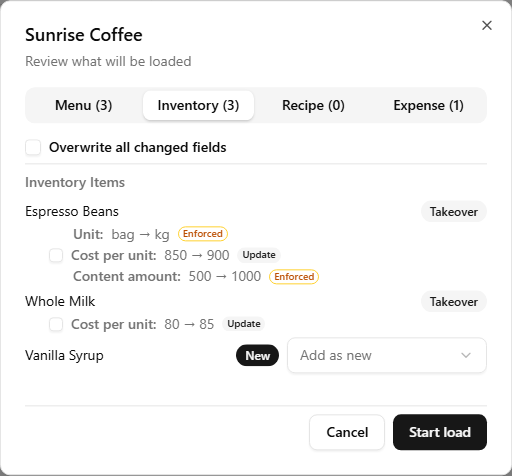
Each preset item is first matched against your master data: anything you've already loaded from this franchise is matched directly, so re-syncing updates it in place. Anything else is matched by name (ignoring case and spacing) — and for menu and expense items, the category has to match too. The outcome is grouped into Menu, Inventory, Recipe, and Expense tabs, with a badge on each row:
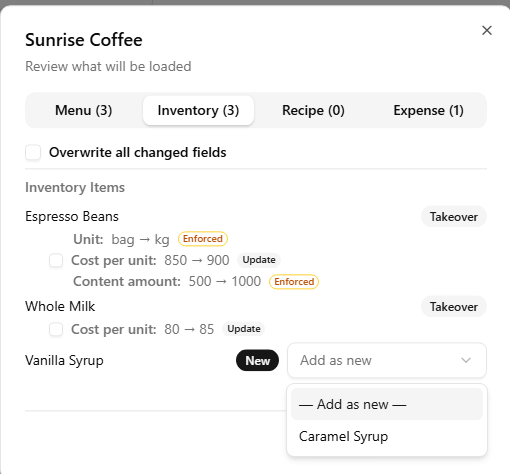
- New — no match found; it's added to your master data. You can also pair it to one of your own items by hand instead — see Pair a new item to one you already have.
- Existing — you already have this item; its changed fields are listed underneath as current → incoming, each with a checkbox so you choose field by field what to adopt. No Change means nothing differs. An Image row shows the two photos side by side rather than a line of text — leave it unticked and your own photo stays exactly as it is.
- Takeover — an item you already had becomes managed by the franchise, so it now updates from the preset like any franchise item.
Use Overwrite all changed fields at the top of a tab to accept every change at once, then click Start load.
Fields marked Enforced always come from the preset — they have no checkbox and can't be opted out of. They keep core catalog values consistent across the brand. Everything else is yours to accept or skip. See Inventory master for which fields stay locked afterwards.
Pair a new item to one you already have
Sometimes you already track the same thing under a slightly different name, so name-matching doesn't catch it and the preset item shows up as New. Rather than end up with a duplicate, you can pair it to your own item by hand.
On any New row, a dropdown reads Add as new by default. Open it and pick one of your existing items instead — the row flips to a Takeover, so your item is adopted by the franchise and updated from the preset rather than a copy being created. The dropdown only offers items that fit: for example, an expense shows only your expense items in the same category, and an item you've already paired to another row won't appear twice.
Add-on Recipe Lines
A line in an add-on recipe has an Effect: Add, Remove, or Replace with. See Set up recipes for what each one does.
The franchisor sets the effect on its preset lines. When you load, the effect comes to your store as the franchisor set it. So do the replacement ingredient and the multiplier. They have no checkbox, so you cannot decline them.
The one choice left to you is the quantity of an Add line. It is a checkbox only when the franchisor's line and a line you already have are both Add. The box starts unticked, like any other recipe quantity.
Say you wrote your own Remove or Replace with line for an add-on option and an ingredient that the franchisor now gives a line to. If it differs from the franchisor's line, the review shows it as an Update, with no checkbox. For example, Coffee Beans: Remove → Add 10 g. If it already matches exactly, the review shows no change. Either way, after the load the line is the franchisor's and is locked.
A line your store cannot use shows Skipped — not available to your store. For example, it may need an ingredient you have not loaded. Nothing is written for it.
Sync later updates
When the franchisor changes the catalog, you pull the updates yourself — your store is never overwritten silently:
- In Settings → Franchise Connections, a connected brand shows an Updates available badge when there's something new to pull.
- Click Reload on that brand to open the same review dialog, check what changed, and click Start load.
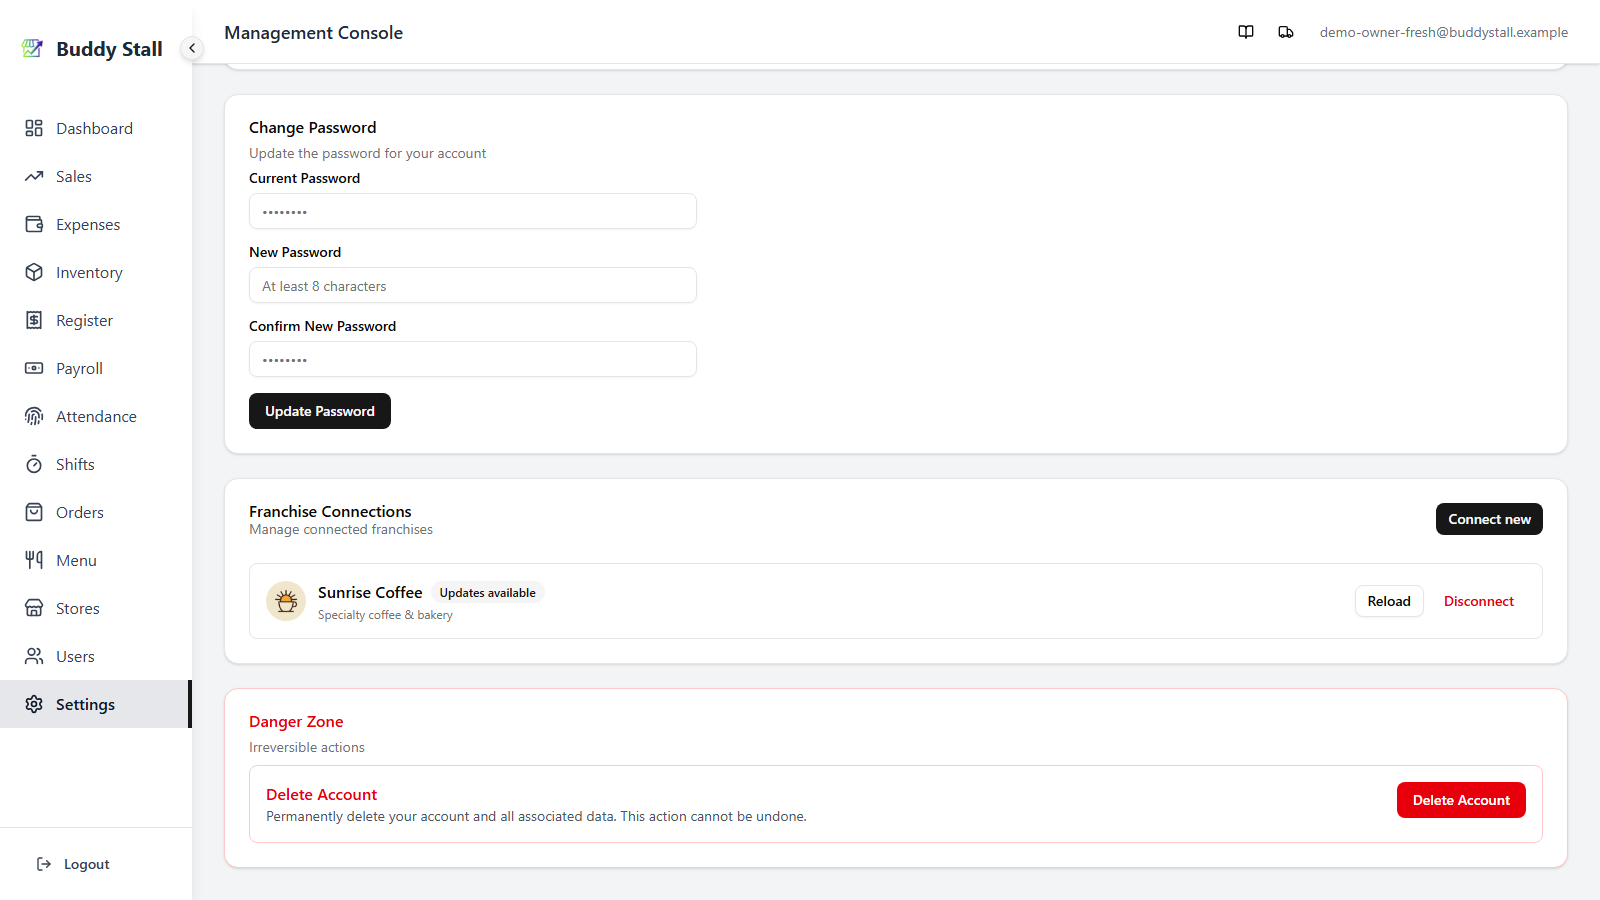
It's the same compare-and-load flow as the first connection — see Review what loads — so you stay in control of every field each time. To leave a brand entirely, use Disconnect — items that came from it stay in place, but their franchise badge is cleared.
When the franchisor removes something
A franchisor can also drop things from the preset. Because you may be selling or stocking the thing right now, a removal is not applied to you automatically — it arrives as one more decision in the review dialog, under Removed by the franchisor.
You will find it in the tab that matches what was removed: menu rows in Menu, ingredients in Inventory, cost items in Expense. Each removal has a single checkbox, and it starts unticked:
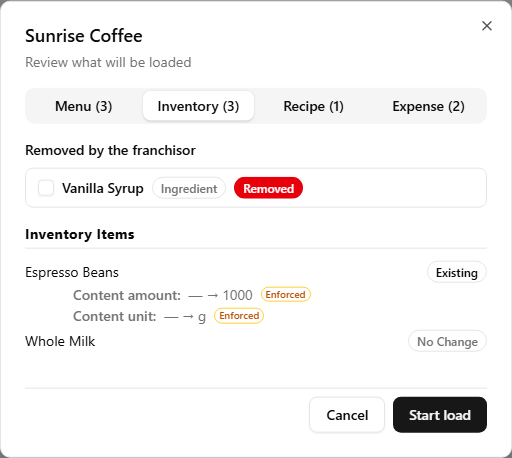
- Leave it unticked and nothing happens — you keep what you have. The removal is not used up by declining it, so it appears again on your next reload. Skipping it is a "not now", not a permanent answer.
- Tick it and your own copy is archived as the load runs. It leaves your working lists, but every past sale, stock movement, and cost entry that refers to it stays exactly as it was. Nothing is erased.
Cost items work the same way, in their own tab:
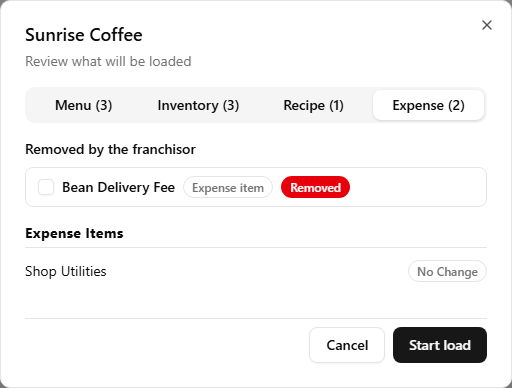
If the franchisor puts something back, the mirror image appears: Brought back by the franchisor, badged Restore. Ticking that revives the copy you already had rather than adding a second one alongside it, so a remove-then-restore round trip leaves you with one item, not two.
Two removals arrive without a checkbox, because there is nothing meaningful to decide:
- An expense item paired to an ingredient rides along with that ingredient's removal, so you answer once rather than twice.
- A recipe line the franchisor deleted is simply removed on load. You can still see it coming — the Recipe tab lists it struck through and badged Removed before you start the load. A removal never touches recipe lines you wrote yourself. The one exception is on an add-on: your own Remove or Replace with line is replaced when the franchisor gives a line to the same ingredient. See Add-on recipe lines.
An ingredient the franchisor marked exclusive is fixed in every store: it is registered for you automatically and you cannot delete or archive it yourself. Everything else that came from the preset is yours to drop the same way you drop your own items.
Read next
Joining a franchise
The bigger picture — what connecting sets up, and how the preset, orders, and reporting fit together.
Inventory master
What the franchise badge means on a master item, and which fields the franchisor keeps locked.
Franchise ordering
Once connected, how to order from the franchisor's stockhouse and approved partner suppliers.