Stores & employees
Stores are the physical locations your business runs out of — each one with its own inventory, expenses, sales, and payroll.
Employees are the people who work at each store — the names recorded by attendance, the recipients of Salary expense entries.
This page walks through setting up both, store first.
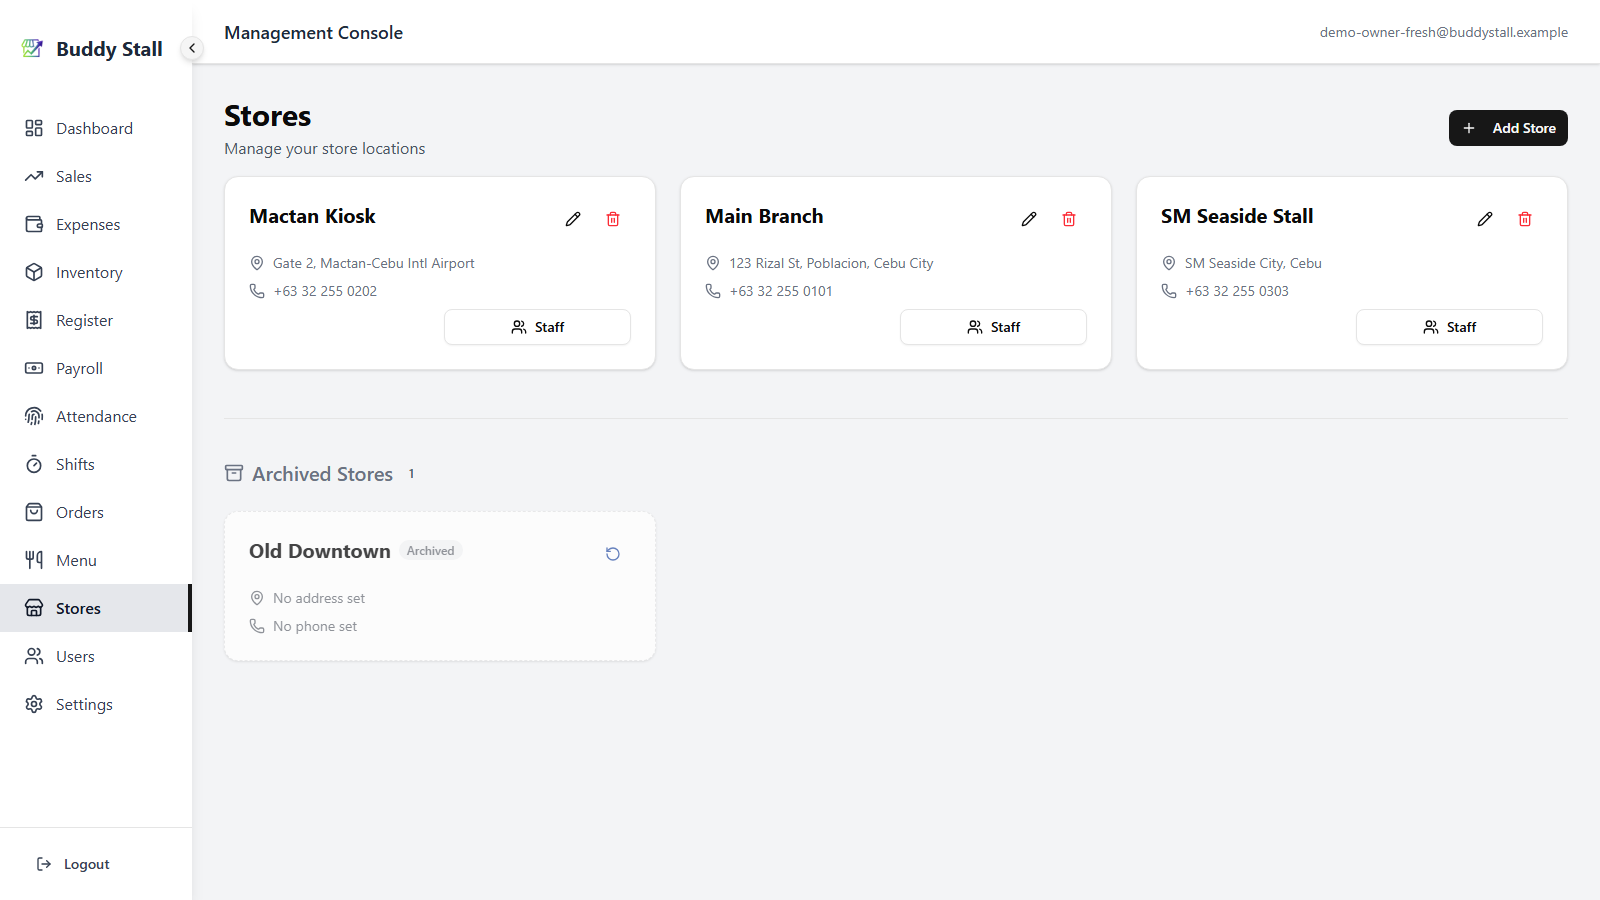
1. Add a store
From the admin sidebar, open Stores and click Add Store. Fill in:
- Store Name — required.
- Address — optional. Type it in directly, or set it from the map (see below) and let the app fill the field for you.
- Phone — optional.
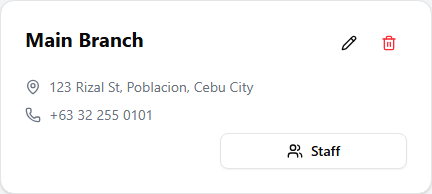
Save and the store appears as a card in the Active section.
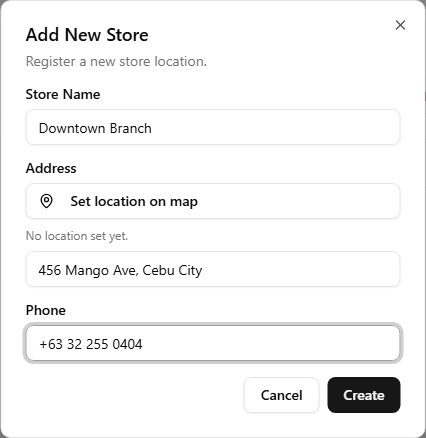
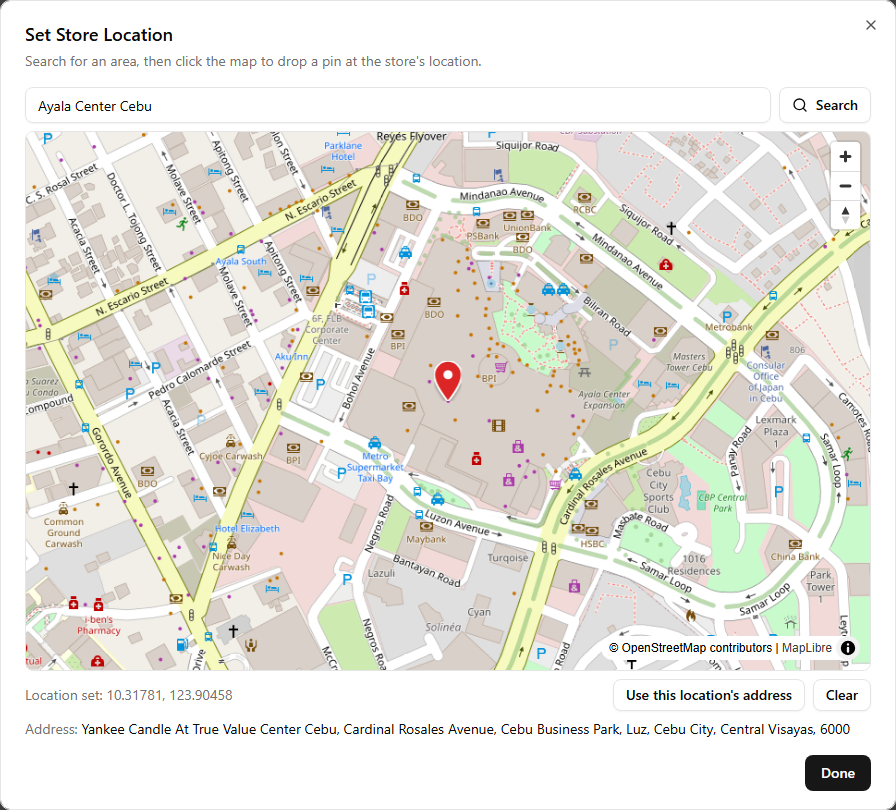
Set the address from the map
Under the Address label, the dialog has a Set location on map button (it reads Edit location on map once a location is set). Use it to pin the store on a map and pull the address back into the field automatically:
- Click Set location on map. A map opens, centred on your last pin if the store already has one.
- Type a place, street, or area into the Search box and press Search (or Enter). The map flies to the best match.
- Click the map at the exact spot of the store. A pin drops and
the coordinates appear below it as
Location set: <latitude>, <longitude>. Click again to move the pin, or Clear to remove it. - Click Use this location's address. The app reverse-geocodes the pin and writes the resulting address into the dialog's Address field. You can still edit that text afterwards.
- Click Done to close the map and return to the store dialog.
Back in the store dialog, a line under the button confirms the saved
coordinates (Location set: <latitude>, <longitude>) or reads No location set
yet. The pin and the address are independent — you can drop a pin
without copying its address, or type an address without a pin.
Searching only moves the map — it does not place the pin. The store's location is whatever point you click on the map, so search to get close, then click the precise spot.
2. Edit or archive a store
Each store card has two actions: a pencil icon to edit the store's details (same dialog, pre-filled), and an archive action that hides the store from the active list.
Archived stores still exist — history, sales, and expenses are preserved — but they no longer appear in store pickers.
The delete action behaves the same way only when the store has no recorded history (no sales, no expenses, no attendance). The moment a store has any record attached, Delete is replaced by Archive to prevent accidental loss of past data.
Archived stores appear in a separate "Archived Stores" section below the active grid and can be restored later.
Archive is the safe path: the data stays, the store is just hidden. Delete is permanent — and the UI only lets you reach it when there is literally nothing to lose.
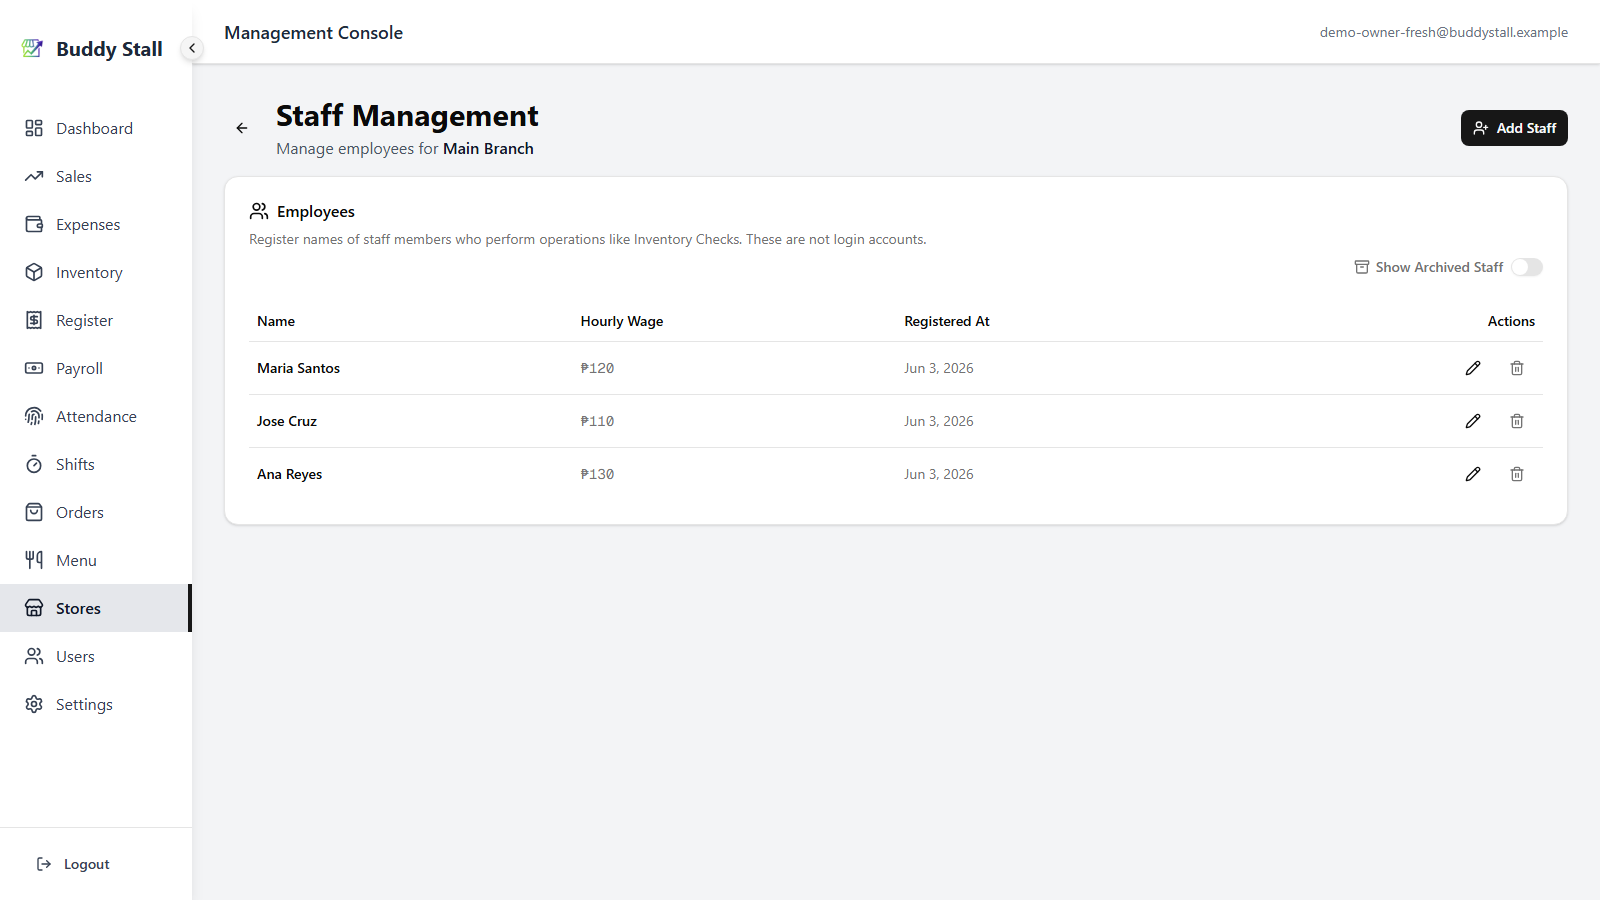
3. Open a store's staff list
Each store card has a Staff button. Clicking it opens that store's Staff Management screen, listing every employee registered at that store with an archived-staff toggle and an Add Staff button in the header.
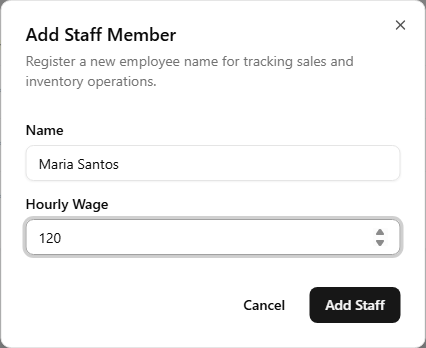
4. Add an employee
Click Add Staff. The dialog asks for two fields:
- Name — the employee's name, as it should appear on shifts, attendance, and Salary entries.
- Hourly Wage — the rate payroll multiplies by payable hours when calculating Salary expense entries.
Save and the new employee joins the list, immediately selectable on shift dialogs, attendance kiosk cards, and payroll.
5. Edit or archive an employee
Each row in the staff list has an Edit button (opens the same dialog pre-filled) and a Delete / Archive button. The same data-preservation rule applies as for stores.
A new employee with no history can be deleted; once shifts, attendance, or payroll records reference them, the action switches to Archive.
Archived employees sit under a "Show Archived Staff" toggle and can be brought back.
Updating an employee's hourly wage affects future payroll only. Salary expense entries that were already registered keep the wage that was in effect when they were posted — so historical payroll totals stay stable when you adjust a rate going forward.
Employees feed the rest of the app
An employee defined here surfaces in several places downstream:
- On the Shift management calendar, when you assign someone to a shift.
- On the Clock in & out kiosk, as one of the cards staff tap to punch in.
- On the Payroll screen, as the selectable subject of each calculation.
- On every Salary expense entry registered through payroll, tagged as the recipient.
- On an Inventory Check in the staff portal, picked as the staff member who counted the stock.
- When receiving an order in the staff portal, picked as the staff member who took delivery.
Getting the name and wage right here saves typing across all of those screens.