Place & receive orders
This guide walks through the full purchase loop end to end: add the suppliers you buy from, create an order with the items and expected delivery date, and mark it received when the goods arrive.
For the why — statuses, ledgers, when to use Orders vs. recording an expense directly — start at How purchasing works.
Franchise Ordering from franchise-linked stock? See Franchise ordering.
Placement (creating, editing, cancelling) is on the admin console and only owner or manager can do it. Receiving the goods is open to both admin and staff — staff drives that part from the POS device via the truck badge in the portal header.
1. Prerequisite: add your suppliers
Before you can create an order you need at least one supplier on file. Suppliers are shared across all stores — the owner adds each one once from Orders → Manage Suppliers. The full walkthrough, including franchise partners, is in Managing suppliers.
2. Open the Orders page and pick a store
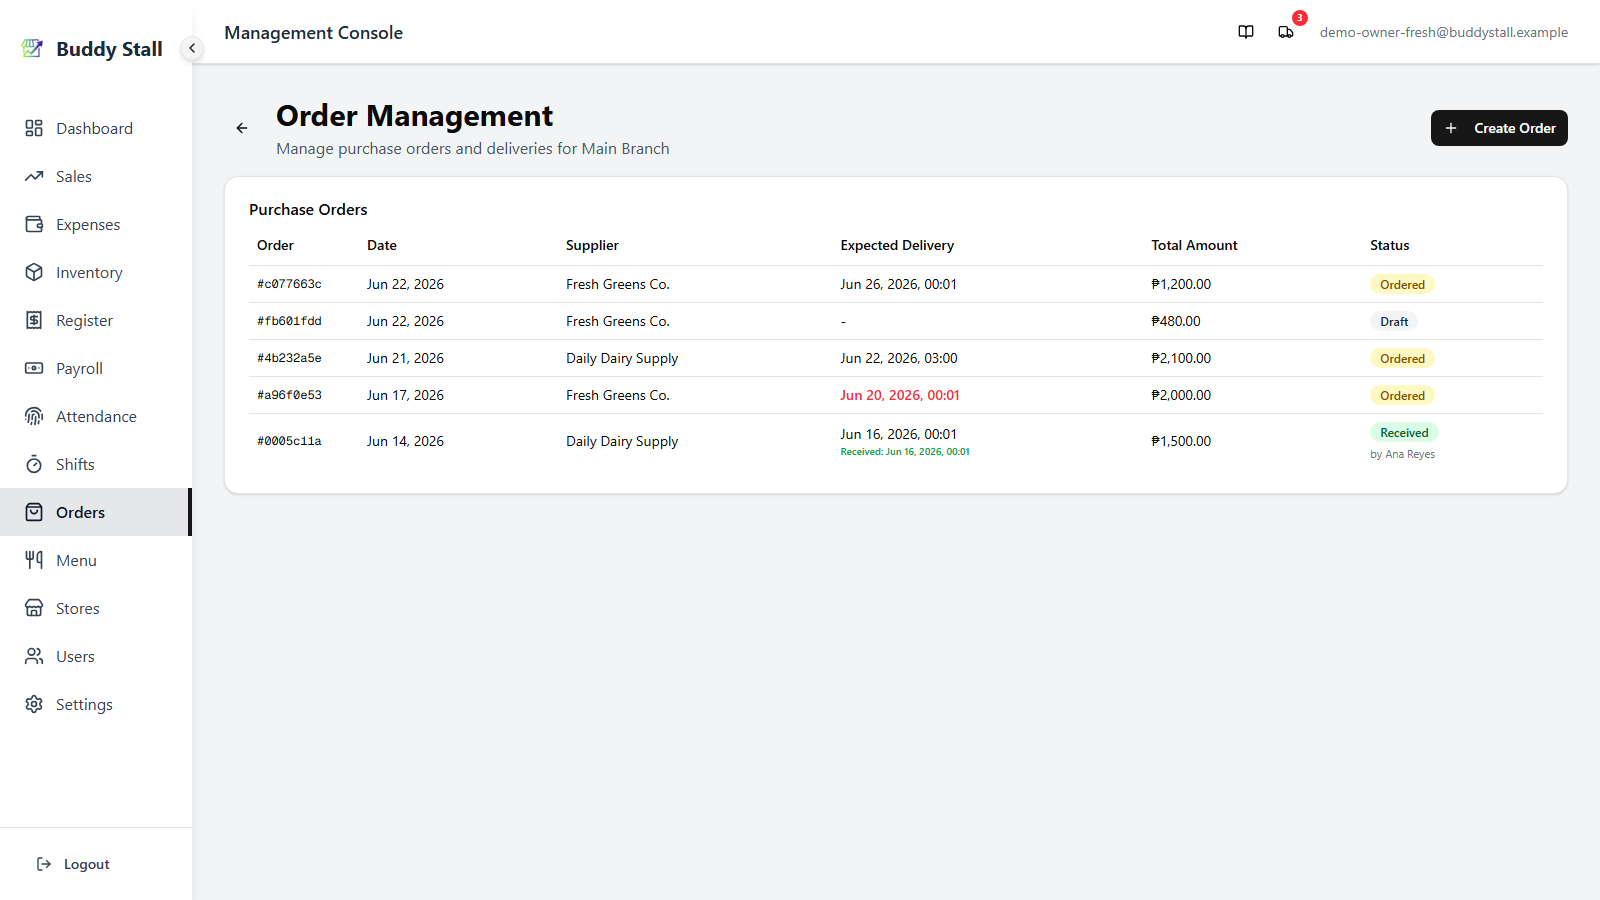
From the admin sidebar, open Orders. The page shows your stores; pick the one you're ordering for. The store‑specific page lists every purchase order — newest first, with date, supplier, expected delivery, total, and status.
3. Create a purchase order
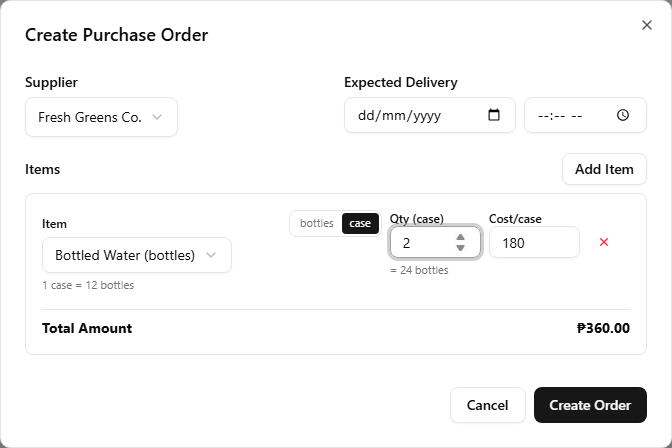
Click Create Order in the top right. The Create Purchase Order dialog opens.

3.1 Supplier
Pick one from the list. If the list is empty, you'll see a link back to Manage Suppliers to add some.
Franchise If you pick a connected franchisor (or a partner supplier) as the supplier, the dialog switches to a franchise order, which follows its own placement and delivery rules — see Franchise ordering.
3.2 Expected delivery
Date and Time fields side by side. Optional, but recommended — the truck badge highlights today's deliveries and turns red on anything overdue.
3.3 Add items
- Click Add Item for each line.
- Item picker — the list comes from the master inventory; pick the ingredient you're ordering.
- Cost/Unit autofills from the master item's cost per unit but is editable per order, so a supplier's actual quote overrides the default.
- Qty — how many units (in the master item's unit) you're buying on this line — unless the item has an order unit, in which case see the note below.
A Total Amount line at the bottom of the dialog adds up every line (quantity × cost per unit) and updates as you type.
If a master item is set up with an order unit — a coarser unit you buy in, such as a case or pack, distinct from the finer stock unit you count on the shelf — the line works in that order unit. (You set this up per item under Set up your inventory.) So:
- The item shows the conversion, e.g. 1 case = 12 bottles.
- The Qty field is labelled with the order unit (Qty (case)), and as you type it shows the stock-unit equivalent — e.g. 2 → = 24 bottles. That stock-unit amount is what restocks your inventory on receipt.
- The Cost field follows suit, labelled per order unit (Cost/case) — still editable, so a supplier's actual quote per case overrides the default.
Each such line carries a small unit toggle by the item. It defaults to the order unit, but you can flip it to the stock unit for a one-off line you'd rather count in pieces — the Qty, cost, and conversion re-label to match.
3.4 Save
Click Create Order. The order is saved as a Draft and a row appears at the top of the list. To place it, open the order and switch its status to Ordered (see the next section).
4. Edit or cancel an order
Click any order on the list to open the Order Details dialog.
- Editable while the status is Draft or Ordered. You can change the expected delivery, add or remove items, edit quantities and costs.
- Status dropdown lets you flip between Draft (a working copy you're still preparing), Ordered (placed), and Cancelled. Setting Received here is also possible but the normal path is the truck badge (next section) so the receiver gets recorded.
- Click Update Order to save changes.
- Received and Cancelled are terminal — the dialog opens read‑only and no editing is possible.

5. Receive an order when it arrives
The arrival side of the loop is driven from the truck badge in the portal header. The badge shows a red count of upcoming deliveries — visible to anyone signed in (admin sees all stores, staff sees just their store).
- Click the truck icon in the header. A popover opens listing
every upcoming delivery, with the supplier, store, and expected
date (red = overdue, green = today).
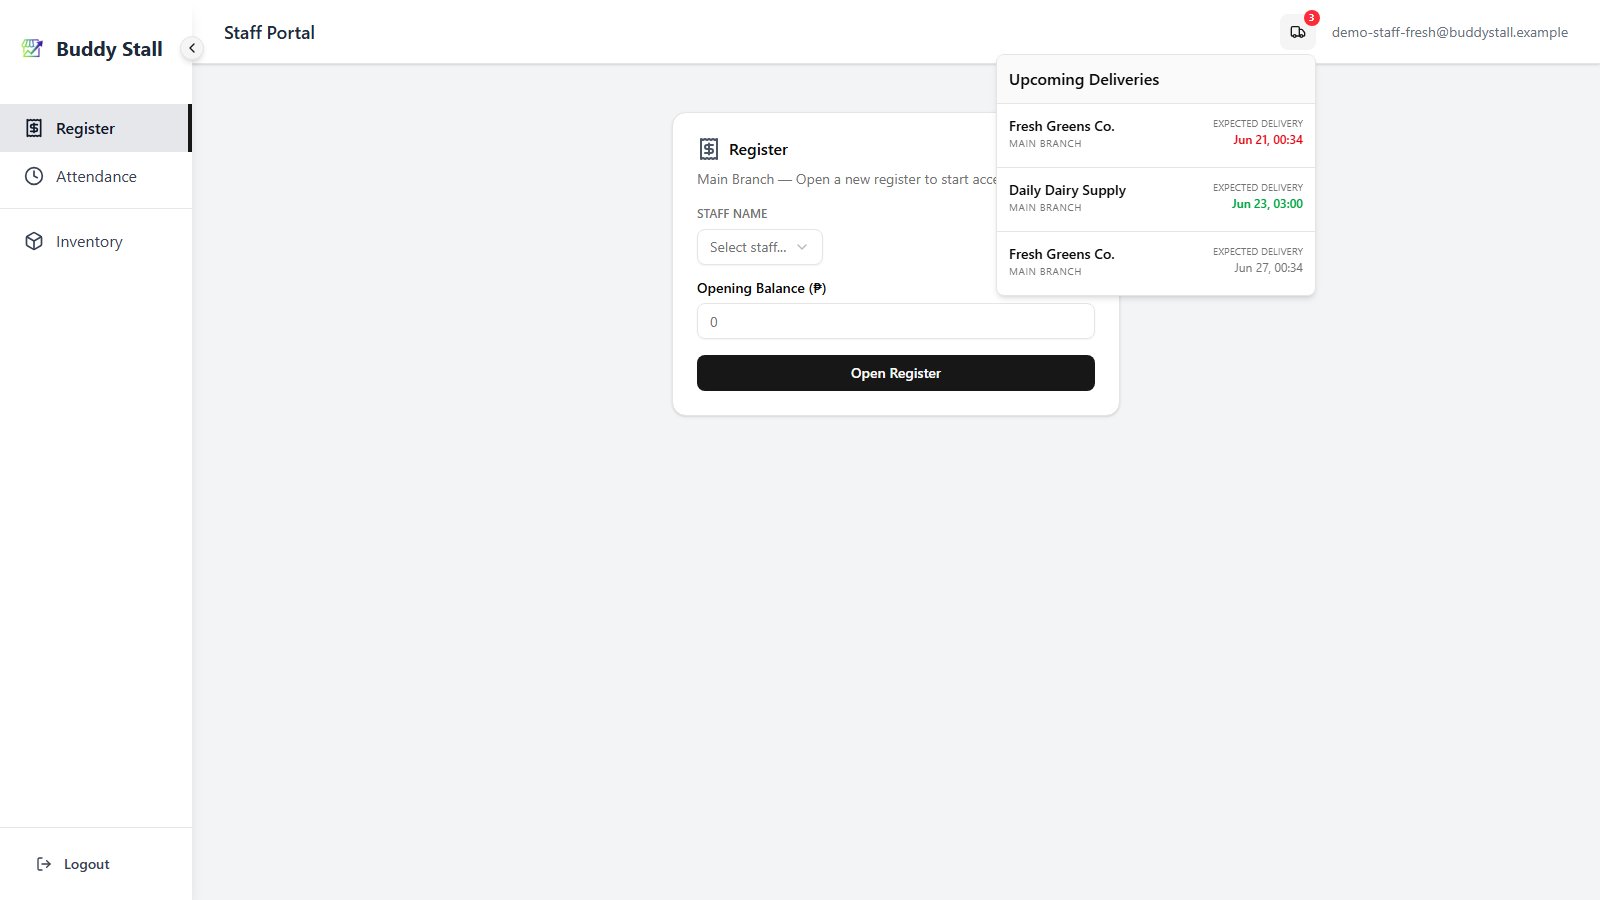
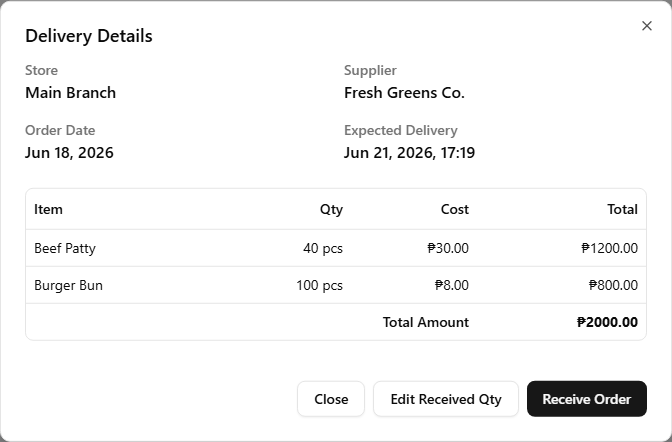
Upcoming Deliveries popover — red rows are overdue, green rows are due today. - Click the delivery you're receiving. The Delivery Details
dialog opens with the supplier, expected date, and item list. It
offers two ways to receive: Receive Order (the goods arrived as
ordered) and Edit Received Qty (adjust the amounts first — see
When fewer (or more) units arrive than ordered below).
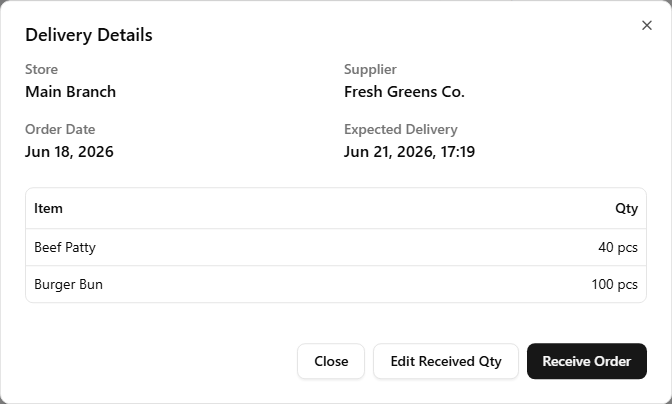
Delivery Details — Receive Order confirms as ordered; Edit Received Qty adjusts the amounts first. - Click Receive Order (everything arrived as ordered). The Receive Order confirmation opens.
- Record who received it:
- Staff — pick the employee from the Who is receiving this order? dropdown.
- Admin (owner / manager) — your login name is filled in automatically as "Receiving as".
- Click Confirm Receipt.
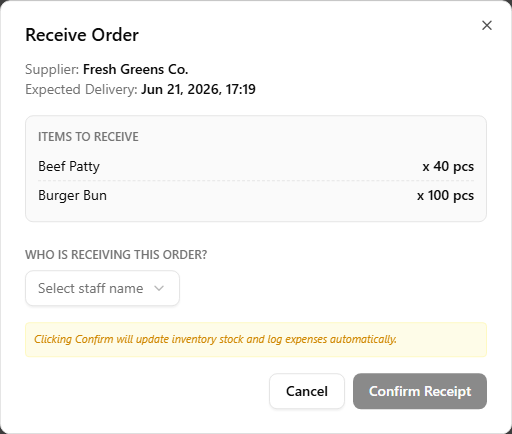
The Delivery Details view changes with who opens it. Staff (the step 2 shot above) see only the item and quantity — enough to check off what physically arrived. Owner and manager also see each line's cost, line total, and the order's Total Amount — the full money picture. Receiving restocks inventory and logs the expense the same way for both.
A single click does three things at once: the order's status flips to Received, every line restocks the store's inventory (added to the matching master item's stock), and each line posts a Material expense entry for that store. No separate inventory or expense entry to record — see How purchasing works for the full ledger picture.
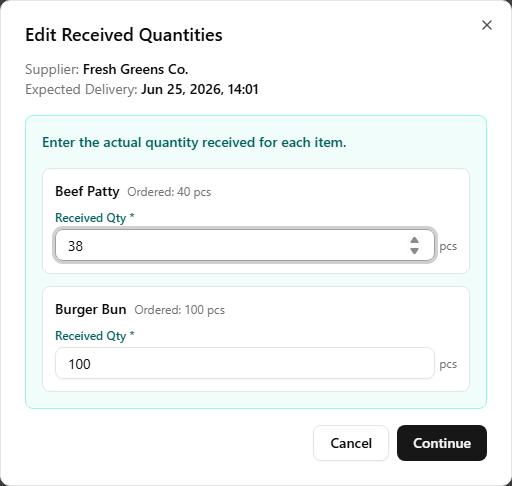
When fewer (or more) units arrive than ordered
Deliveries don't always match the order. On the Delivery Details dialog, click Edit Received Qty instead of Receive Order. Every line becomes an editable Received Qty field, pre-filled with the ordered amount — type the actual quantity that arrived (enter 0 for a line that never came), then click Continue.
The Confirm Receipt step opens next, showing the adjusted quantities. Record who received it, then click Confirm Receipt.
Inventory is restocked, and the Material expense is logged, at the received quantity rather than the ordered one. The received amount is saved on each line, and the order's Total Amount — along with the line quantities and totals in the order detail — updates to reflect what actually arrived, not what was ordered. Everything else (status → Received, who received it) works exactly the same.
6. Read the order log
Back on the per‑store order list:
- Status chips — each row shows the order's current status at a
glance. A regular order moves through Draft / Ordered / Received /
Cancelled; what each status means is covered in
How purchasing works.
Franchise A franchise-linked order uses a different set of statuses (it also passes through the franchisor's side) — see Franchise ordering. - Expected delivery in red = overdue (past and not yet received).
- A green Received: … line appears on the row once it lands, recording the time and the name of whoever confirmed it.

Read next
How purchasing works
The explanation behind these steps — statuses, the truck badge flow, and how receiving wires Orders into Inventory and Expenses.
Set up your inventory
The master items orders restock — define each one once on the owner side.
Recording expenses
The other path to bring stock in — direct entry under Material, no supplier needed. Useful for one-off purchases.