Recording expenses
Once your expense items are set up in Master Expenses, recording an entry is the day-to-day step. If you haven't defined your items yet, start with Set up expense items first.
The two roles typically record different kinds of spending. Owner and manager enter the periodic, back-office costs — rent, utilities, salaries, and larger or planned material purchases — often after the fact, backdated to the day they fall on. Staff log the small, on-the-spot spending that comes up while running the stall — a quick ingredient top-up, a petty-cash buy, or spoilage — stamped with today's date and limited to the items you've made visible to them.
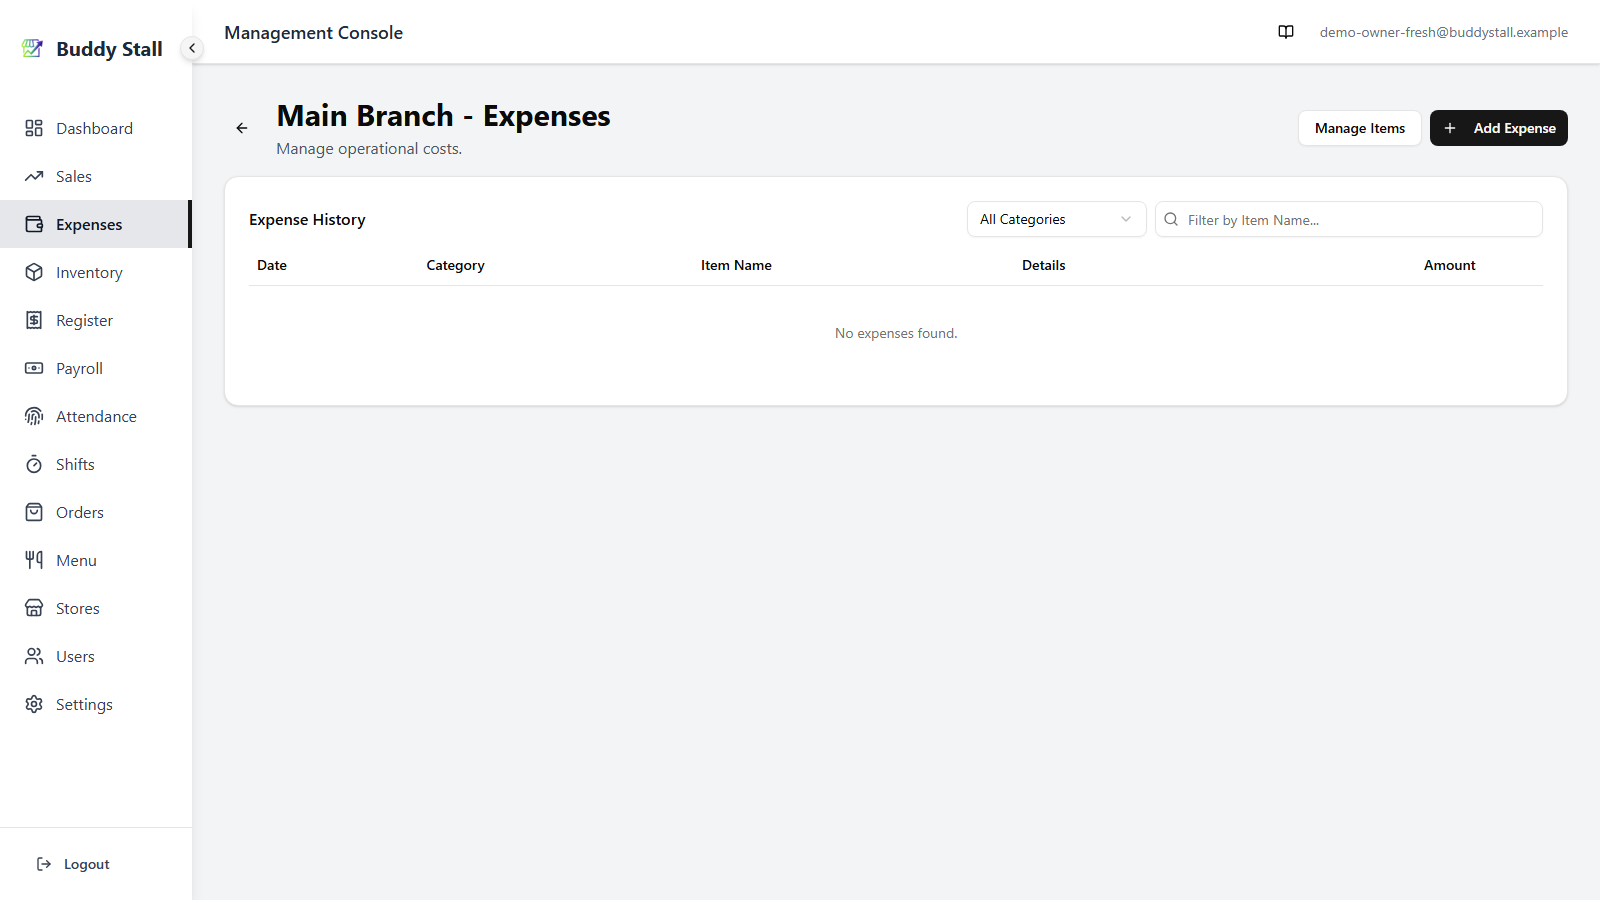
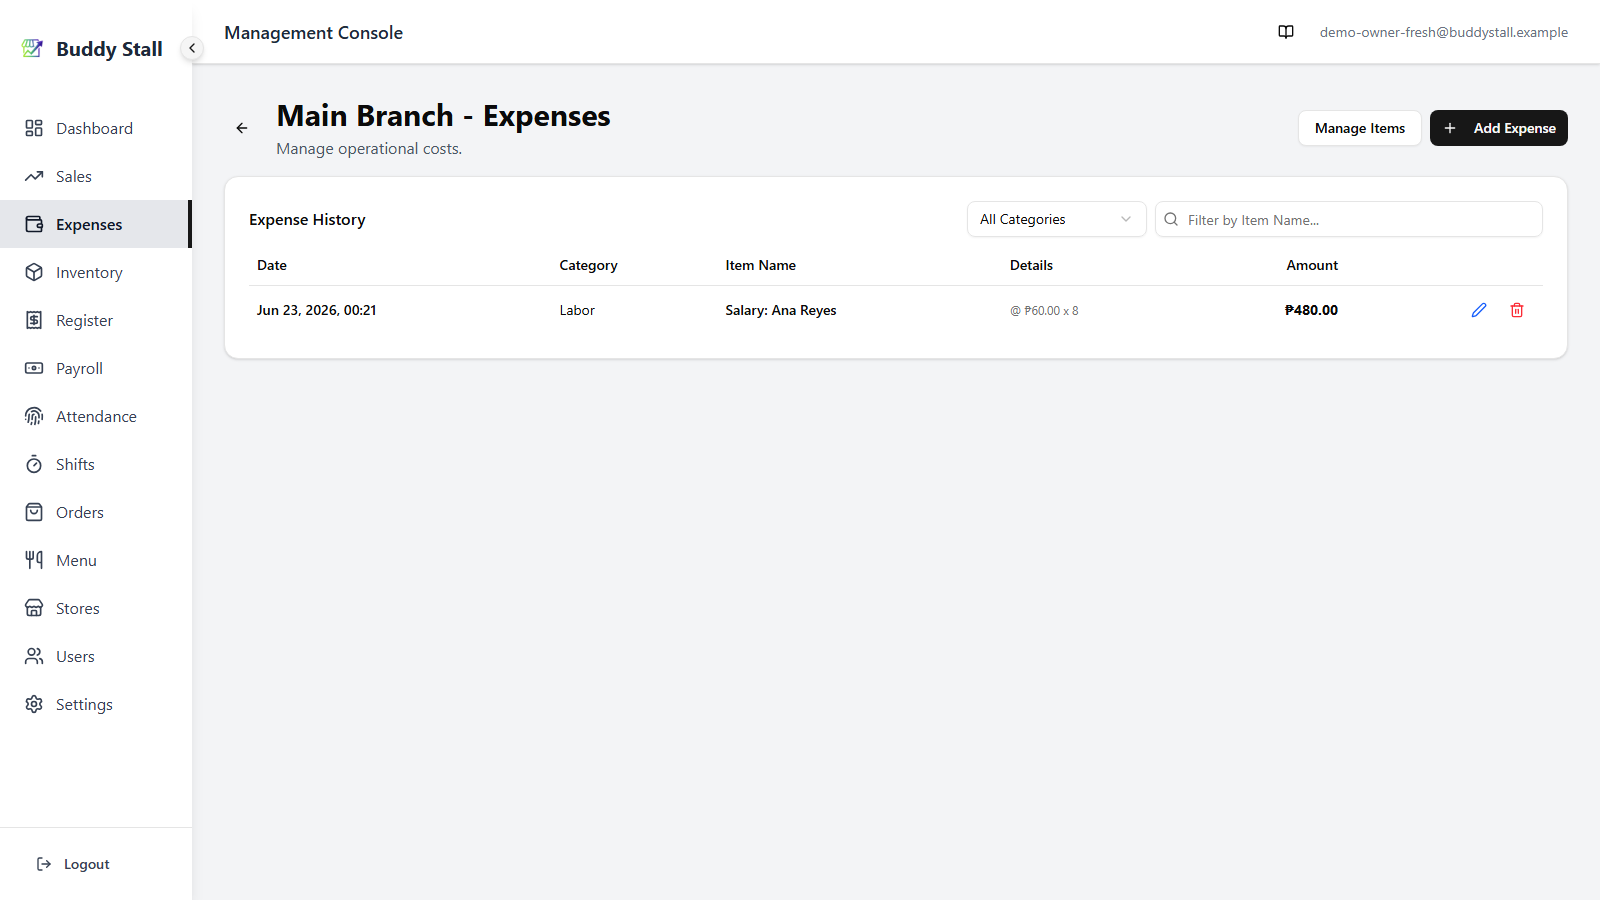
Owner & manager — from the store's Expenses page
Go to a store's Expenses page (Expenses → pick the store) and click Add Expense in the top-right.
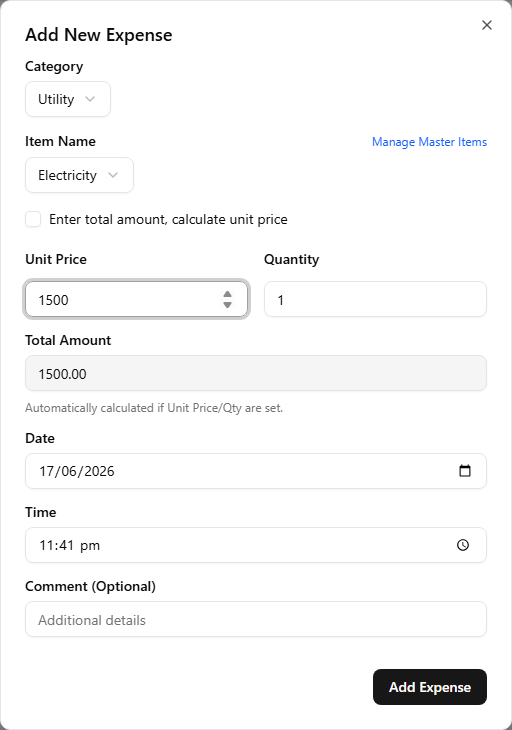
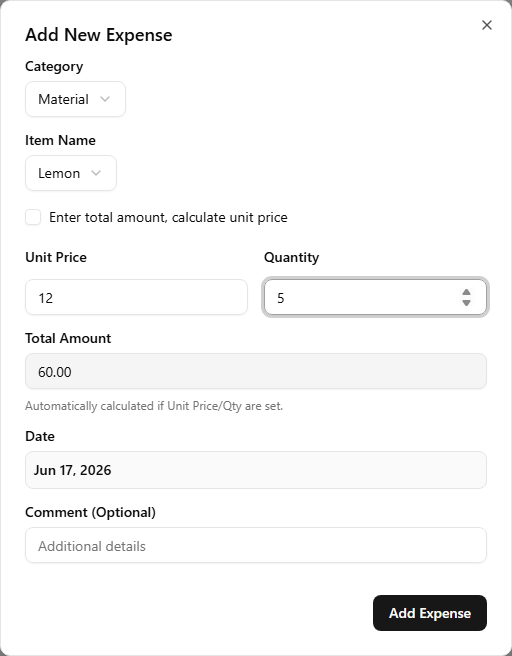
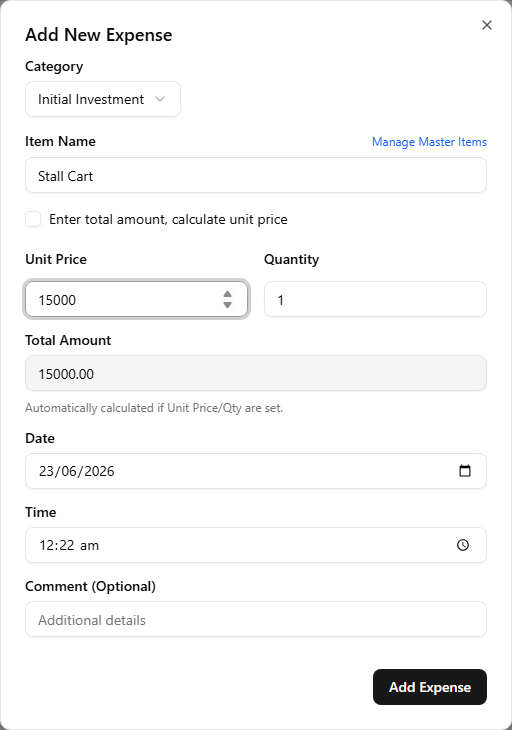
The dialog walks you through:
- Category — pick the category. The form's other fields adapt to the category you chose.
- Item — pick from the master items registered to this store (or, for Initial Investment, type the item name freely).
- Unit Price and Quantity — the per-unit cost and how many units; together they set the entry's Amount. For a Material item linked to inventory, the quantity is also what drives the auto-restock.
- Date and Time — the day and time of day the entry falls on. Owner and manager can backdate an entry and set its time.
- Comment — an optional note about the entry.
Click Add to save.
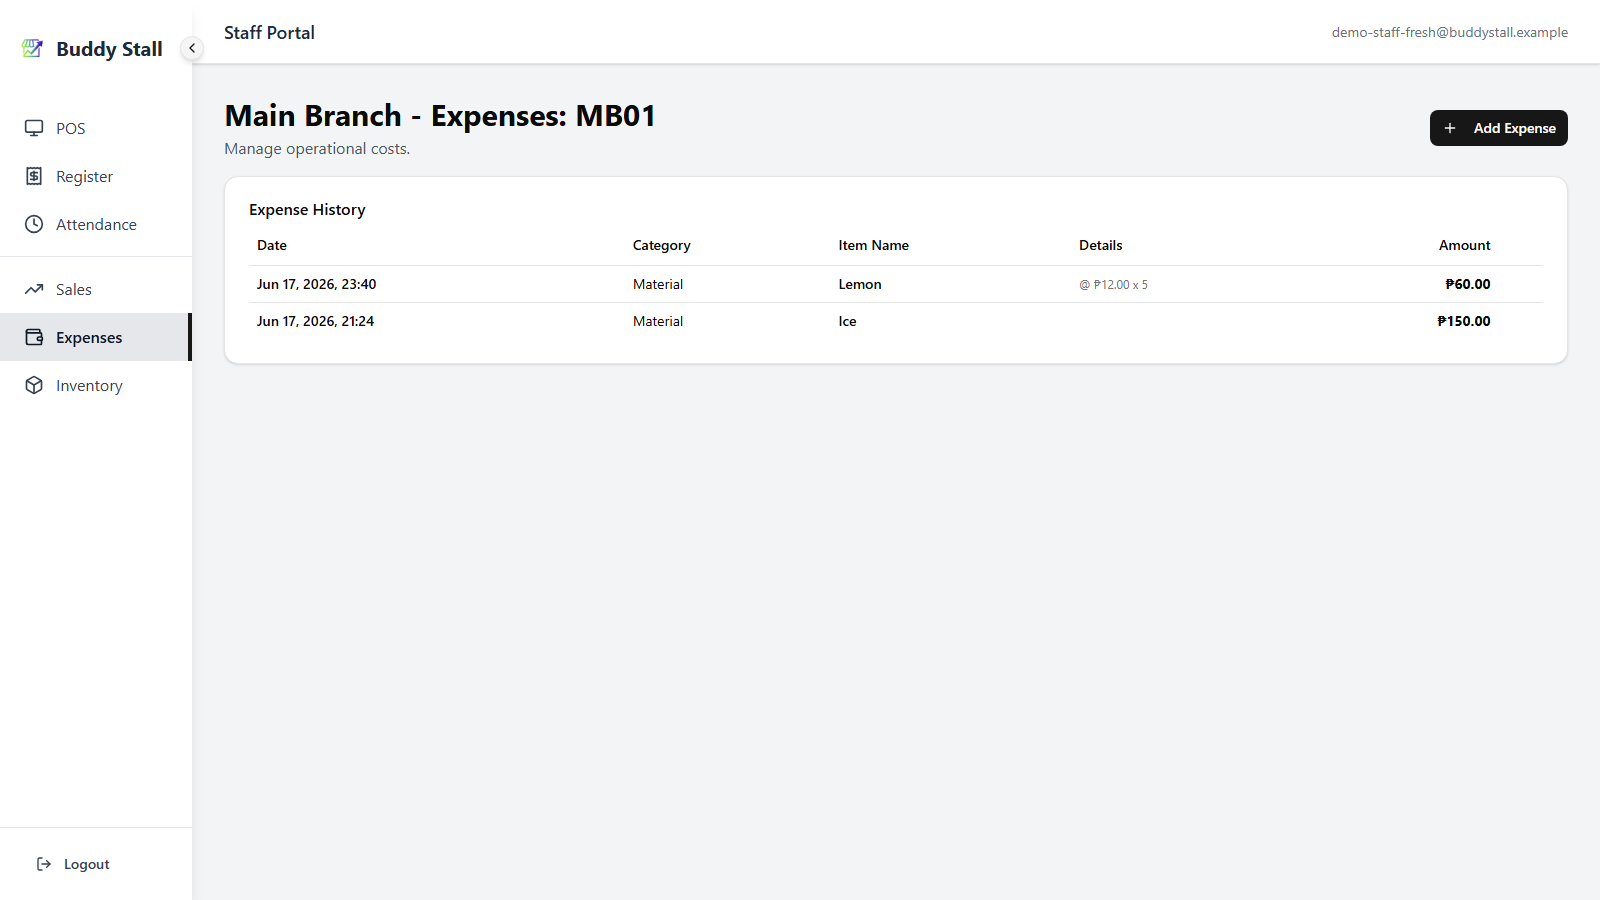
After you click Add, the entry lands at the top of Expense History with its date, category, amount, and details.
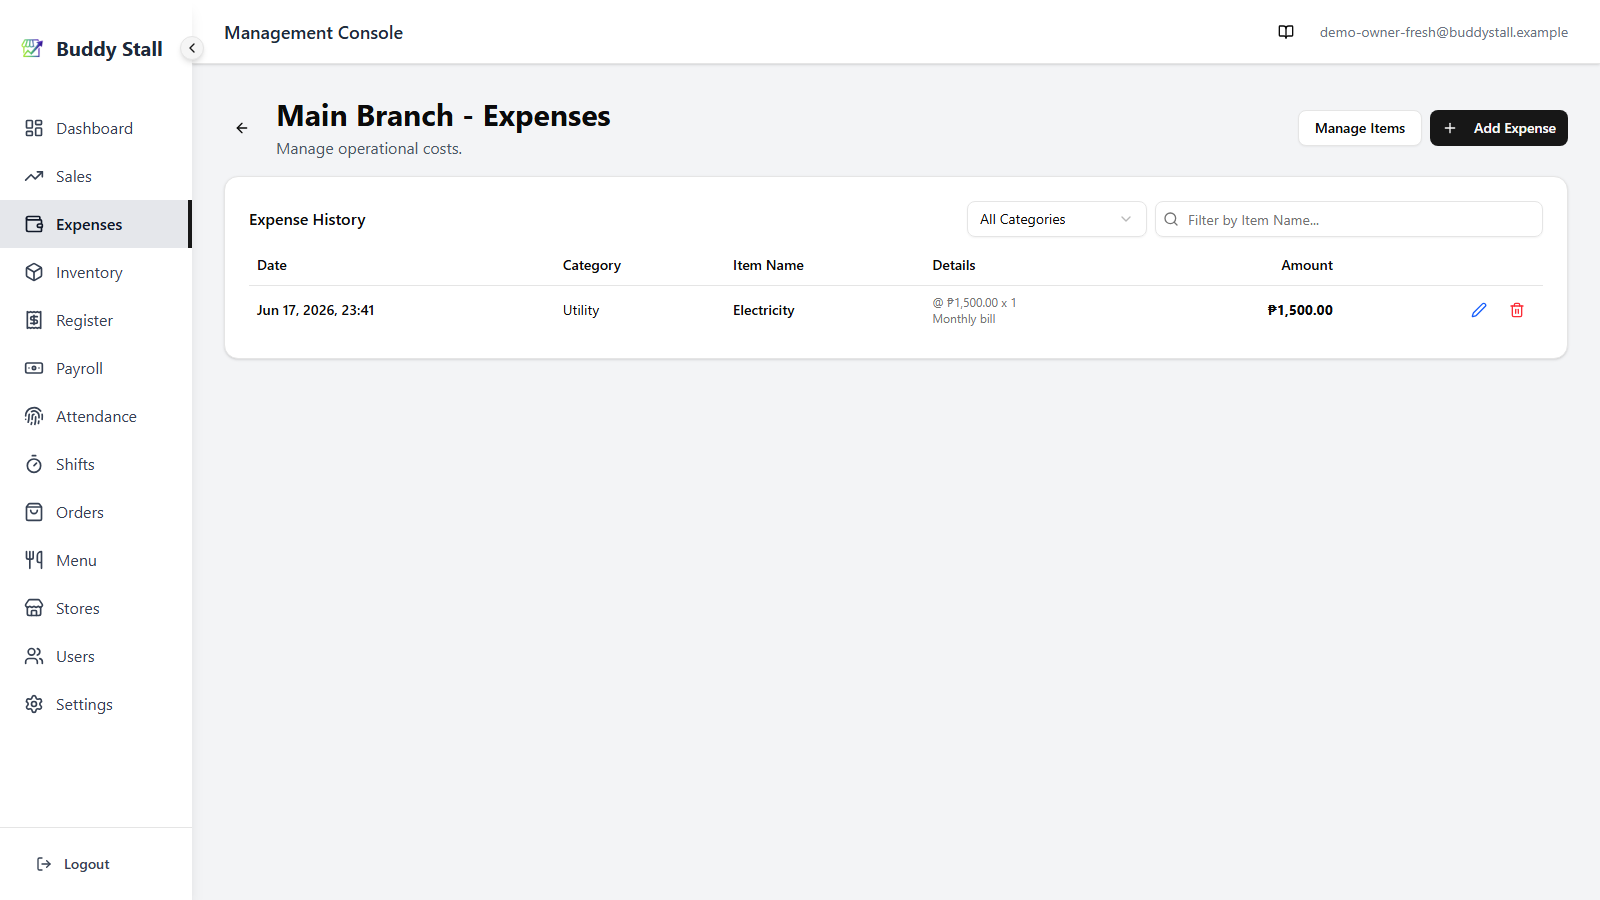
Edit or delete an entry
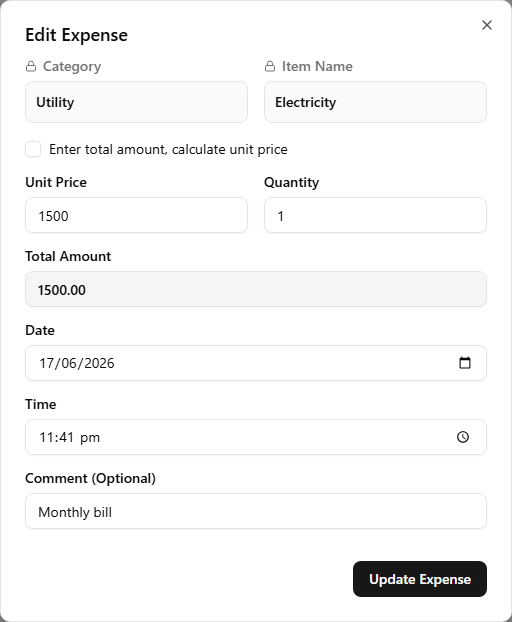
Each row in Expense History carries two actions at its right end: a blue pencil to edit and a red trash to delete. A manager needs the cost-edit permission to use either.
The pencil opens an Edit Expense dialog. Category and Item Name are locked there — to change what an entry is filed under, delete it and add a fresh one. Everything else (amount, date, time, and comment) stays editable; adjust and save. The trash asks for a quick confirmation, then removes the entry — its totals drop out of the dashboard right away.
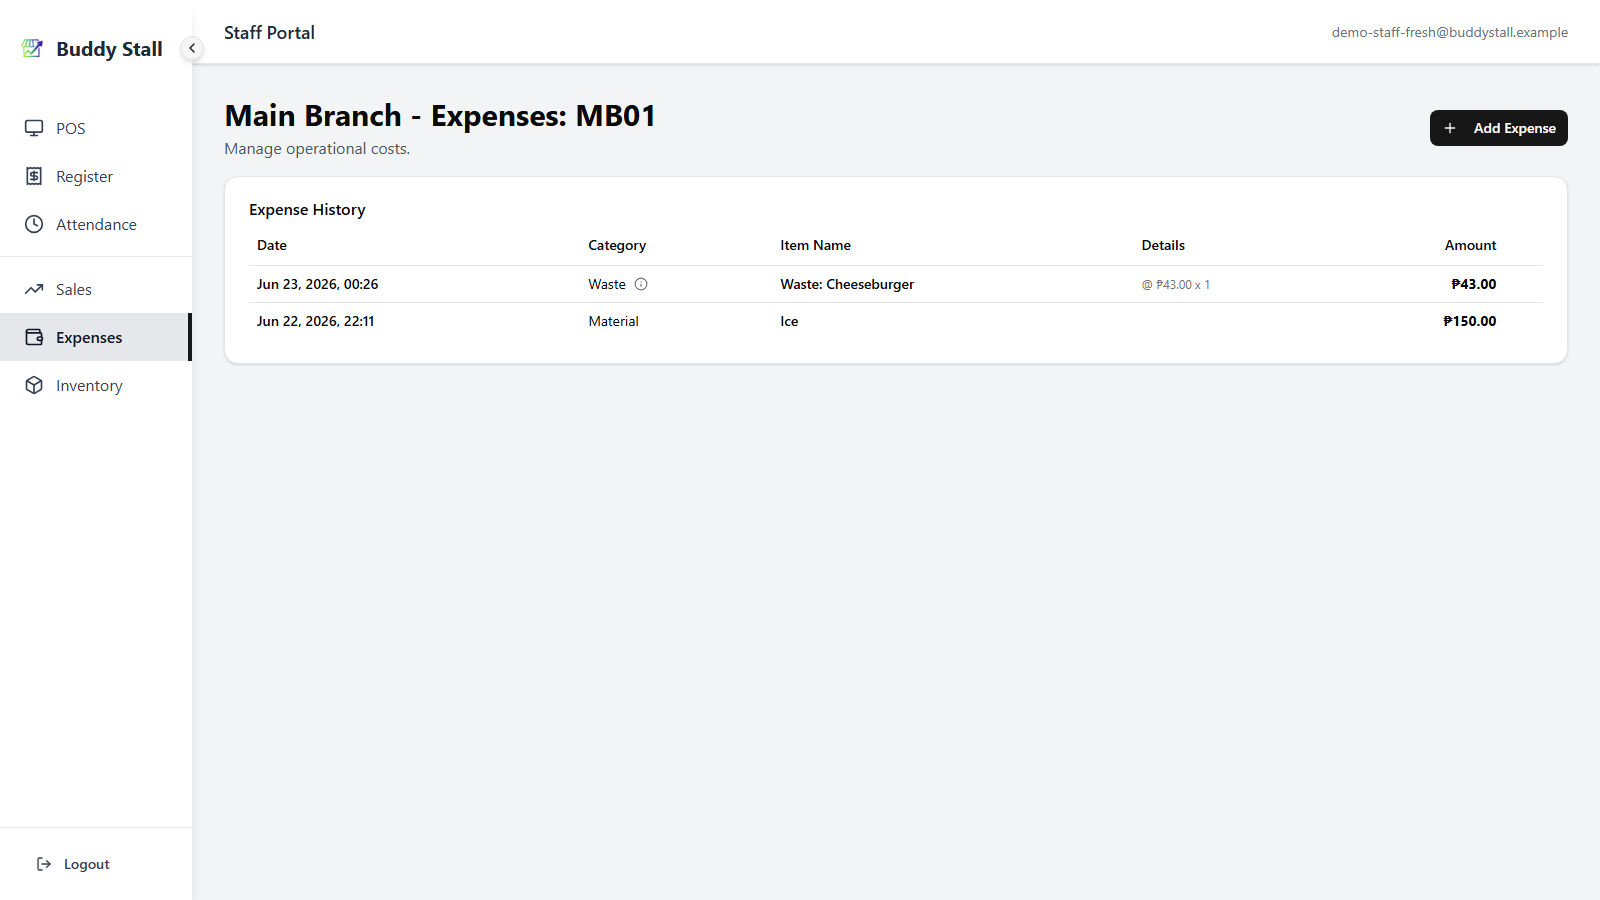
Staff — from the portal
Staff record expenses from the Expenses tab in the staff portal. The tab only appears while the register session is open — staff open the register at the start of a shift, which unlocks the POS, Sales, and Expenses tabs together. With the register closed those tabs are hidden, so an expense logged here always falls inside an active session. Open the Expenses tab and tap Add Expense in the top-right.

The form is the same dialog with a few differences that match the front-of-house role:
- Only staff-visible items appear. The Category and Item lists are limited to the items left visible to staff in Set up expense items (plus Waste, which is always available for logging spoilage). Admin-only items like Labor or Rent stay hidden.
- The date is fixed to today. Staff can't backdate an entry or set a time — the entry is stamped with the current date and time automatically.
Tap Add to save.
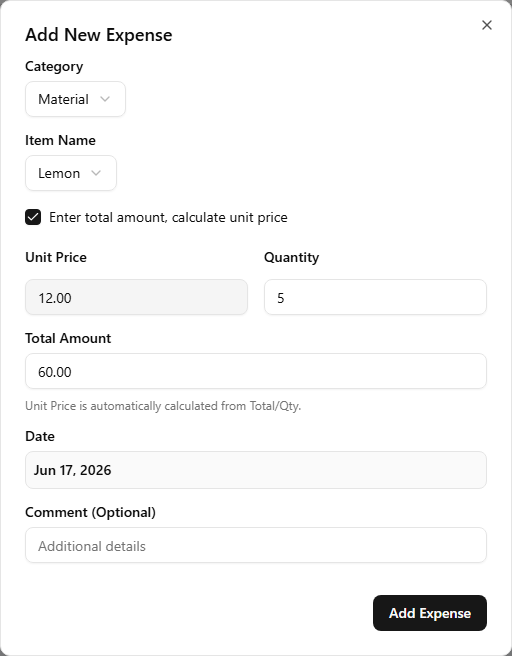
Know the total but not the per-unit price — a bulk buy where only the grand total is printed? Tick Enter total amount, calculate unit price to flip the form: type the Total Amount and the Unit Price is worked out as Total ÷ Quantity instead.
The entry then appears at the top of the day's expense list.
What special items set in motion
Four categories do more than file an amount — each one feeds another part of the app, so you record the event once and the right ledger updates itself. They're summarized on Expenses overview; here is what each one triggers, and where to look for the result.
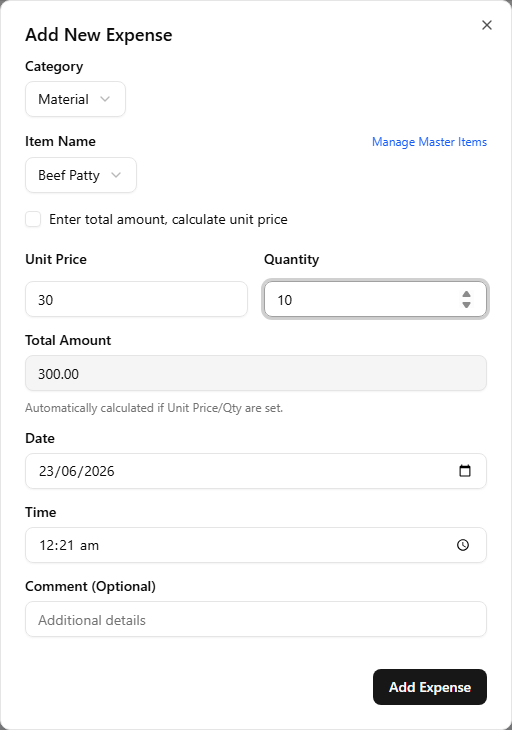
A Material entry restocks inventory
Record a Material entry against an item linked to inventory and its quantity is added to that store's stock — a green Restock line in the inventory log. You book the purchase once and the count is right, with no duplicate entry on the inventory side.
Items that carry the INVENTORY badge in Master Expenses are the ones wired to a stock item — recording a Material entry for any of them updates the count.
Here is how the dialog looks when you record a Material entry — pick the linked item, enter the quantity received, and the restock happens automatically.

Franchise Inventory items the franchisor marks Franchisor Exclusive are the exception — they're left out of the items you can record a Material expense against, so they can't be topped up this way and restock only through franchisor orders. See Franchisor-exclusive items stay franchise-sourced.
A Salary entry posts to payroll per employee
A Labor → Salary entry is tagged to an employee: picking Salary surfaces a Working Staff picker, and that person's hourly wage drops into Unit Price. The entry lands in payroll for them — whether you register it from a calculated pay slip or log a one-off straight from Expenses.

Once saved, the entry appears in Expense History with the employee name embedded in the item name — confirming which staff member's pay the entry belongs to.
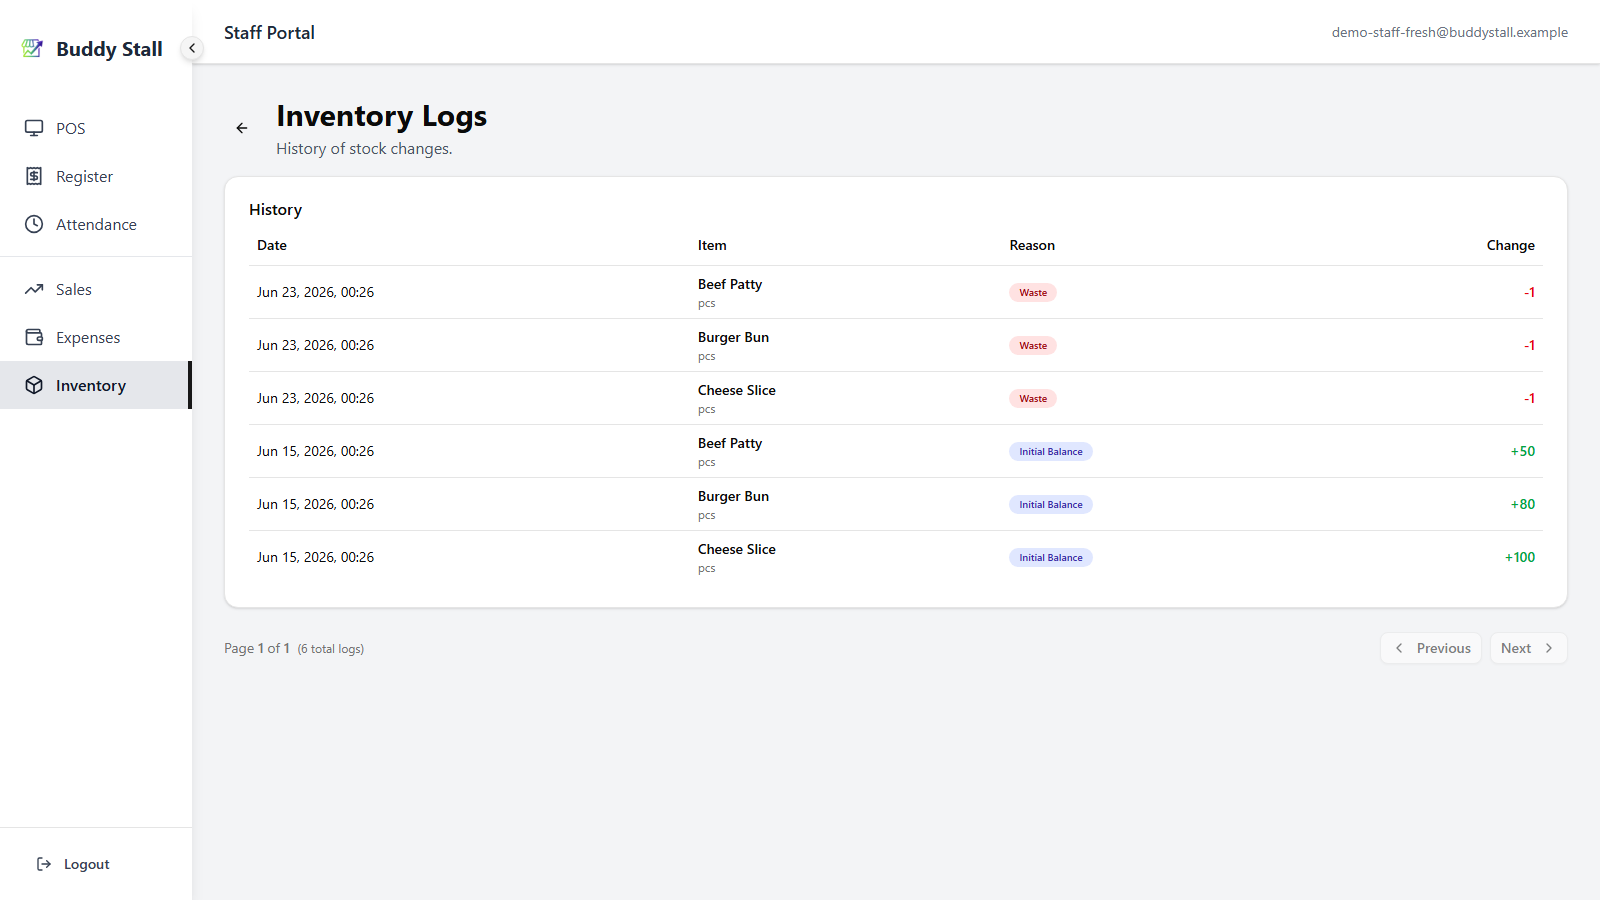
A Waste entry deducts a recipe's ingredients
Recording a whole prepared menu item as wasted deducts every ingredient in
its recipe from stock — one waste line each in the inventory log. Here one
Cheeseburger removed a Beef Patty, a Burger Bun, and a Cheese Slice. See
Throwing away a finished menu item.
The entry itself appears in the Expense list named after the wasted item, so you can trace the cost back to the specific discard.
Behind that single entry, every ingredient leaves stock.
Initial Investment is reported separately on the dashboard
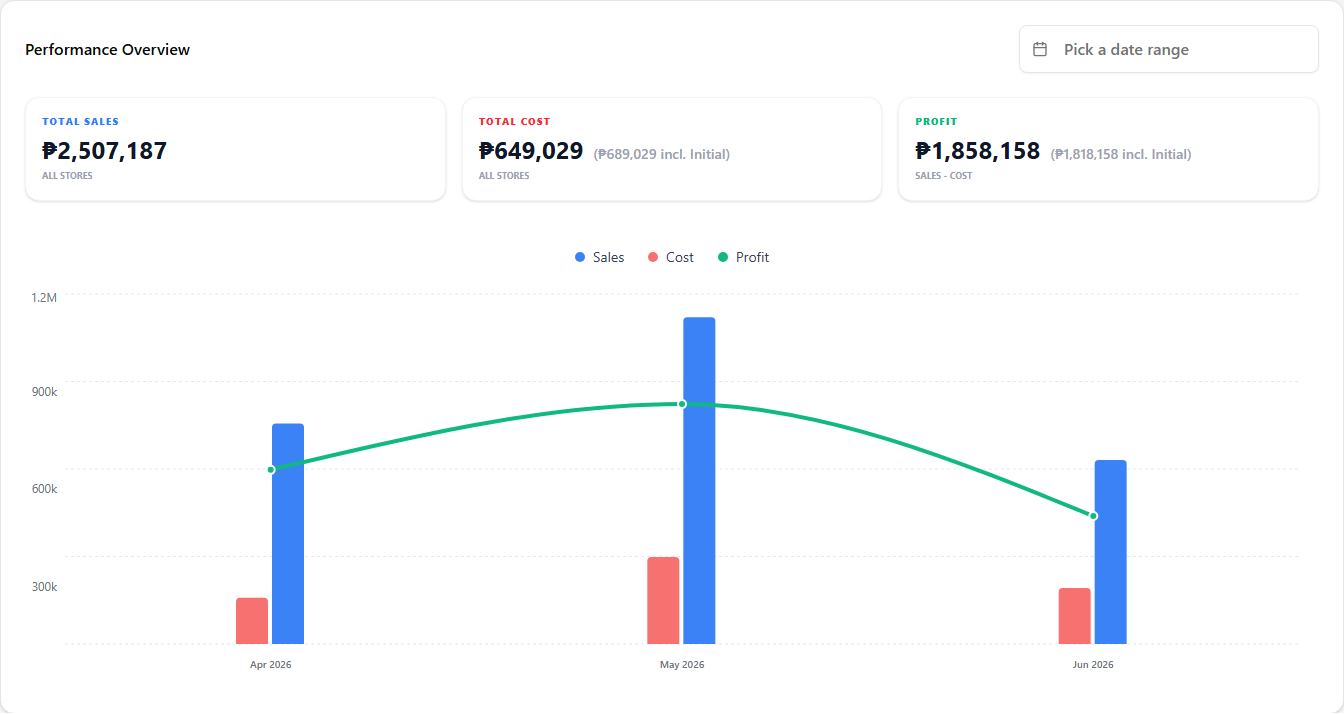
Initial Investment entries are the one-off setup costs — equipment, deposits, opening stock. They sit out of running cost and surface only in the dashboard's all-time view, where Total Cost and Profit each gain an (incl. Initial) figure beside the operating number. See Performance Overview.
You can name the item freely — no master item needed — so each piece of equipment or deposit gets a clear label in the record.
Once recorded, the entry feeds the all-time dashboard view.
Read next
Set up expense items
The step before this one — define your master items and per-store staff visibility.
Reading the dashboard
Where the entries you just recorded turn into trends, breakdowns, and margin checks.
Expenses overview
The structure behind this walkthrough — categories, two-tier model, and the automatic links.