Set up expense items
Expense items are defined once in Master Expenses and inherited by every store automatically. This walkthrough sets up that catalog: you define the items you will record against, then adjust per-store staff visibility so the staff portal only surfaces the items you want.
Once your items exist, head to Recording expenses to put an entry on the books.
Franchise If your store is connected to a franchisor, part of this catalog is already filled in — the franchisor's expense preset loads straight into your Master Expenses. See the franchise note at the bottom of this page.
1. Open the Master Expenses page
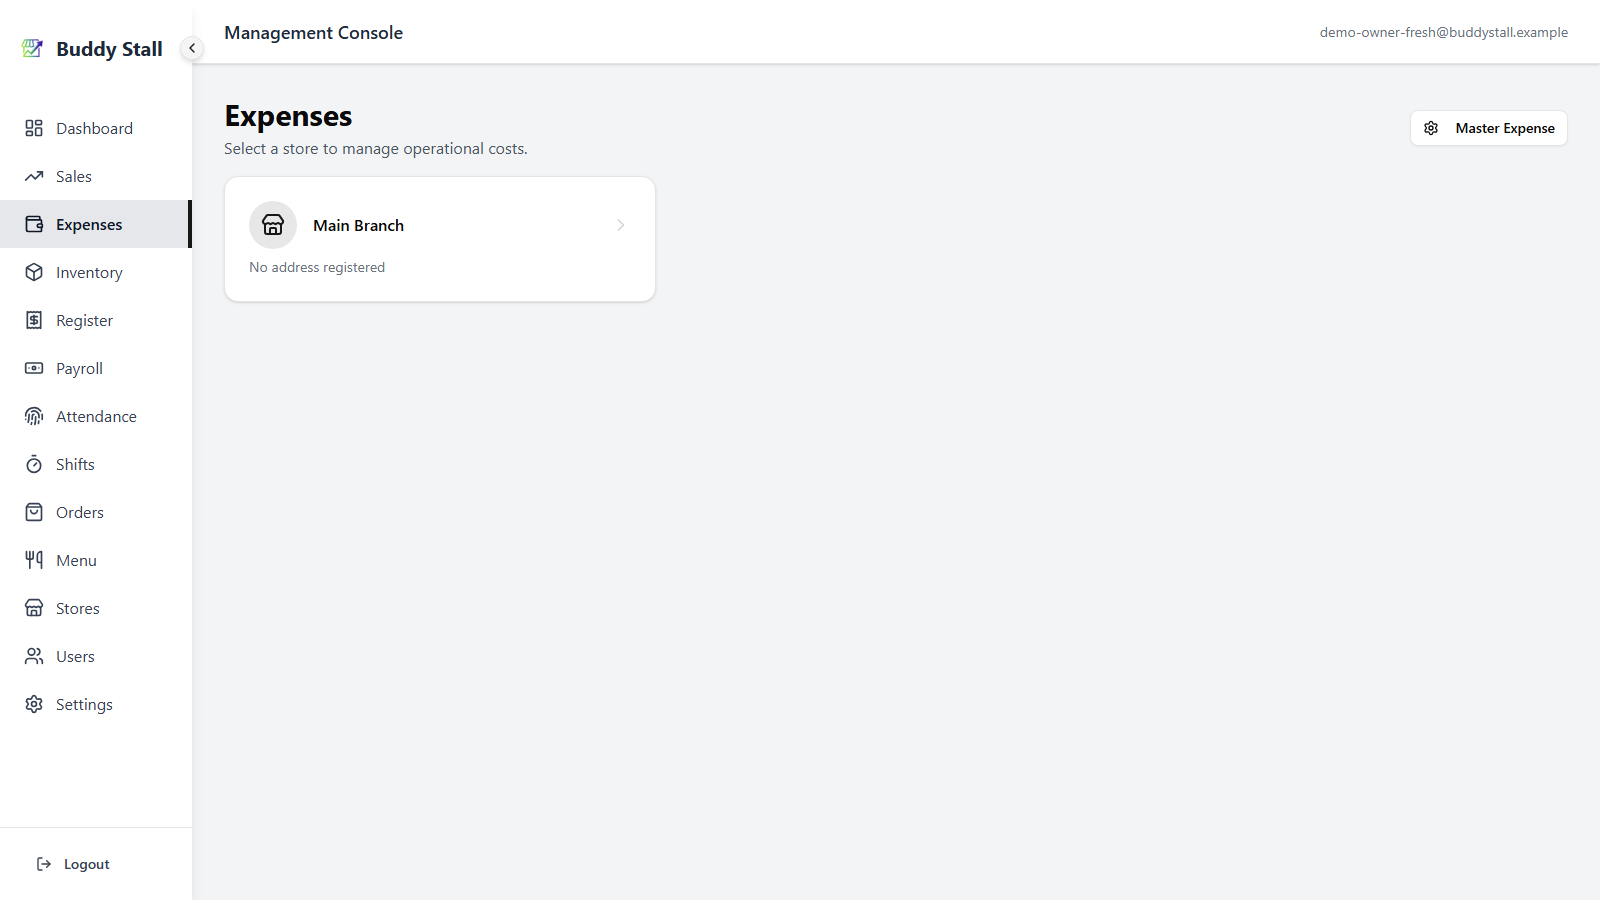
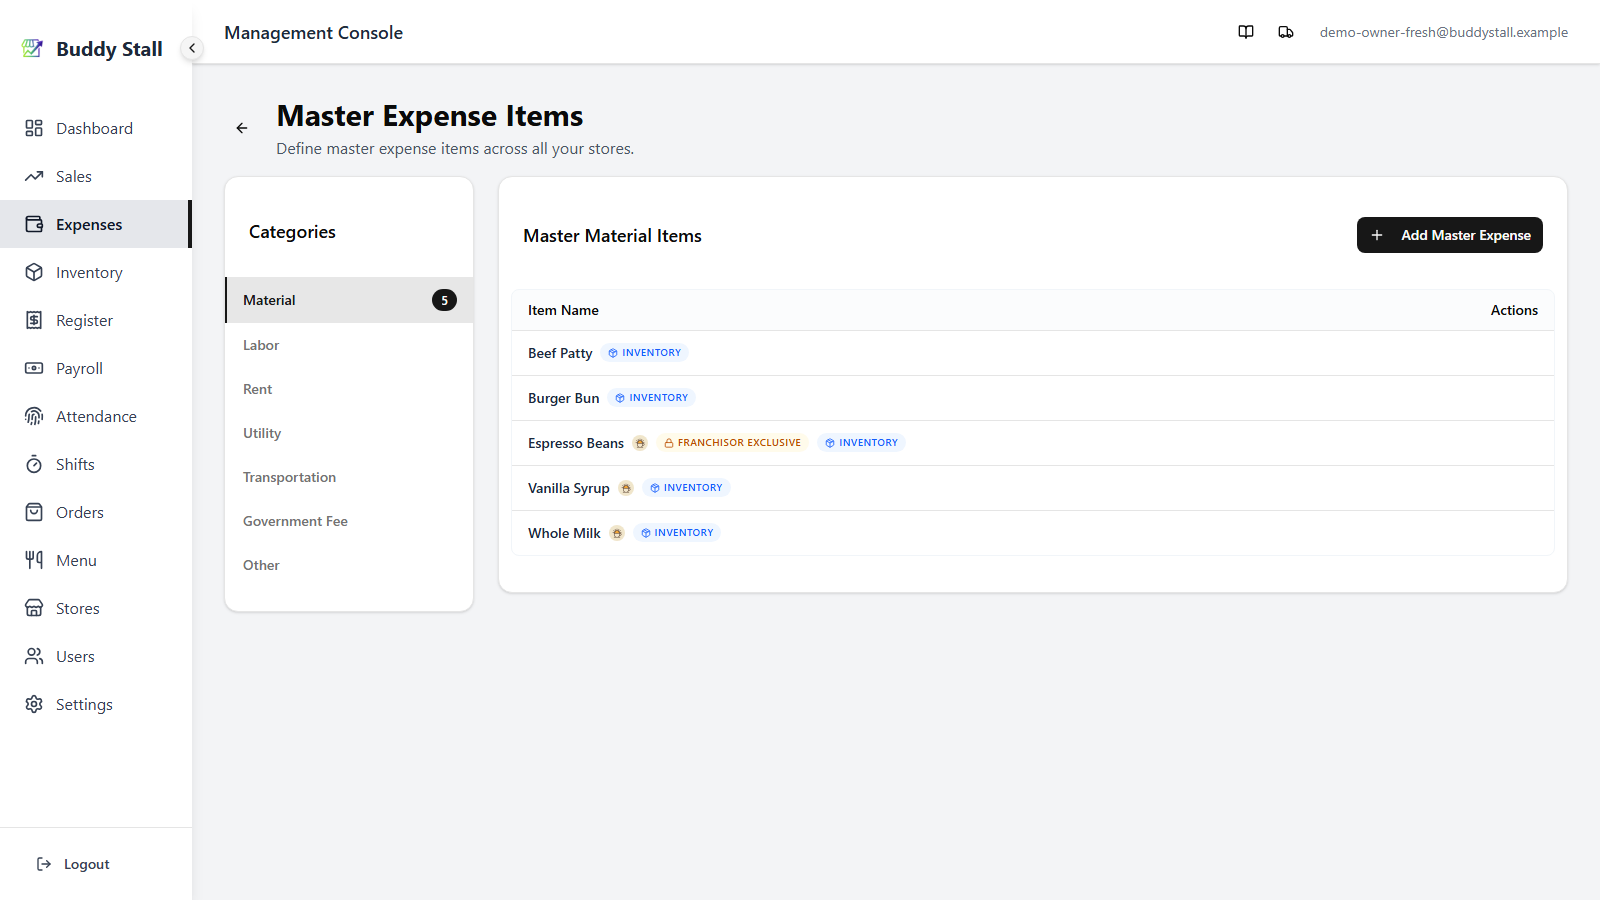
Sign in as the owner. From the main navigation, open Expenses — you will see the list of your stores. Click Master Expenses in the top-right to open the owner-wide catalog grouped by category.
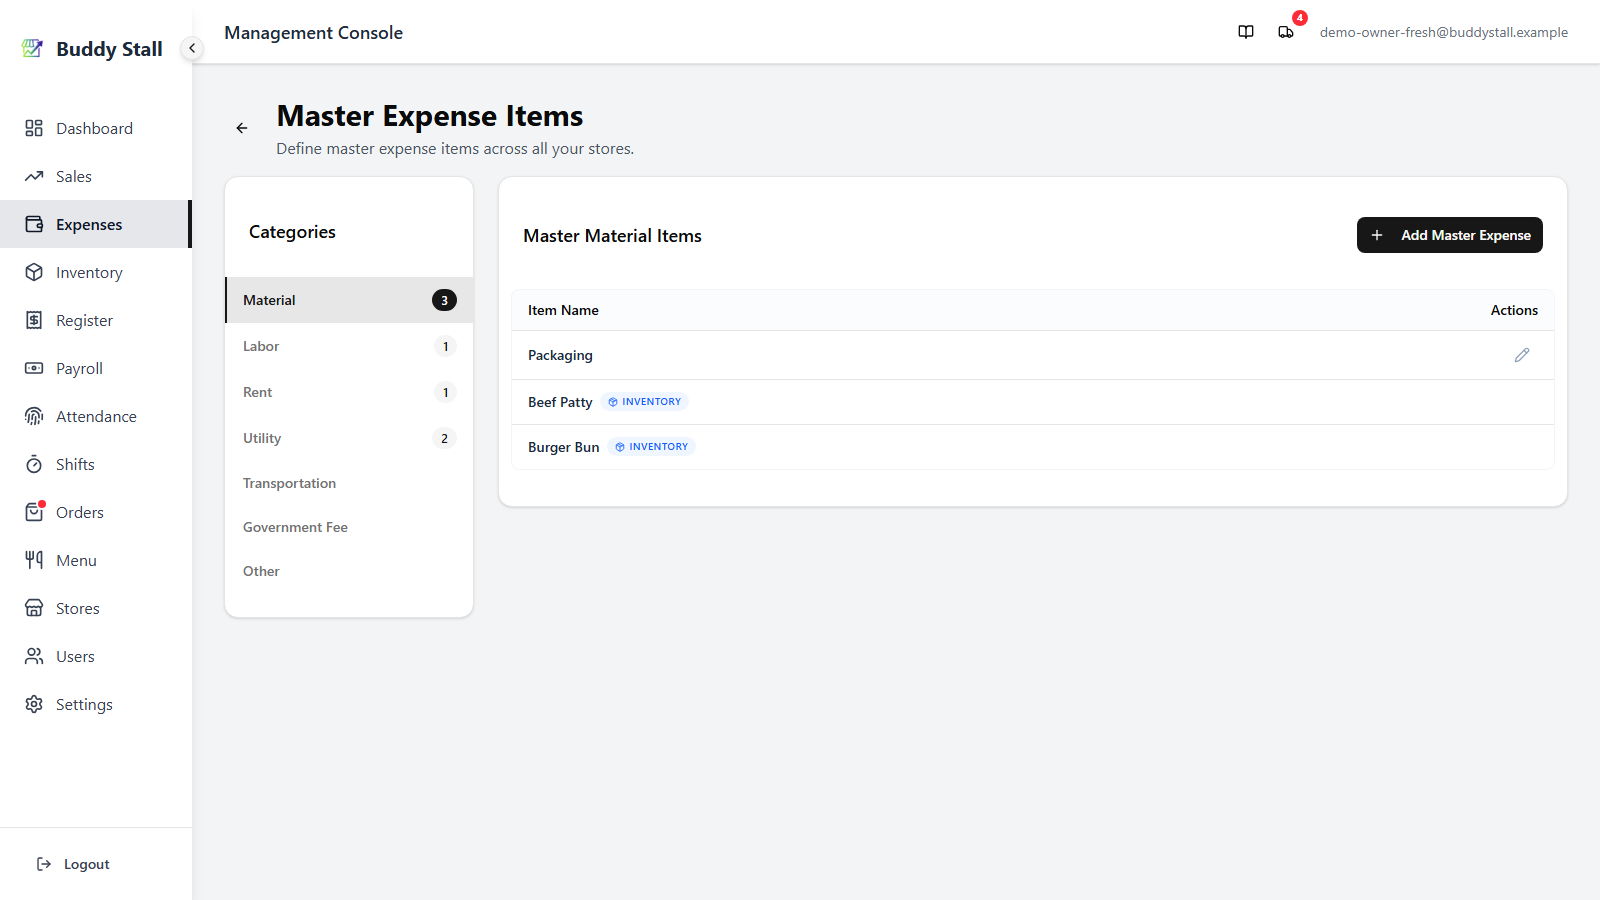
2. Starter items are already there
Your catalog isn't empty on day one. Every new owner account is seeded with a handful of common expense items, so you can start recording right away instead of building the list from scratch:
| Item | Category | Edit / delete? |
|---|---|---|
| Salary | Labor | Locked |
| Rent Fee | Rent | Yes |
| Inventory Delivery Fee | Transportation | Locked |
| Water Bill | Utility | Yes |
| Electricity Bill | Utility | Yes |
| Wifi Bill | Utility | Yes |
| Tax | Government Fee | Yes |
Edit, recategorise, or delete any of these to fit your shop — they behave like items you create yourself and fan out to every store automatically. The exceptions are Salary and Inventory Delivery Fee, which are locked: the app posts payroll and order delivery charges to them by their exact name, so they can't be renamed or removed.
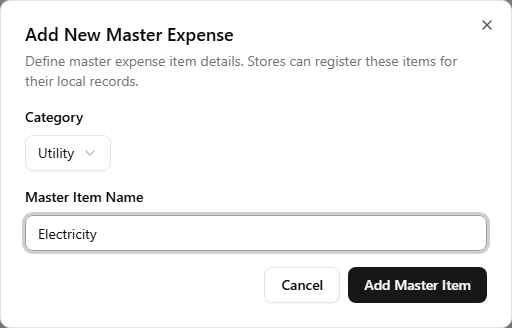
3. Add a master expense item
Pick a category in the left sidebar — Material, Labor, Rent,
Utility, Transportation, Government Fee, or Other — then
click Add Master Expense in the top-right of the items panel. The
dialog asks for the category (pre-filled from your selection) and the
item name (e.g. Electricity, Stall Rent, Beef Patty).
The other two categories work differently and don't need a master item created here:
- Waste is created automatically from inventory waste logs and from recording a whole prepared menu item as wasted on the Add Expense dialog — see Logging waste.
- Initial Investment entries are typed as free text on the Add Expense dialog itself; no master item is needed.
- Material items can also be created from Set up your inventory — adding a master inventory item automatically creates a paired Material expense item with a link back to the inventory.
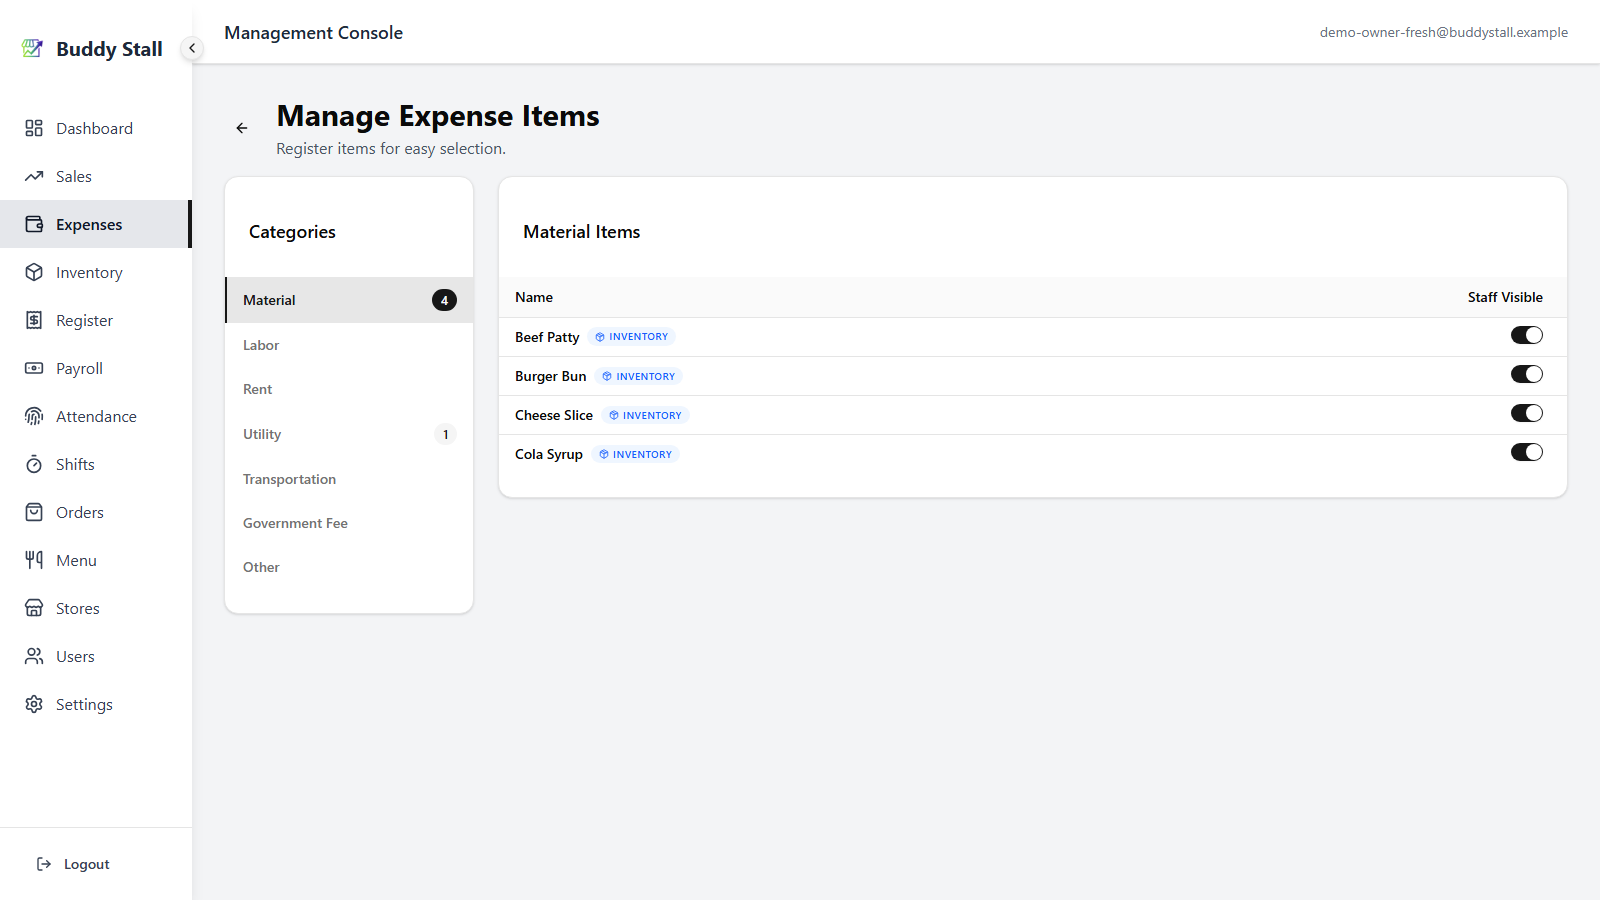
4. Adjust per-store staff visibility
Every store inherits the full master catalog automatically the moment a master item is saved, so there is no per-store registration step. What you can adjust per store is whether each item is visible to the staff role on the portal — useful for hiding admin-only items like Labor or Rent from the front-of-house.
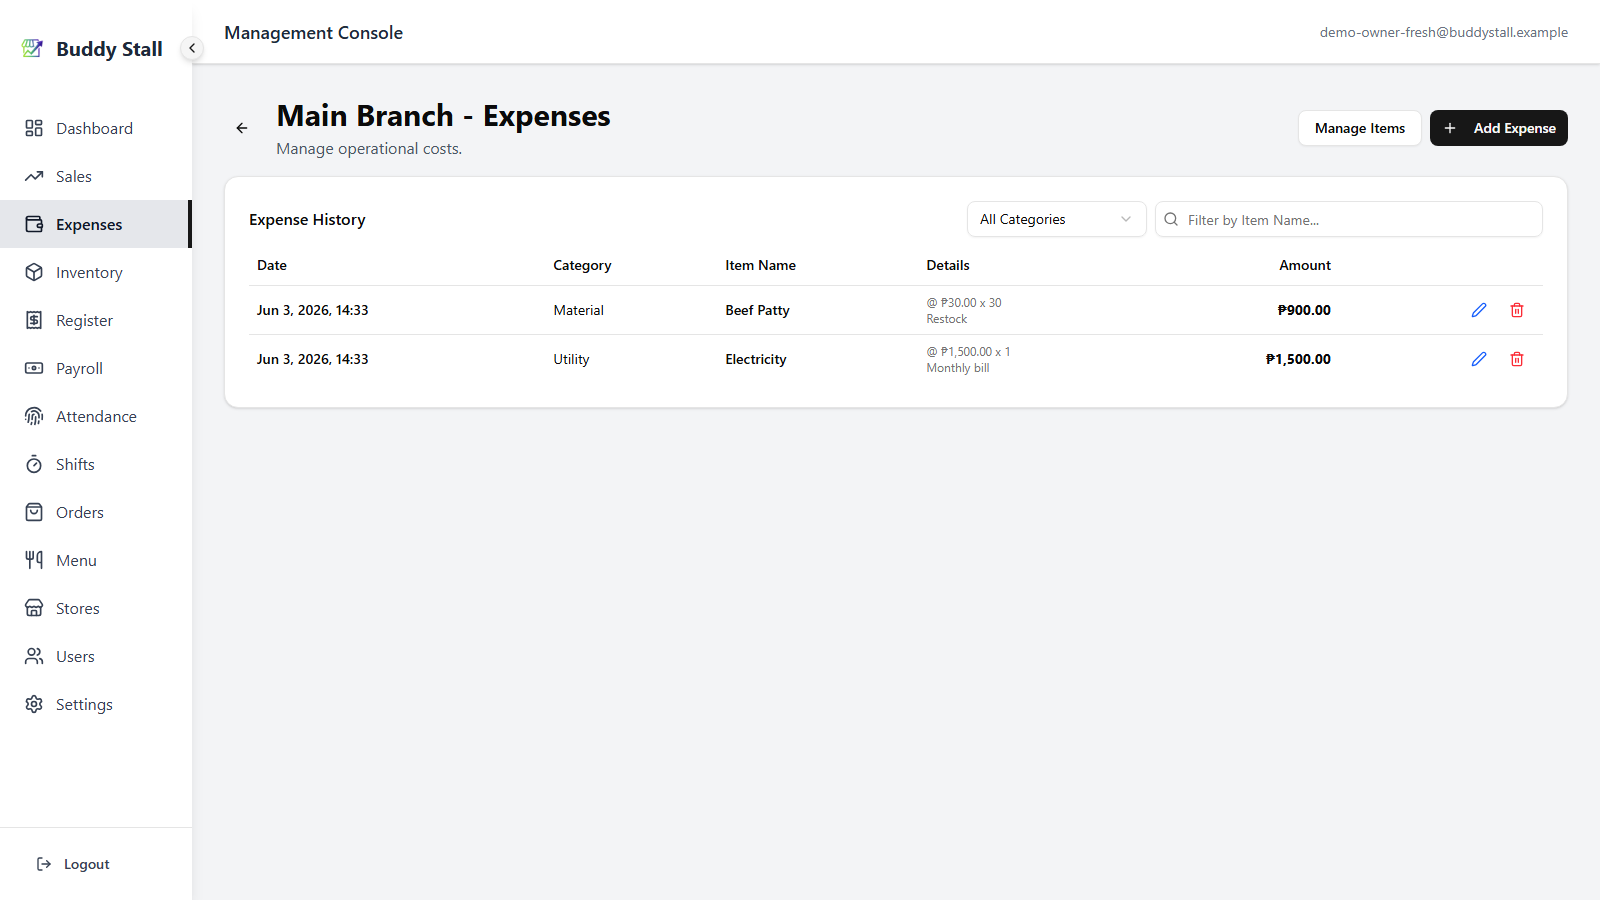
Go to a store's Expenses page (Expenses → pick the store), click Manage Items in the top-right, then toggle the Staff Visible switch for any item you want hidden from staff. Items hidden here don't appear in the staff portal's Add Expense dialog; owner and manager still see everything.
Read next
Recording expenses
Put an entry on the books — pick the item, amount, date, and any links, from the dashboard or the staff portal.
Set up your inventory
The Material-link side of the workflow — inventory items auto-create their expense counterparts.
Expenses overview
The structure behind this walkthrough — categories, two-tier model, and the automatic links.
Everything below applies only once your store has joined a franchise. These features stay hidden until you connect, so a single, unconnected store can stop here. See Joining a franchise.
Items from a franchise preset
When your store is connected to a franchisor, part of this catalog arrives ready-made. The franchisor's preset — loaded in from Settings → Franchise Connections — drops its expense items straight into Master Expenses, each preset row carrying the franchisor's logo badge. Most are Material items paired to a franchise-preset ingredient (the Inventory tag marks the link), so you don't add them by hand — they come in with the inventory preset.
Because the franchisor owns them, preset items cannot be deleted here; re-pull the franchisor's updates from Settings when the catalog changes. A preset item linked to a franchisor-exclusive ingredient also carries an amber Franchisor Exclusive marker — those restock only through franchisor orders, so recording a direct expense against them is disabled.
See Joining a franchise and the master expense items reference for the full picture.