Store expenses
A store expenses page is one store's running ledger of money it has spent — ingredients bought, wages paid, utilities settled. Every store inherits the full master catalog of categories and items automatically, with no per-store registration step; what a store keeps of its own are the entries it records against those items. Two stores can spend very differently against the same master item; what they share is the definition.
This page is a map of the screen itself. The how-to pages cover the actions you take here: set up expense items and recording expenses.
Open it from Expenses, then pick a store. (Staff land on their own store's expenses directly — see What staff see below.)
The screen
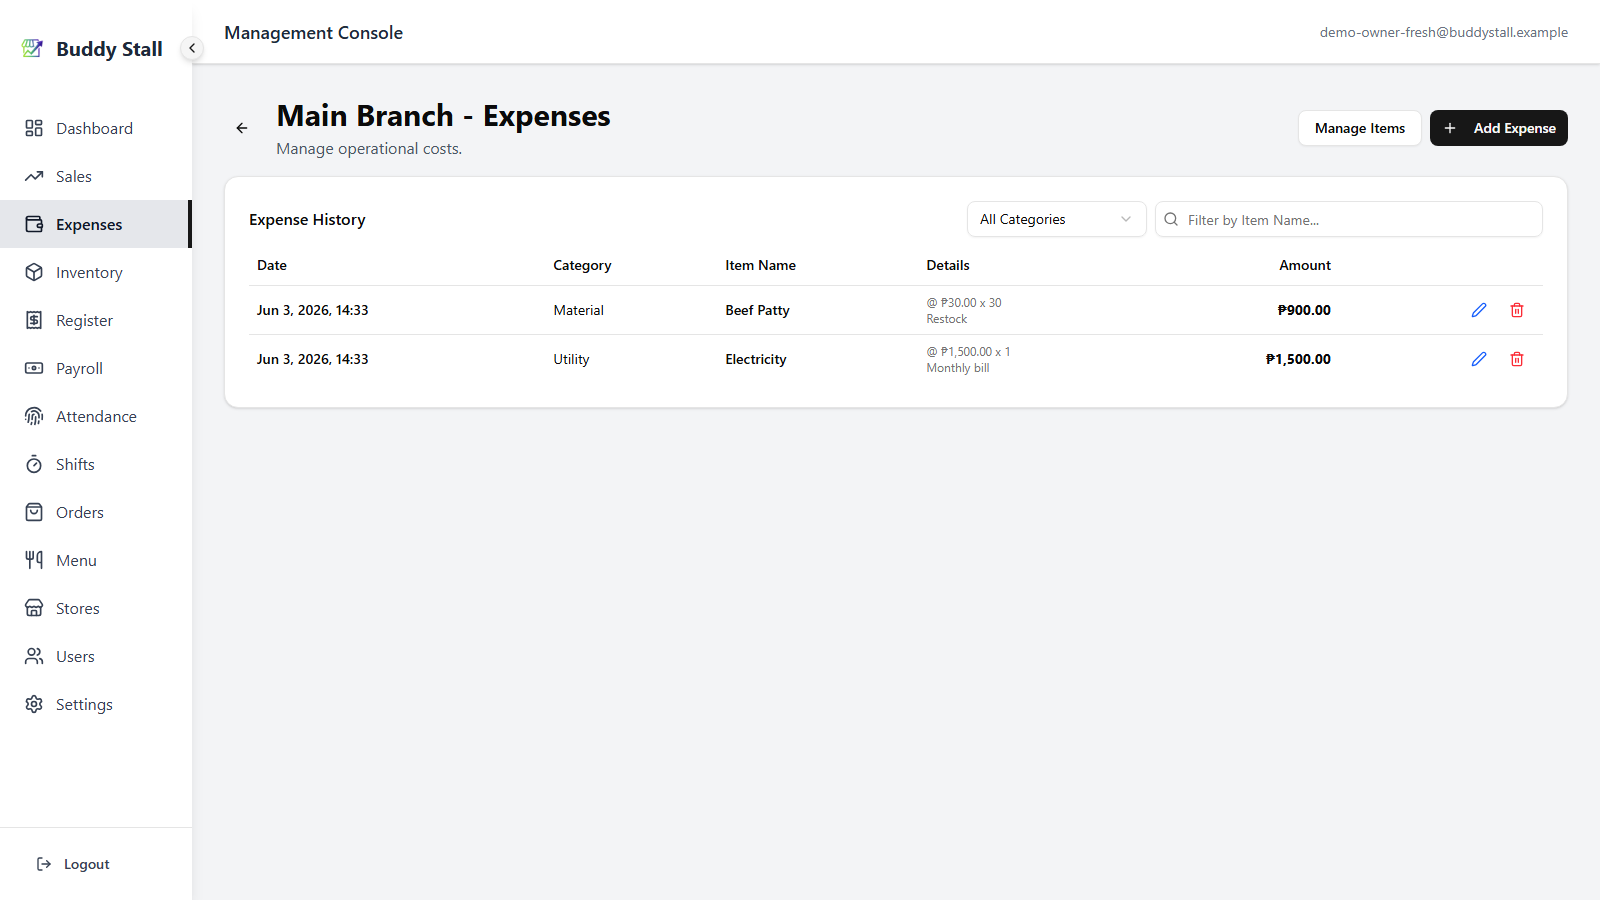
The header carries two actions, and the Expense History card lists every entry the store has recorded, newest first, filterable by category and item name.
 12345
123451 Manage Items — opens this store's per-item Staff Visible switches, so you can hide admin-only items (Labor, Rent) from the staff portal. The catalog itself is owner-wide and edited in Master Expenses; see Set up expense items.
2 Add Expense — opens the Add New Expense dialog to put an entry on the books: category, item, amount, date, and any links. See Recording expenses.
3 Filter — a category dropdown and an item name search, narrowing the list below. Both are owner/manager controls.
4 Expense History — one row per recorded entry:
- Date — when the expense was recorded.
- Category — the item's category. A Waste row carries an info marker: waste is recorded for management visibility only and is not counted in the dashboard cost totals.
- Item Name — the master item the entry was filed under.
- Details — the unit price × quantity and any comment, when present.
- Amount — the total for that entry.
5 Edit / delete — the pencil opens the Edit Expense dialog; the trash removes the entry (after a confirmation). Editing and deleting are owner-only by default; a manager needs the Edit cost data permission. Auto-generated entries from inventory waste keep their own reconciliation, so those rows are not editable here.
A long list paginates in pages of 50, with Previous / Next controls beneath the table.
Add Expense dialog
Add Expense opens the Add New Expense dialog — the form that puts one entry on the books.
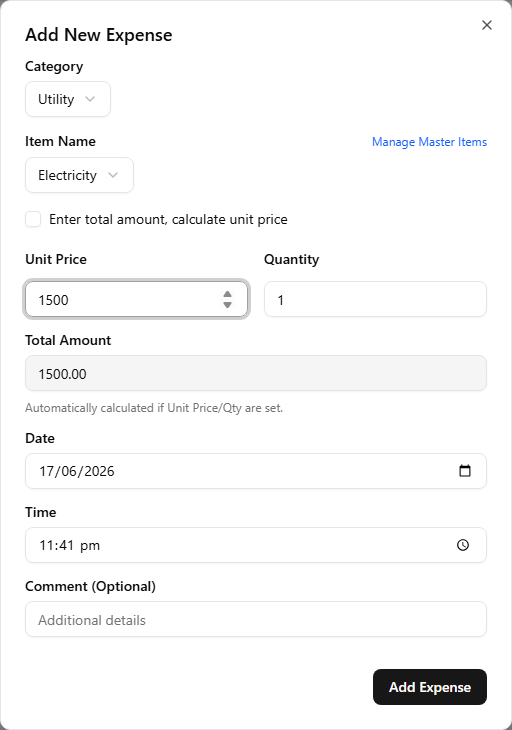
- Category then Item Name — pick the category, then the master item within it. The Manage Master Items link (owner/manager) jumps to the master catalog to add a missing item.
- Enter total amount, calculate unit price — off by default, so you type a Unit Price and Quantity and the Total Amount is computed for you (read-only). Tick it to type the Total directly and have the unit price back-calculated instead.
- Date — the day the expense falls on. Time is shown to owners and managers only; the staff portal omits it and stamps the current time.
- Comment (Optional) — a free-text note (e.g. Monthly bill).
Recording against a Material item that is linked to inventory also restocks that ingredient — see Recording expenses.
Edit Expense dialog
The pencil on a row opens the Edit Expense dialog, pre-filled with the entry's values.
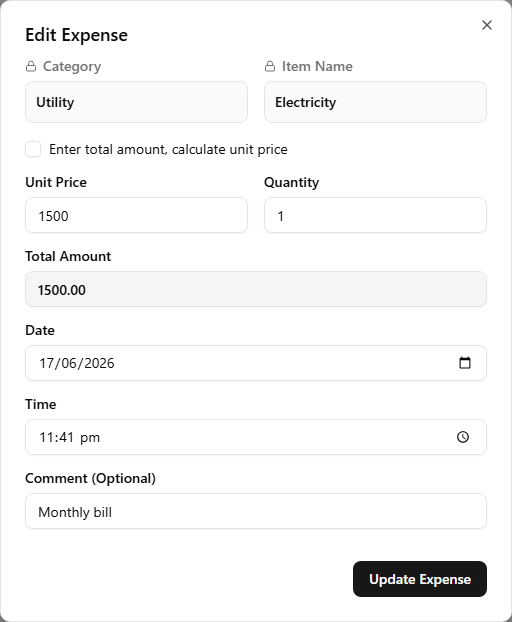
The fields match the Add dialog, with two differences: Category and Item Name are locked (the padlock icon) — an entry stays under the item it was filed against — and the button reads Update Expense. Auto-generated entries from inventory waste are not editable here.
Manage Items screen
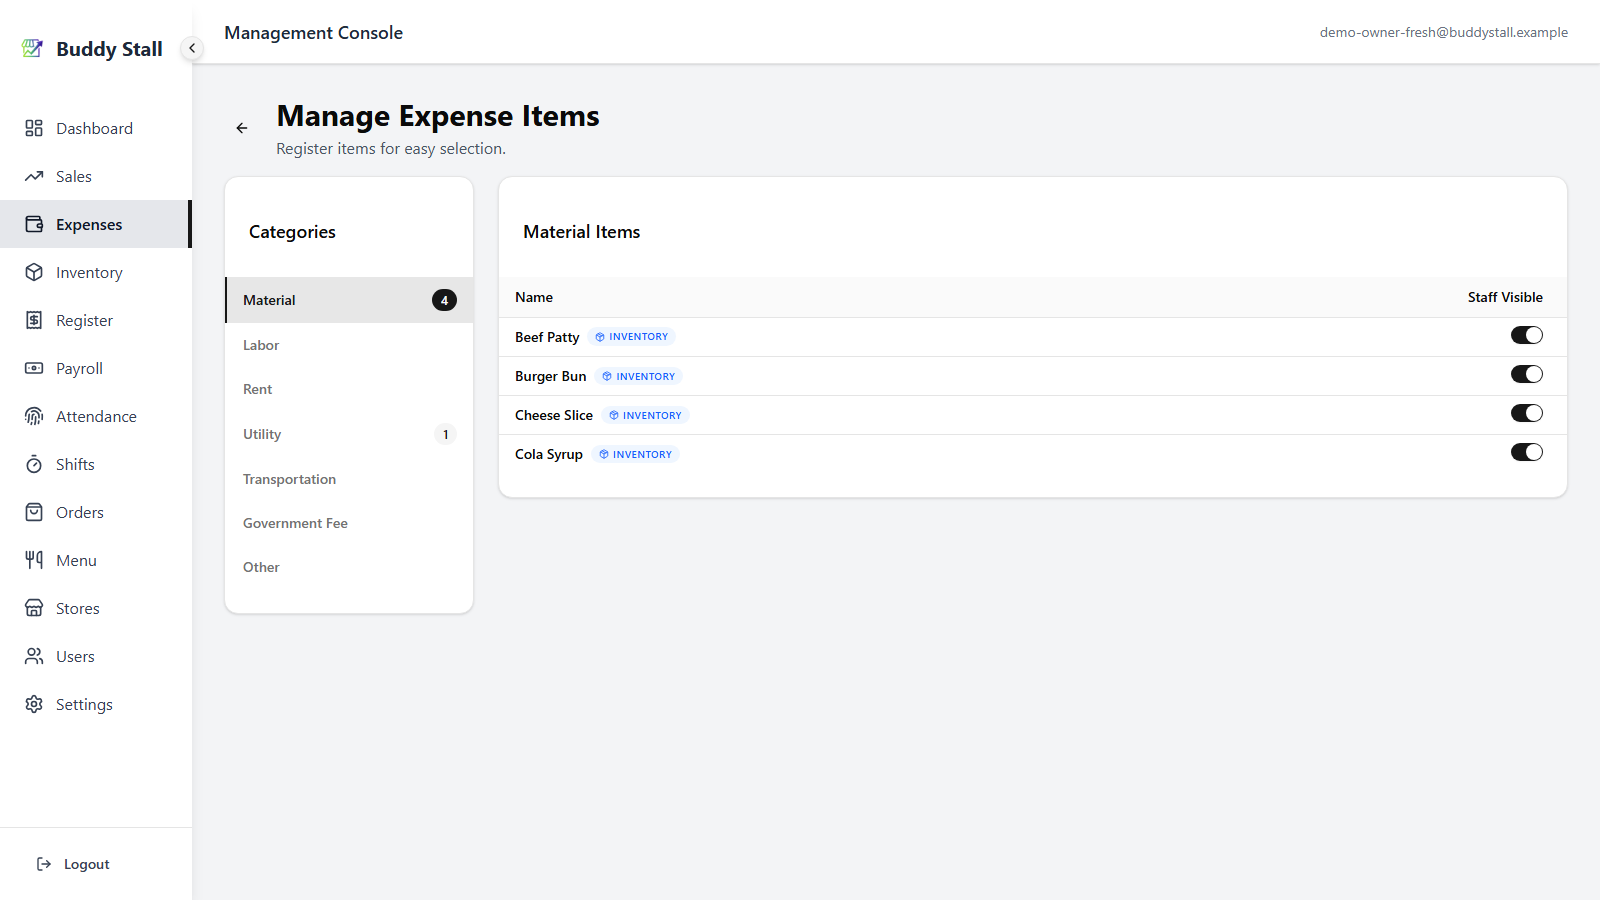
Manage Items opens the per-store Manage Expense Items screen, where you choose which items the staff portal surfaces.
 123
1231 Categories — the spending buckets down the left, each with a count of the items it holds; selecting one filters the list on the right. Waste and Initial Investment are omitted — their entries are not registered items.
2 Items — one row per master item under the selected category. A blue INVENTORY badge marks Material items paired to an inventory ingredient.
3 Staff Visible — toggle off to hide an item from the staff portal's Add Expense dialog. Owners and managers always see every item. This is the only per-store control over the catalog; names and categories live in Master Expenses.
What staff see
Staff open Expenses in the portal and land straight on their own
store's list — no store picker. The tab is available only while the
register is open, and the view is scoped to the current register
session: the title reads {store} - Expenses: {session}, and the list
shows just the expenses recorded against that open session, not the
store's full history.

Staff keep Add Expense, but only for items marked Staff Visible in Manage Items. They do not get Manage Items or the category/search filter — those stay with owners and managers on the admin dashboard. Entries added offline show a Pending badge until they sync, or a Failed badge if a sync gives out; both are read-only until resolved.
Read next
Recording expenses
Put an entry on the books — pick the item, amount, date, and any links, from the dashboard or the staff portal.
Set up expense items
Define every item once in the master catalog, then tune per-store staff visibility.
Expenses overview
The structure behind this screen — categories, the two-tier model, and the automatic links.