Payroll
The Payroll screen is where you preview each employee's pay for a period, fix anything that doesn't look right, and register the result as Salary expense entries.
How time and pay work covers the calculation; this page covers driving the screen.
1. Open Payroll
From the admin sidebar, open Payroll and pick the store you want to calculate. The screen opens in a two-column layout: Settings on the left and Pay Slip Preview on the right.
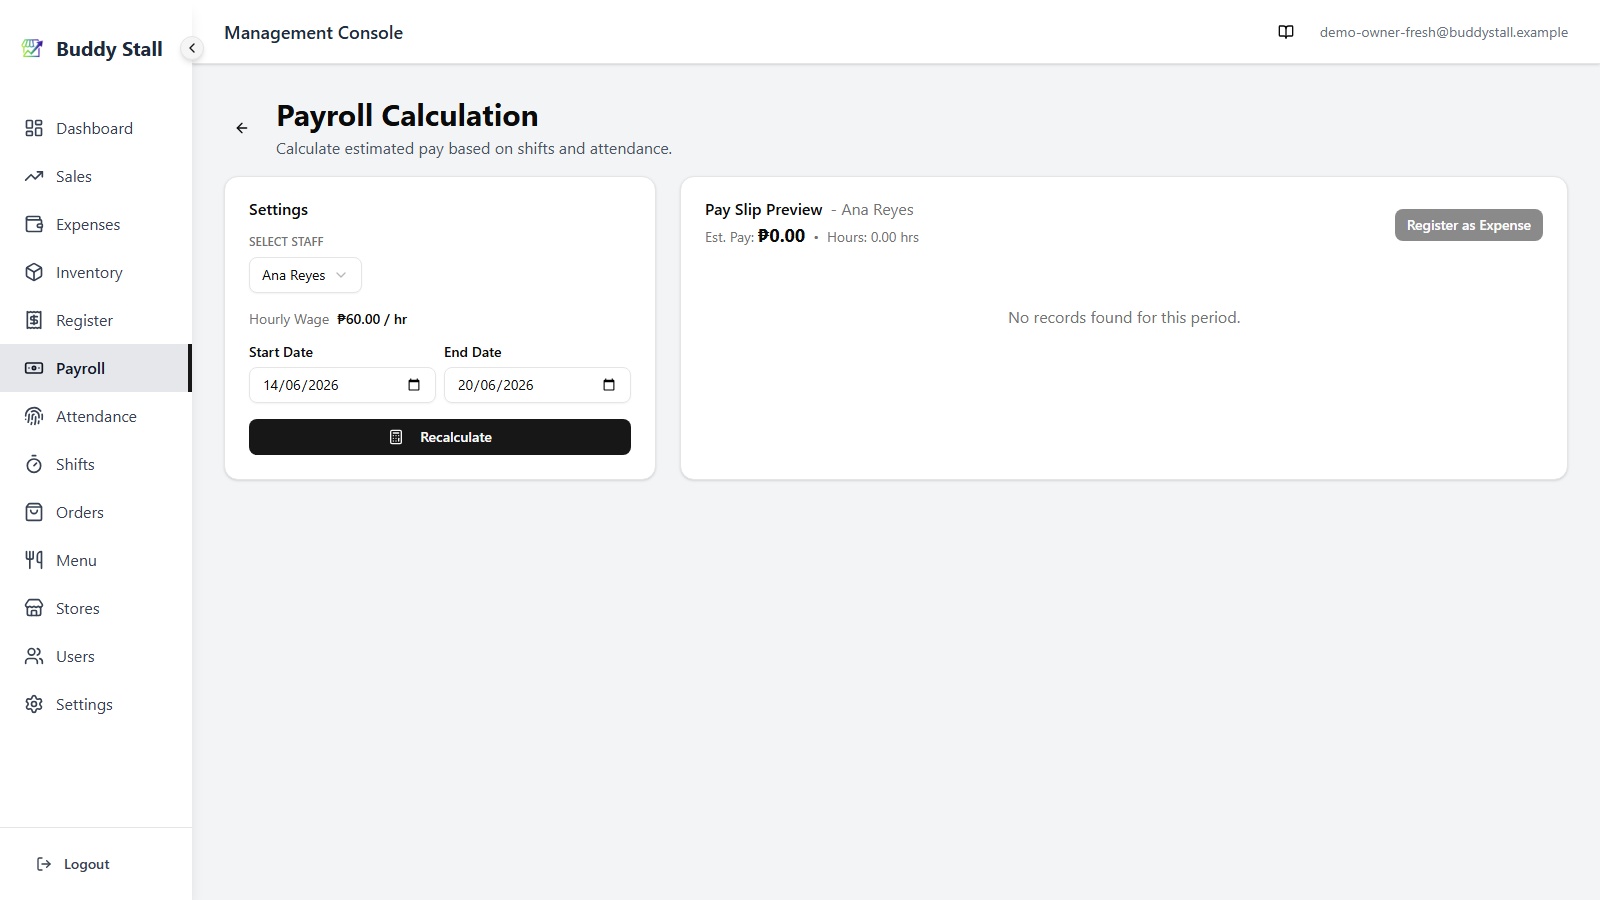
2. Pick the employee and the period
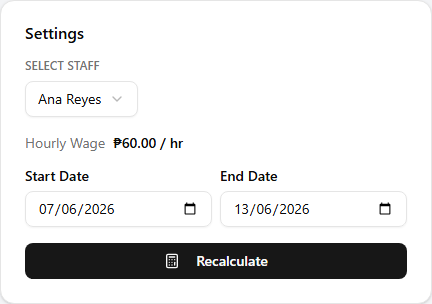
In Settings:
- Select Staff — pick the employee to calculate.
- The hourly wage appears below the staff picker, read-only.
- Start Date / End Date — the period to cover. Defaults to the current week.
- Click Recalculate.
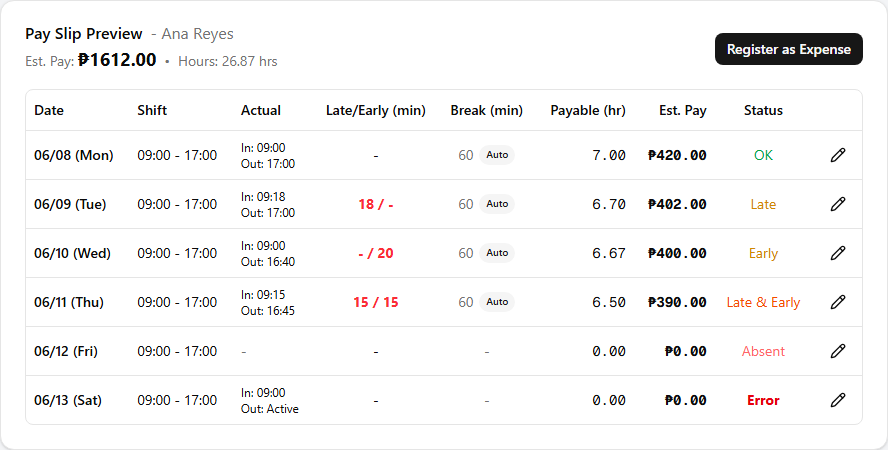
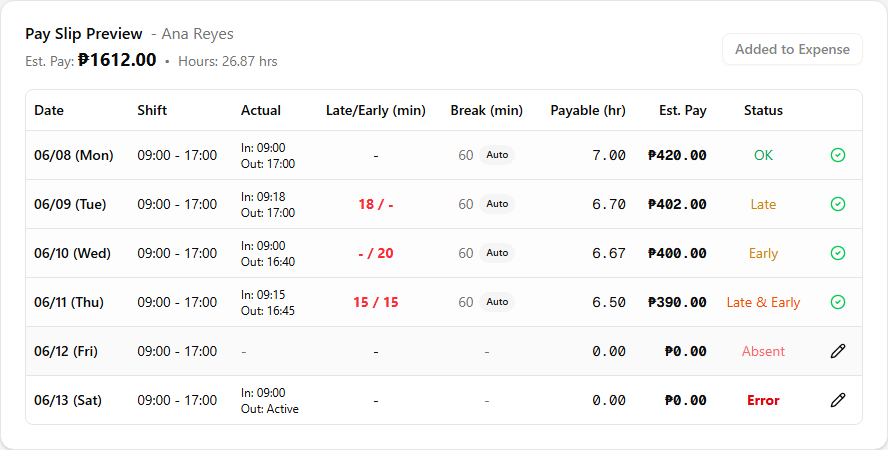
The Pay Slip Preview populates with one row per day in the range, and the header shows the period's totals — Est. Pay and Hours.
3. Read the pay slip
Each row in the preview is one day in the range. The columns are:
- Date — the day.
- Shift — the planned shift's start–end times for that day.
- Attendance — the actual clock-in–clock-out from that day.
- Late / Early (min) — minutes the staff was late at the start and/or left early at the end. Both 0 on a clean punch.
- Break (min) — break time deducted (auto rule or explicit value).
- Payable (hrs) — what actually rolls into pay after deductions.
- Est. Pay — payable hours × hourly wage.
- Status — a one-word summary of how the day went, colour-coded:
- OK — clean: clocked in on time, clocked out on time.
- Late / Early (yellow) — late clock-in or early clock-out.
- Late & Early (orange) — both.
- Absent (light red) — a shift was planned but no attendance landed; pays 0.
- Error (bold red) — broken state, see step 4.
- Off — neither shift nor attendance on the day; nothing to pay.
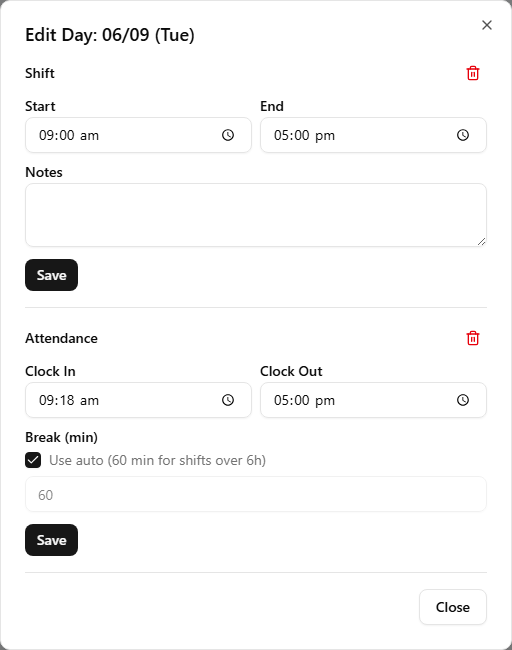
4. Fix a day before registering
For any row that needs a correction — wrong clock-out time, a missed punch, a shift that should have been a different length — click the Edit button on the row. The day-edit dialog opens with the saved values pre-filled across three groups:
- Shift — start and end times, plus notes. Edits here update the underlying shift.
- Attendance — clock in / clock out times. Edits here update the underlying attendance record.
- Break — auto (the >6h rule) or an explicit value in minutes.
Save and the table recalculates the row immediately. Repeat for each day that needs a fix.
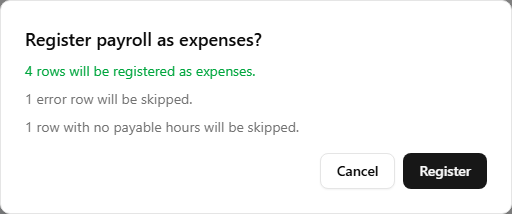
The confirmation dialog at the next step shows what will and won't be registered:
- Error rows are skipped — they need a fix in this step before they can be paid (typically a missing clock-out, or attendance on a day without a shift).
- Already-registered rows are skipped — safe to click Register more than once without creating duplicates.
- Zero-pay rows (Absent, or 0 payable minutes) are skipped — nothing to expense.
5. Register as Expense
Once the period looks right, click Register as Expense in the preview header. A confirmation dialog shows how many rows will be registered, and which ones will be skipped (already-registered, error, zero-pay). Click Register.
Once registered, the button changes to Added to Expense (disabled unless new rows appear in the range), and each registered row links to its Salary entry on the Expenses side.
Where the Salary entries land
Each registered row produces one Salary expense entry, filed under the Labor category in Expenses and tagged with the employee.
From there it behaves like any other expense — it shows up on the store's Expense History alongside materials, rent, and the rest. See Salary ↔ Employees for the link from the other side.
Add a salary straight from Expenses
You don't have to run the calculation to record pay. For a one-off amount — a bonus, an advance, or a payment for someone without shift and attendance records — log it directly on the store's Expenses screen:
- Click Add Expense and set Category to Labor.
- Pick Salary as the item. A Working Staff picker appears — choose the employee, and their hourly wage drops into Unit Price automatically.
- Enter Quantity (the hours) and the Total Amount fills in (Unit Price × Quantity). Or tick Enter total amount, calculate unit price to type a lump sum and let the rate back-calculate.
- Set the date, add an optional comment, and click Add Expense.

This skips the late / early / break maths — you enter the hours and rate yourself — but the entry lands in exactly the same place as a registered row: Labor → Salary, tagged to the employee. See Recording expenses for the full Add Expense flow.