Set up recipes
A recipe tells the app what a menu item is made of — which inventory items it consumes, and how much. With recipes in place, every sale deducts the right stock automatically, and the app can work out each item's cost.
Franchise If your store is connected to a franchise, some recipes may already be in place — the franchisor can ship recipes with its menu preset. See the franchise note at the bottom of this page.
What a recipe does
When an item with a recipe is sold:
- its inventory items are deducted from the selling store's stock, and
- the recipe's quantities feed the item's cost, used in reporting.
Without a recipe, an item still sells — but its stock is not tracked and its cost is unknown.
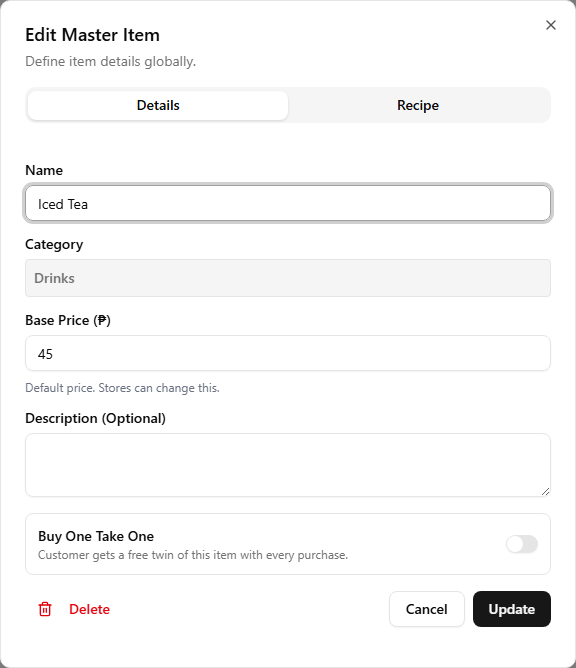
1. Open the item's edit dialog
In the master menu, find the single item you want to give a recipe to and click the pencil (edit) icon on its row in the Items panel.
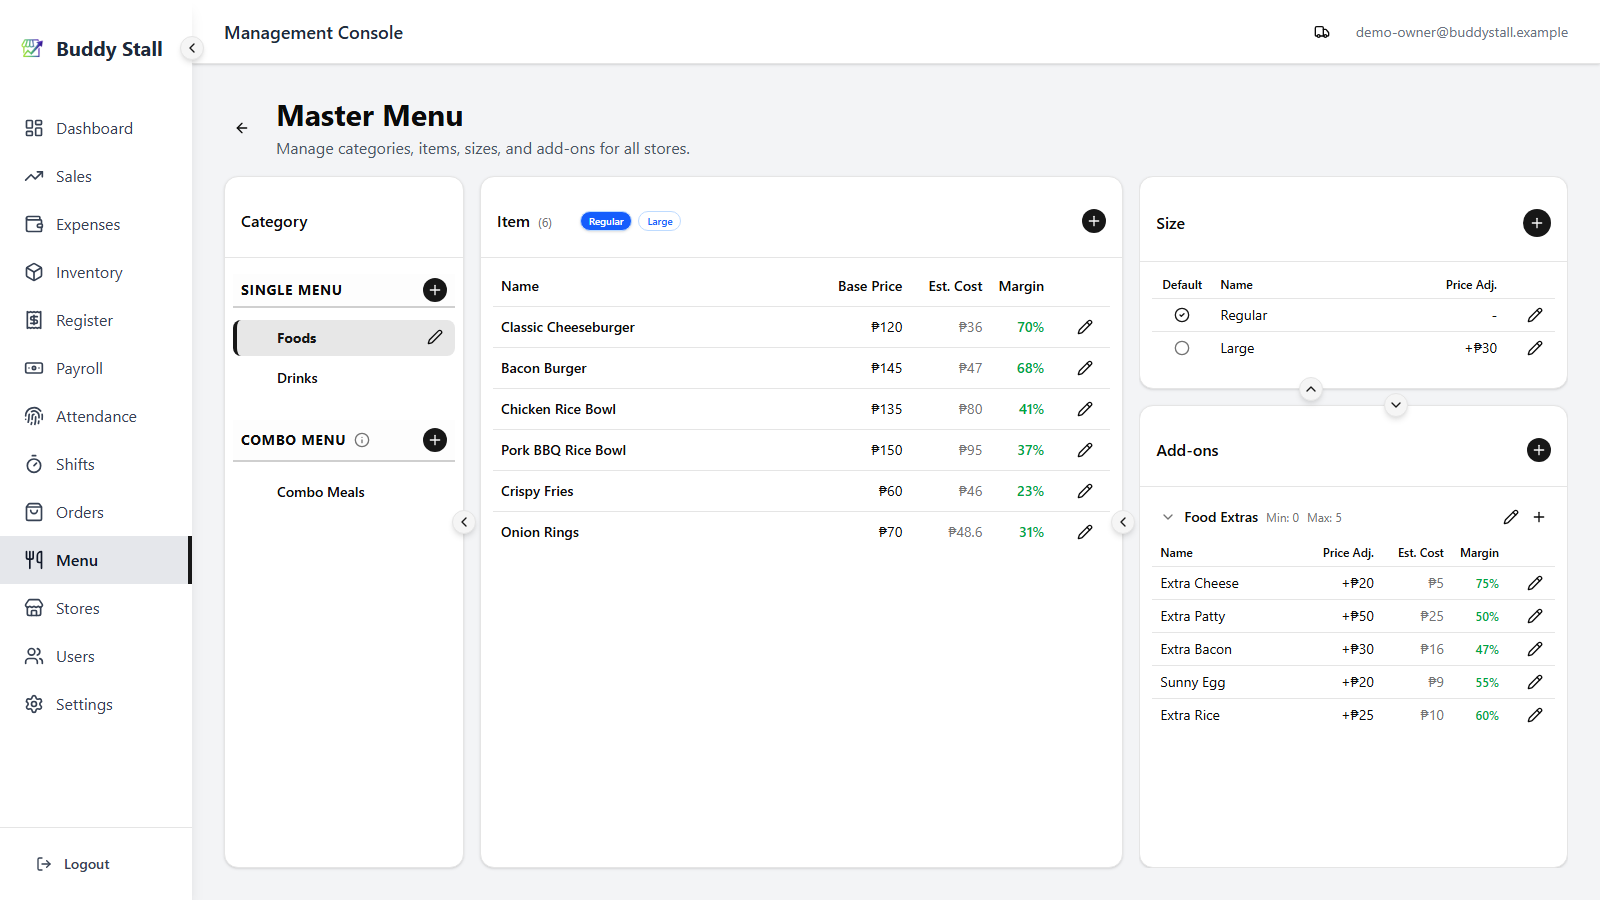
2. Switch to the Recipe tab
The item dialog opens on its default tab. Click the Recipe tab to switch to the recipe editor — a two-column, drag-and-drop layout with Available Inventory on the left and the recipe zone on the right.
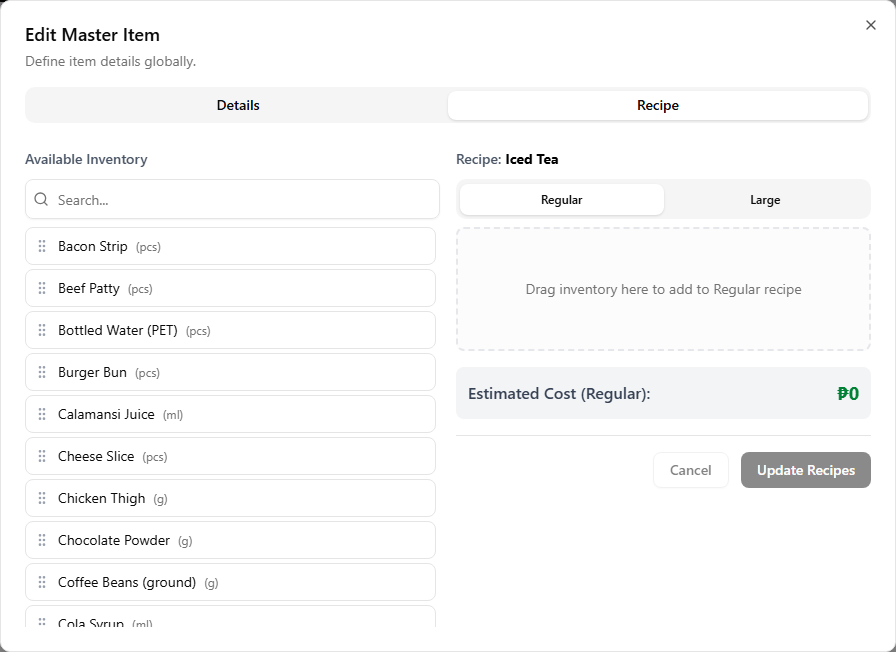
3. Drag an ingredient into the recipe zone
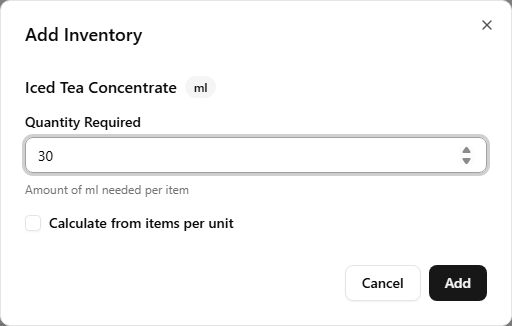
Find the ingredient in the left panel — use the Search box if the list is long — then drag the card across into the recipe zone. The zone highlights when you hover over it as a valid drop target. As soon as you release, a Quantity dialog opens.
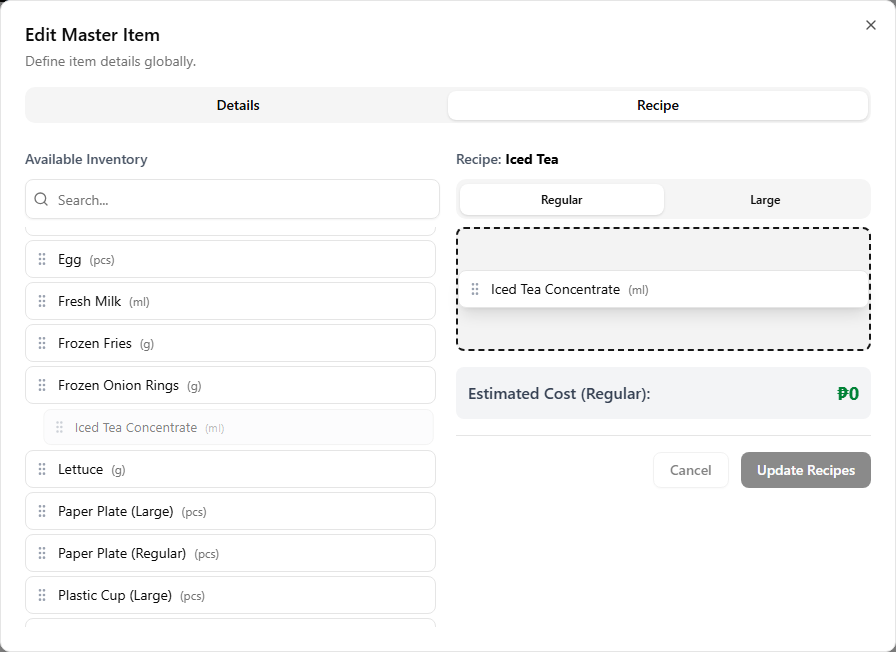
4. Set the quantity for one sale
Enter how much of the ingredient one sale consumes, in the item's
unit (the unit you set when you defined the inventory item —
0.15 kg, 1 pcs, 50 ml, …). Confirm to add the line to the recipe.
If it's easier to think in terms of yield — "this pack makes N
servings" — tick Calculate from items per unit below the input.
The Quantity field flips to ask how many items can be made from
1 unit of the ingredient, and the app stores the per-item amount
as 1 / yield for you. For a 1 kg dough ball that yields 10 pizzas,
enter 10 once instead of working out the 0.1 kg fraction
yourself.
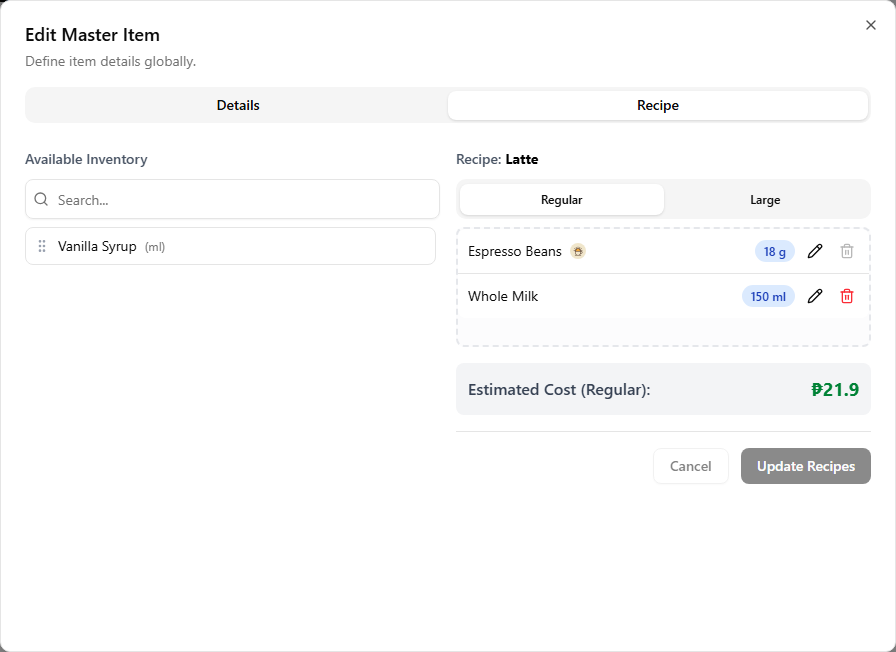
5. Per-size recipes (sized categories only)
If the item's category has sizes (Small / Regular / Large, …), the recipe zone has one tab per size. Switch tabs and build a separate list for each, so a Large can consume more than a Small.
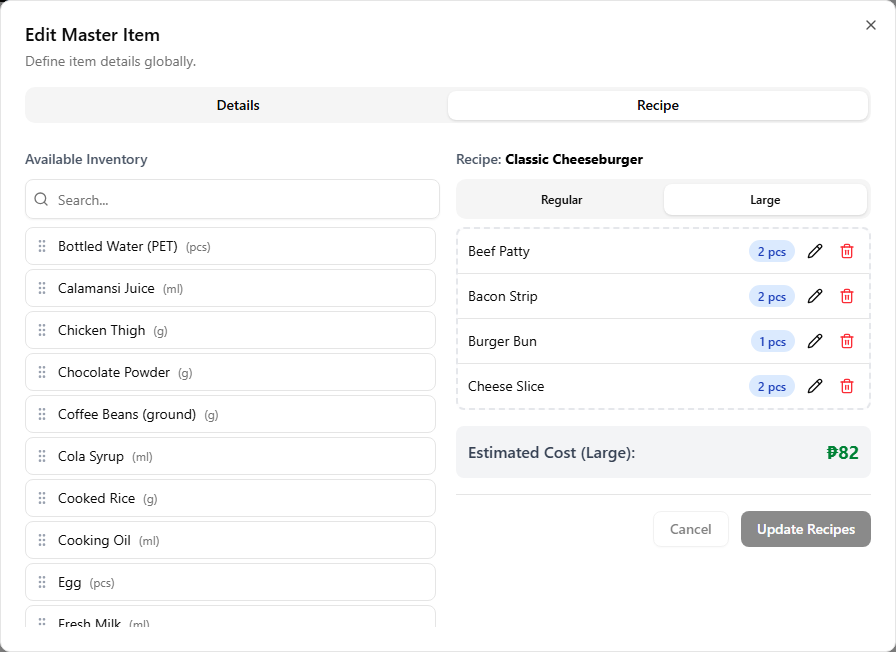
Adding an ingredient while you are on the default size tab also adds it to every other size at once, with the same starting quantity — so you don't have to drag and re-enter the same ingredient on each tab. Edits and deletes are not propagated; only the initial add fans out. The intended workflow is: build the recipe on the default size first, then switch to the other size tabs and fine-tune the quantities (or remove ingredients) that differ for that size.
6. Save the item recipe
Click Update Recipes at the bottom of the Recipe tab — the button pulses while you have unsaved changes. Until you save, your edits live in the form only — closing the dialog without saving discards them. After saving, the next sale of this item starts deducting the listed ingredients from the selling store's stock.
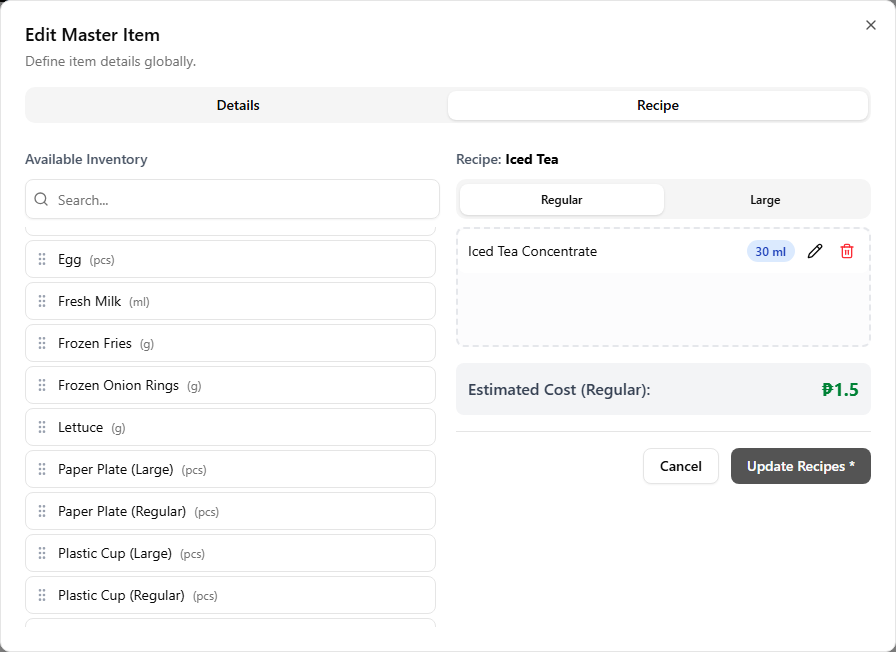
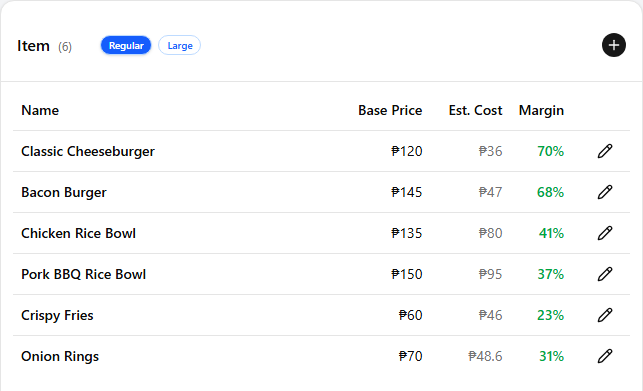
Back on the master menu, the saved recipe lights up the item's Cost and Margin columns in the Items panel — until then both show as a dash. A red margin warns you the item is selling below or close to cost; a green one is on the right side of break-even.
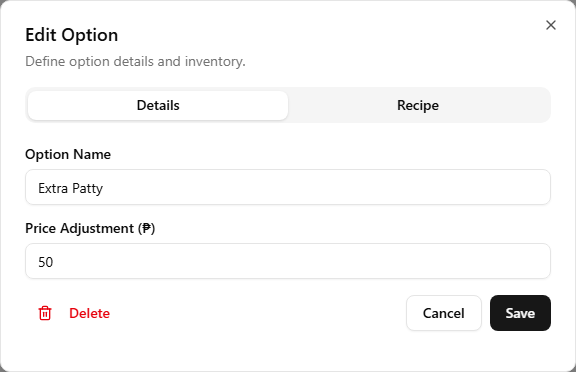
Add-on recipes
Add-on options can have recipes too. An option like "Extra cheese" consumes inventory the same way an item does, so choosing it on an order deducts stock. The flow mirrors an item recipe — open the option, switch to its Recipe tab, drag in ingredients.
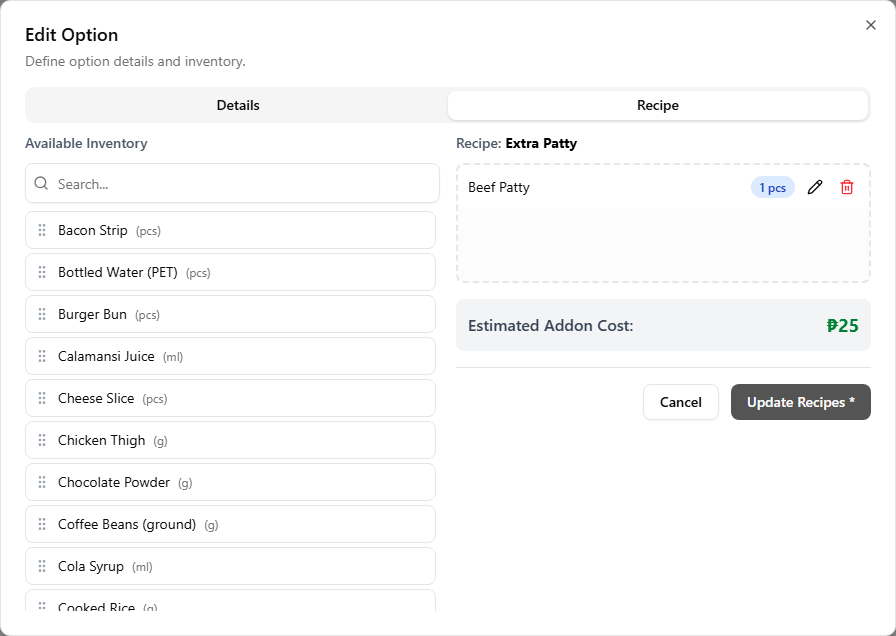
7. Open the add-on option's edit dialog
In the master menu, select the category that holds the add-on you want to give a recipe to. In the Sizes & Add-ons panel on the right, find the option's row inside its add-on group, then click the small pencil (edit) icon to open the option dialog.

8. Switch to the Recipe tab
The option dialog has two tabs. Click the Recipe tab to switch to the recipe editor. (If you are adding a brand-new option, the Recipe tab stays disabled until you save the Details first — save the option, then come back to add its recipe.)
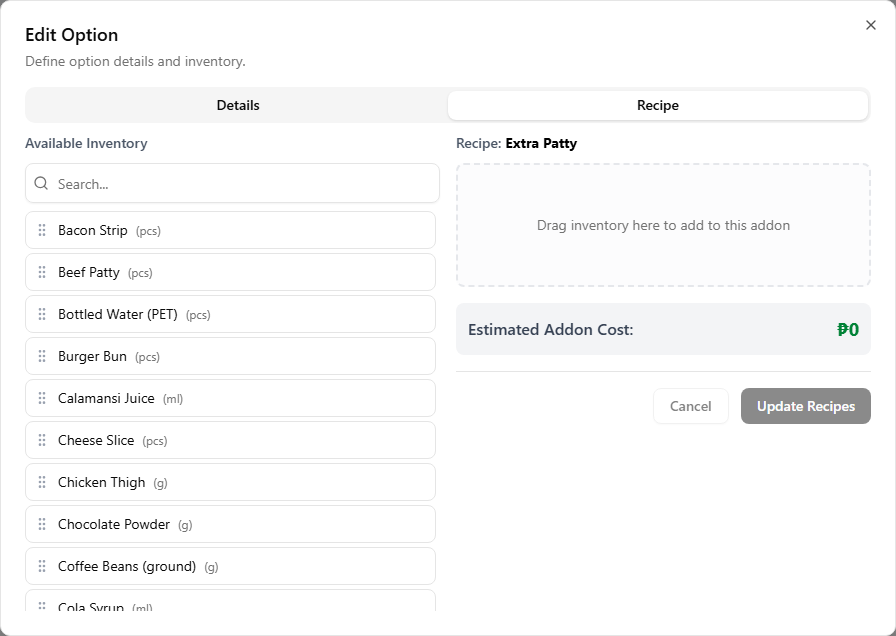
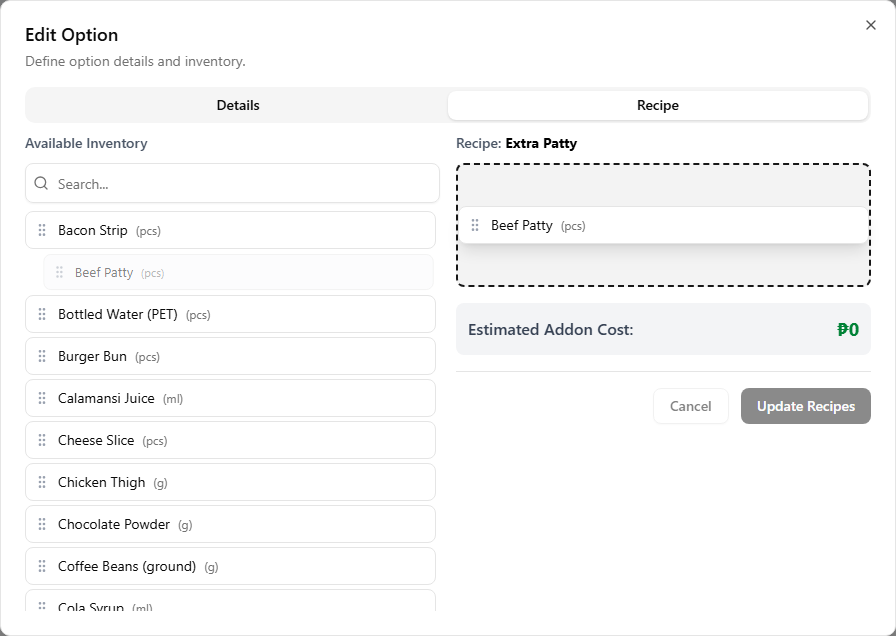
9. Drag an ingredient into the recipe zone
Find the ingredient in the Available Inventory panel — use the Search box if the list is long — and drag the card across into the recipe zone. The Quantity dialog opens when you release.
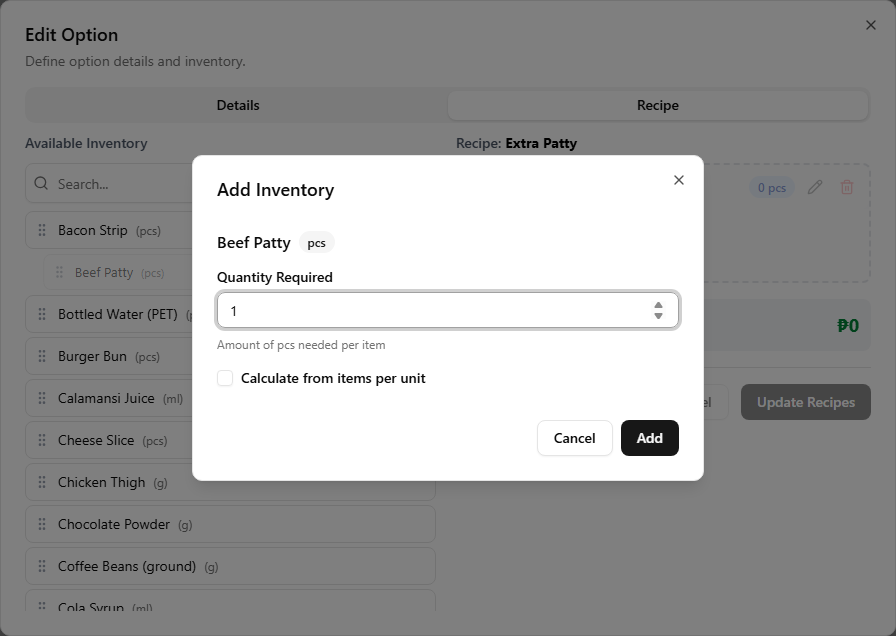
10. Set the quantity for one use
Enter how much one use of this add-on consumes, in the ingredient's unit. When a customer picks the same option more than once on a single order (e.g. "Extra pearls × 3"), the deduction is multiplied by the selected quantity at sale time — so the value here is per single selection.
11. Save Recipes
Click Update Recipes at the bottom of the Recipe tab — the button pulses while you have unsaved changes. Closing the dialog without saving discards them. After saving, choosing this add-on on an order starts deducting its ingredients alongside the item's own.
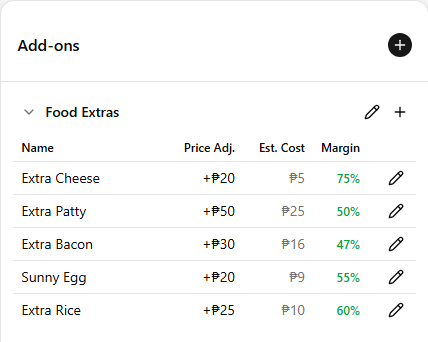
Back on the master menu, the saved recipe lights up the option's Est. Cost and Margin columns in its add-on group's options table — until then both show as a dash. A red margin warns the option's price adjustment is too low for what it consumes; a green one is on the right side of break-even.
Combos
A combo item has no recipe of its own. Its stock and cost come from the recipes of the items inside it — define those on each component item, not on the combo.
One recipe, every store
A recipe is defined once on the master menu and applies to every store. The deduction always hits the selling store's own inventory, using that store's stock levels.
Read next
Master menu
Build the owner-wide catalog: categories, items, sizes, and add-ons.
Set up your inventory
Register the ingredients your recipes will draw from.
Inventory master
Define each ingredient once: name, unit, cost, and low-stock threshold.
Everything below applies only once your store has joined a franchise. These features stay hidden until you connect, so a single, unconnected store can stop here. See Joining a franchise.
Recipes from a franchise preset
When you pull a franchisor's preset, its items can arrive with recipes already attached. Open such an item's Recipe tab and the franchisor's lines sit alongside any you add yourself.
 12
121 Franchisor line — carries the franchise logo badge and is locked: its delete icon is greyed out, so you cannot remove it.
2 Your own line — added the usual way and fully editable, with an active red delete. Build your own recipe alongside the franchisor's; the preset lines stay put.