Set up your inventory
This walkthrough takes you from an empty inventory to a store that is ready to receive stock, with the matching expense items wired in along the way.
You start in the master inventory (the owner-wide list of ingredients to track), move to a store inventory (the per-store running counts), and finish where a purchase logged anywhere flows into the store's stock automatically.
Franchise If your store is connected to a franchise, the franchisor's preset ingredients load straight into your master inventory, paired expense items and all. See the franchise note at the bottom of this page.
1. Open the Master Inventory
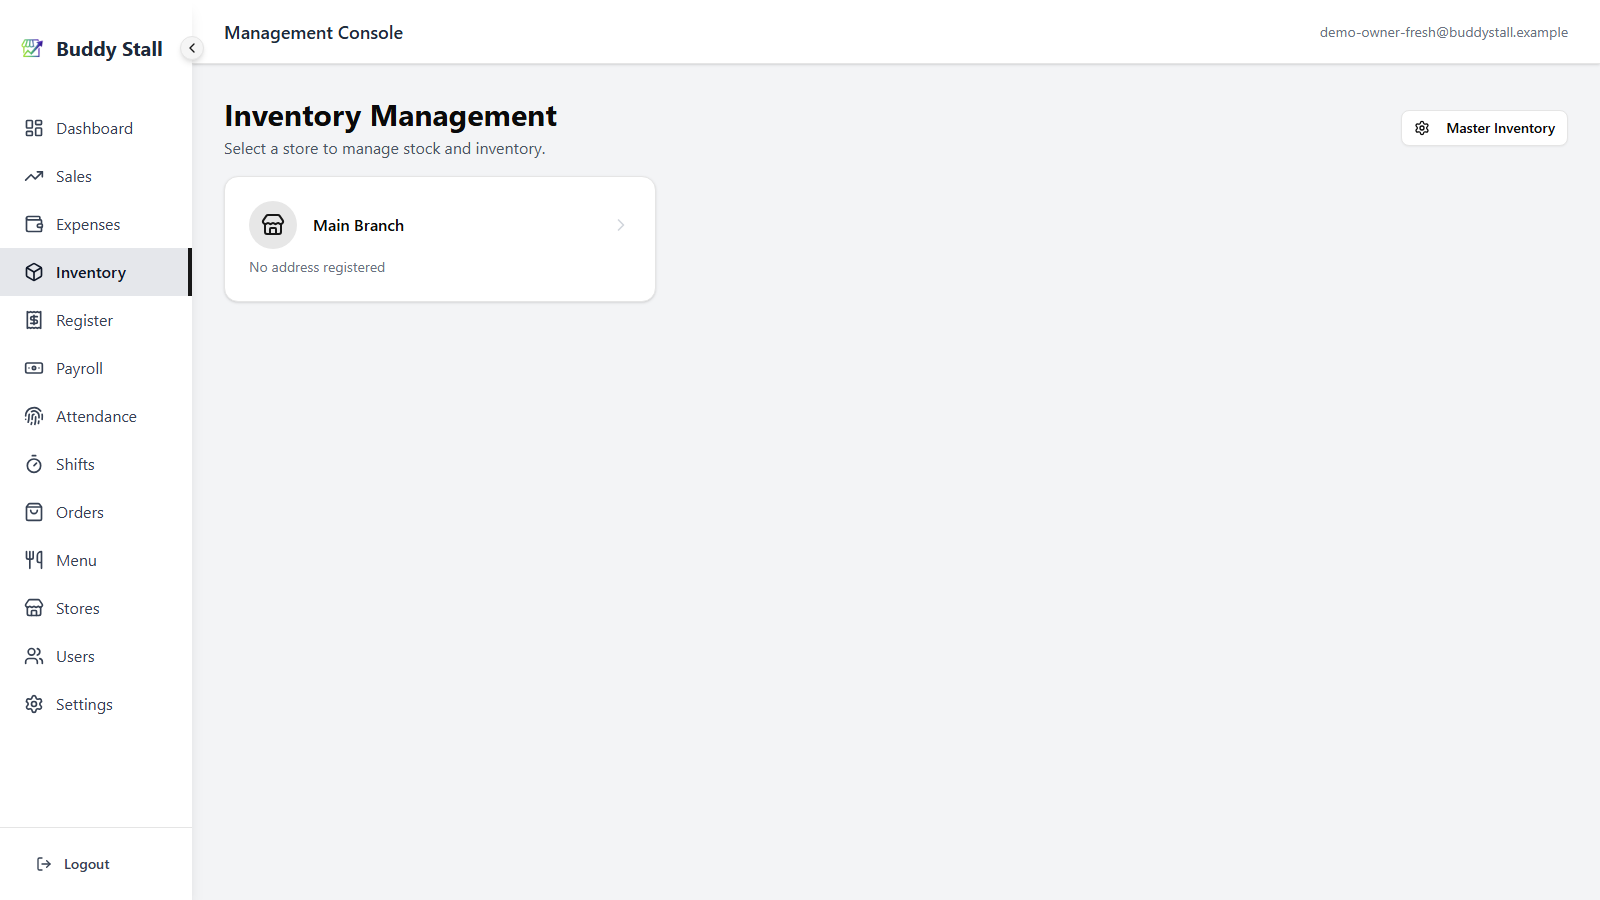
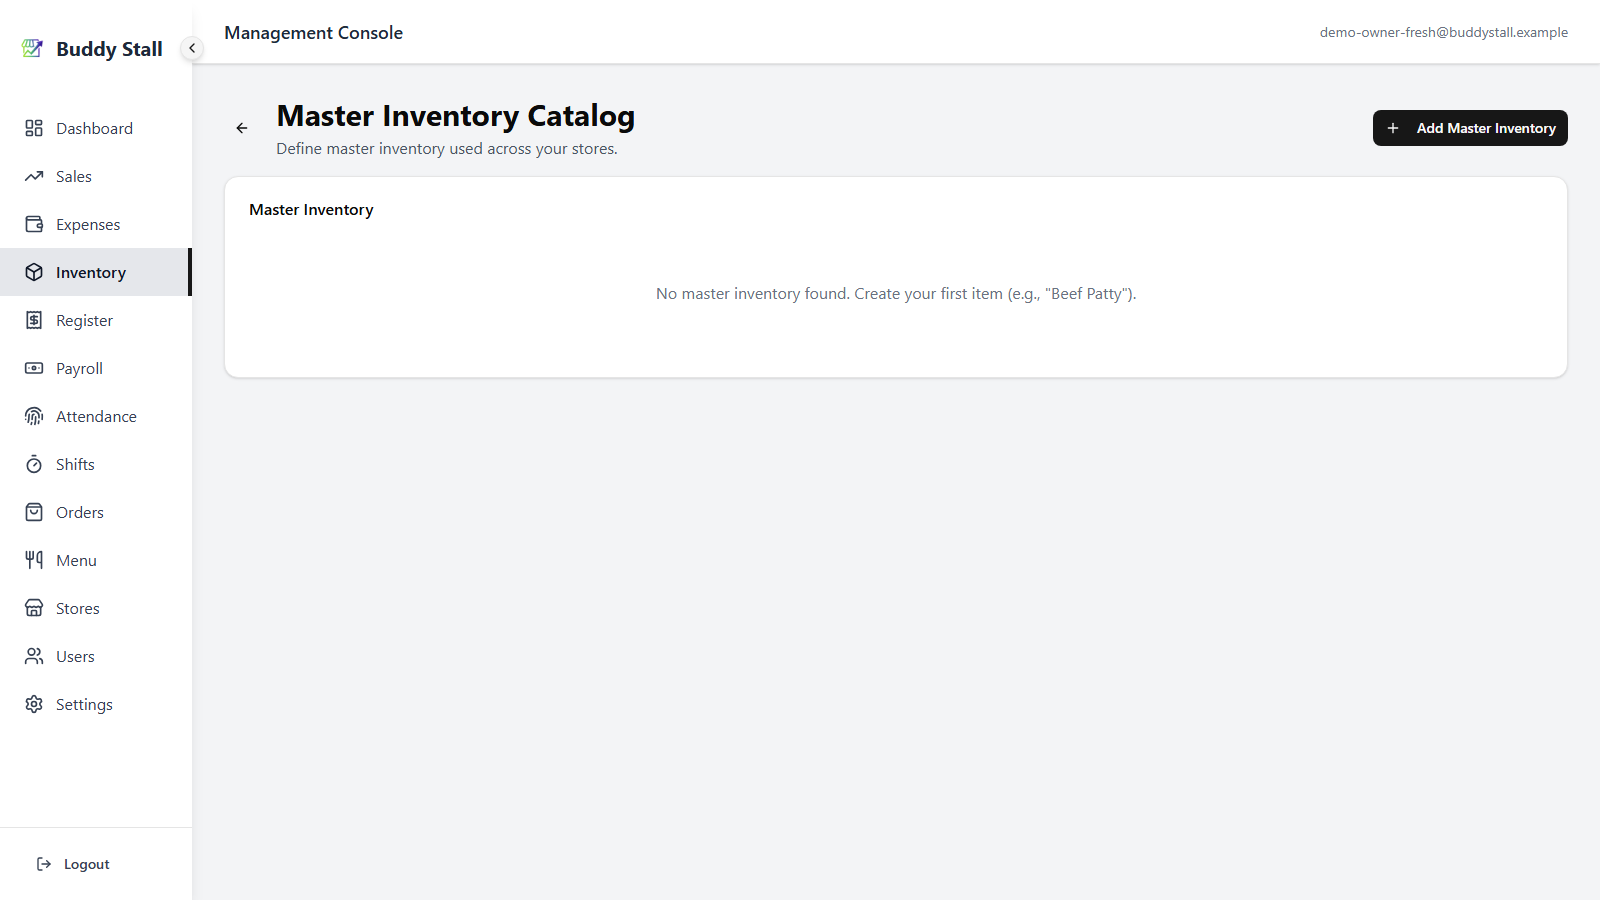
Sign in as the owner. From the main navigation, open Inventory — you will see the list of your stores. Click Master Inventory in the top-right to open the owner-wide catalog of ingredients you want to track.
2. Add a master inventory item
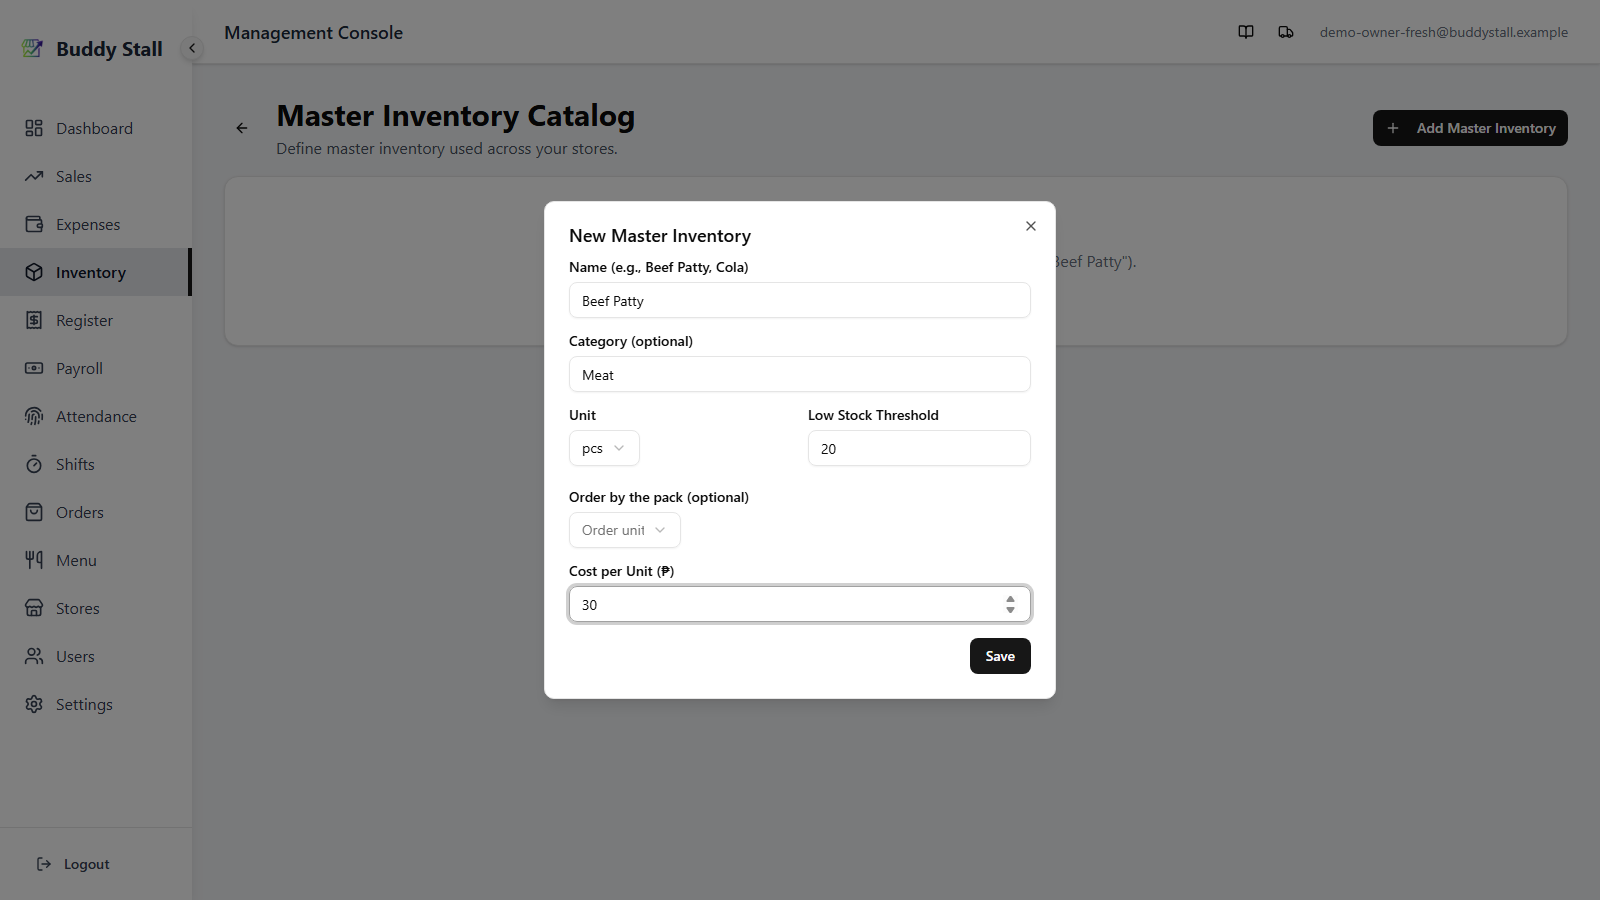
Click Add Master Inventory in the top-right to open the new-item dialog.
Fill in the dialog:
- Name — the ingredient as you will refer to it (e.g. "Beef Patty").
- Category — optional grouping label (e.g. "Meat", "Drinks") that organises the inventory list; leave it blank for Uncategorized. See Organize with categories in the inventory master reference for more.
- Unit — how you count it (kg, g, L, ml, pcs, packs, cans, bottles, containers). For packaging units you can optionally add Content per unit (what one unit holds, e.g. 1 bottle = 1 L) and Order unit (a coarser unit you buy in, e.g. 1 case = 12 bottles). See How an ingredient is measured for the details.
- Cost per Unit — the price you pay per unit. Used to value waste and expected expenses.
- Low Stock Threshold — the level at which the item should start flagging red on the store inventory screen.
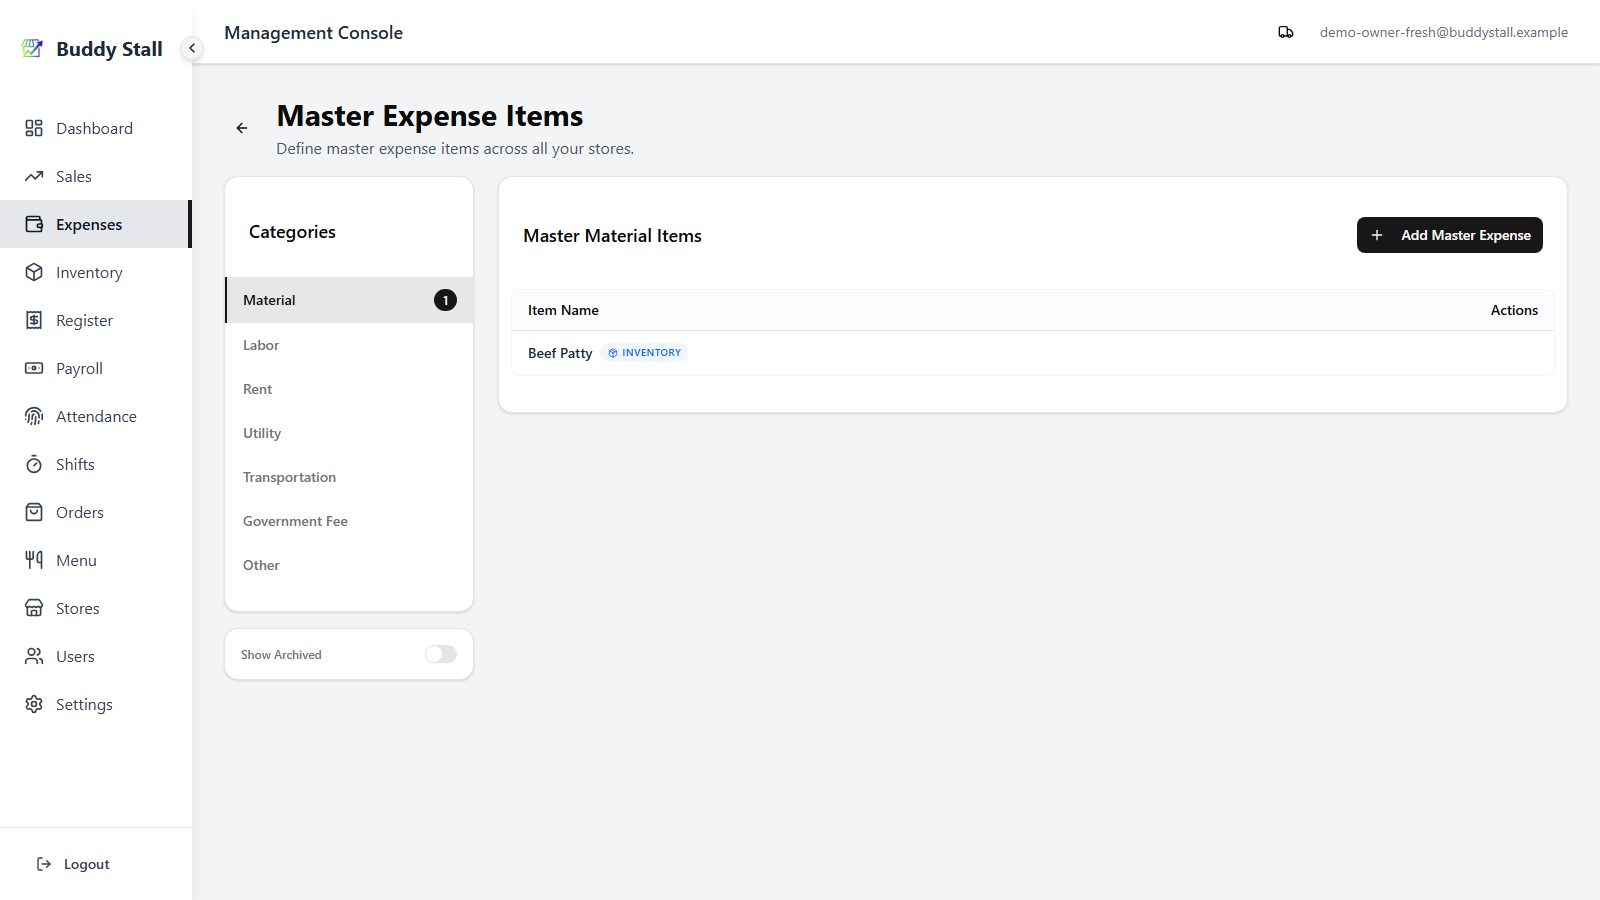
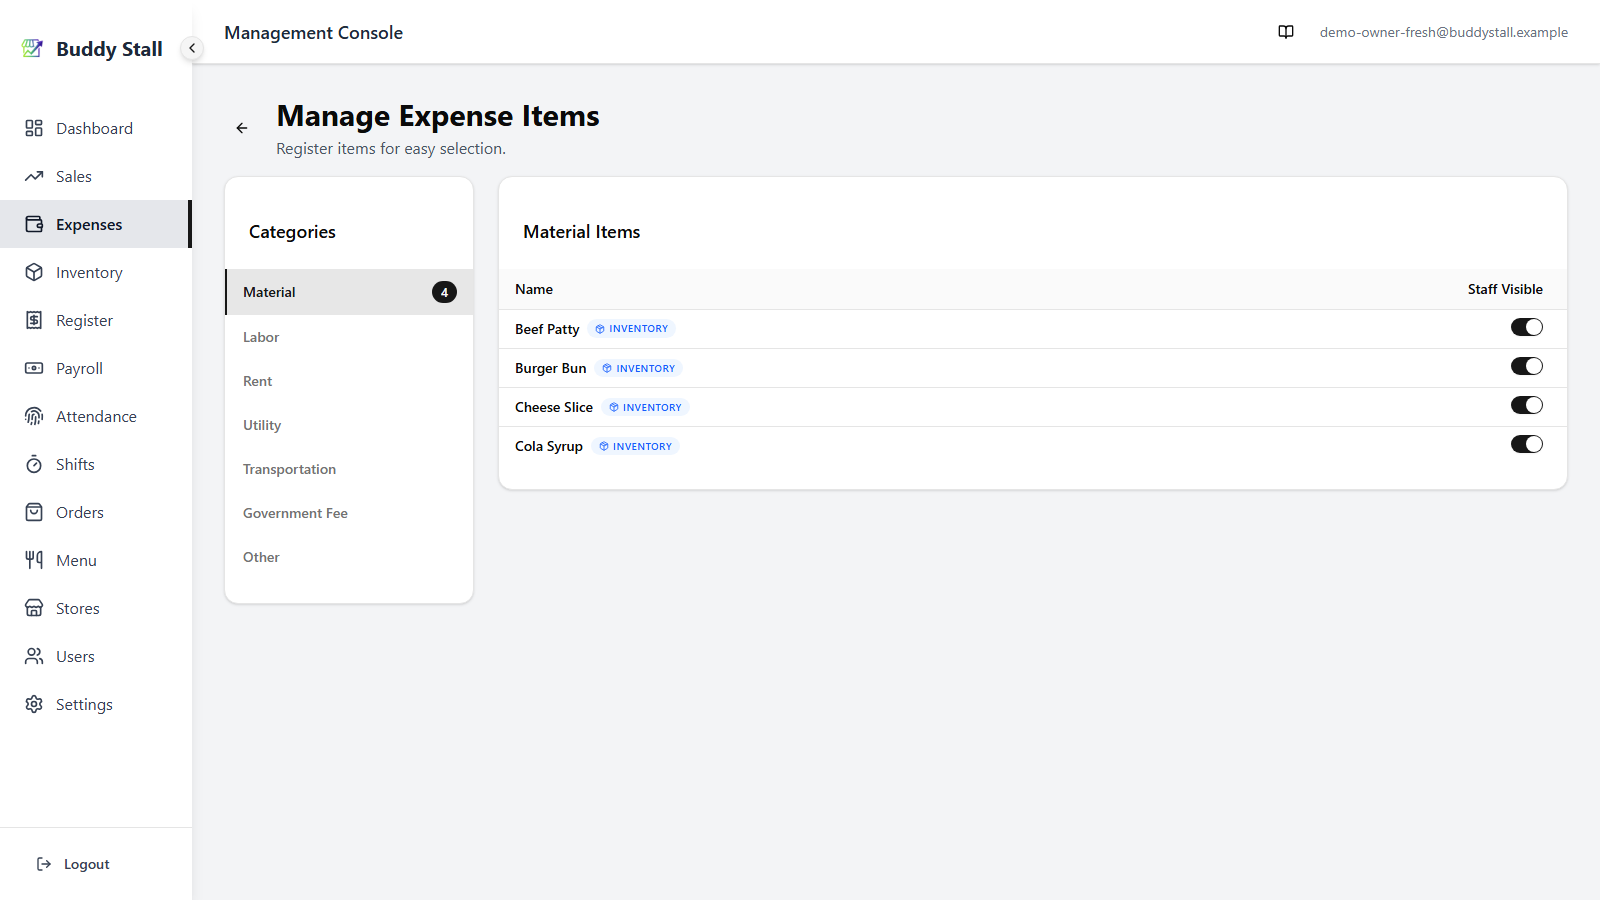
Saving a master inventory item automatically creates a paired master expense item under Expenses — same name, category Material. This is the link that lets a future expense entry know which ingredient it is buying, and so know which store inventory to restock.
Repeat for every ingredient you want to track. You can come back and add more later.
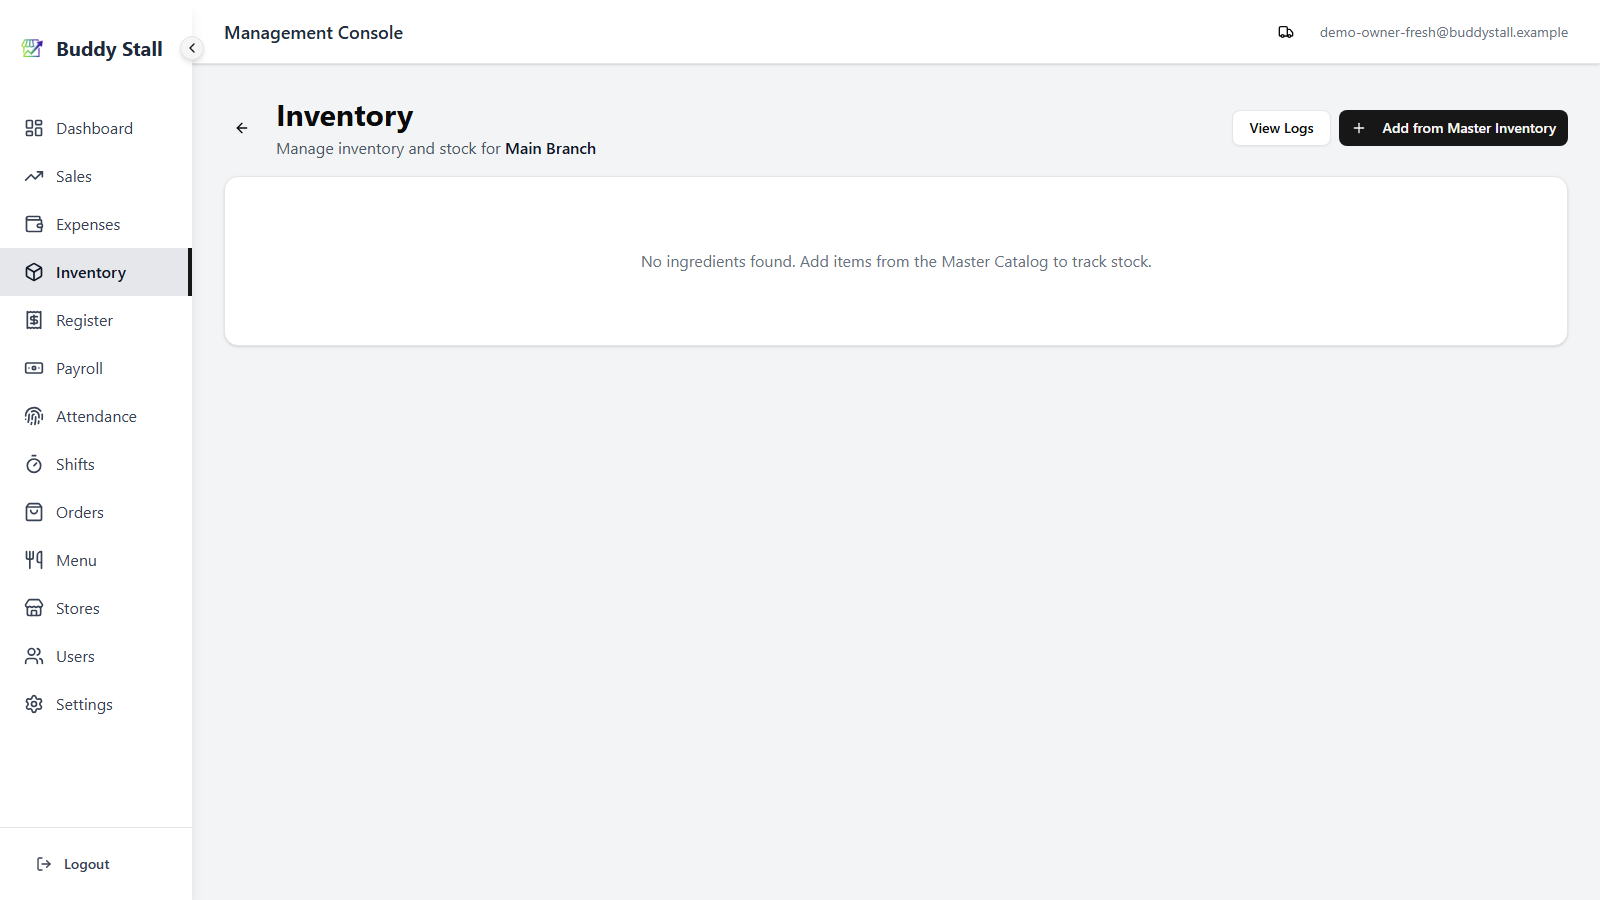
3. Open a store inventory
Go back to Inventory and pick the store you want to set up. The screen opens onto the store's running stock list — empty for a brand-new store.
4. Add items from the master to the store
Click Add from Master Inventory. The dialog lists every master item the store does not already carry as a checklist. Tick the items you want — or use Select all at the top — then click Add selected.

Registering an item to a store also adds the linked store expense item to that store's Expenses. The store can record purchases against it from day one — no extra setup on the Expenses side.
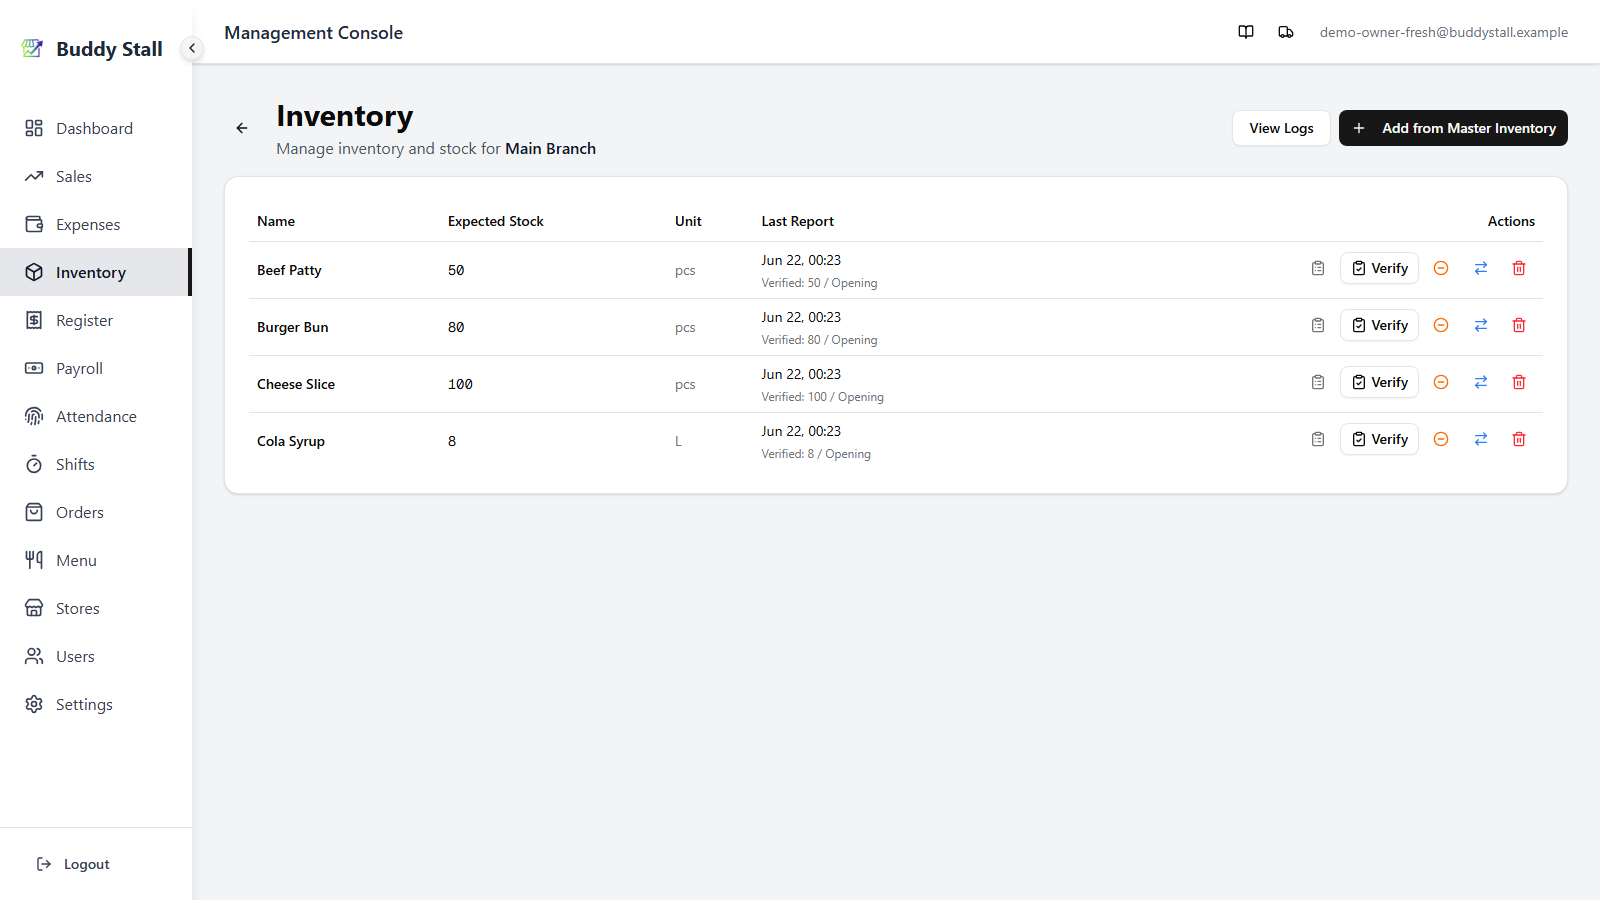
The store inventory now lists every item you added, each flagged Not counted until you declare its opening balance — that is the next step.

5. Set the opening stock with a first inventory check
Registering an item only puts its name on the store's list — the count is still zero. Your first inventory check is what declares how much is actually on hand, and it becomes the baseline every later count is measured against.
On a Not counted row, click Set opening stock.
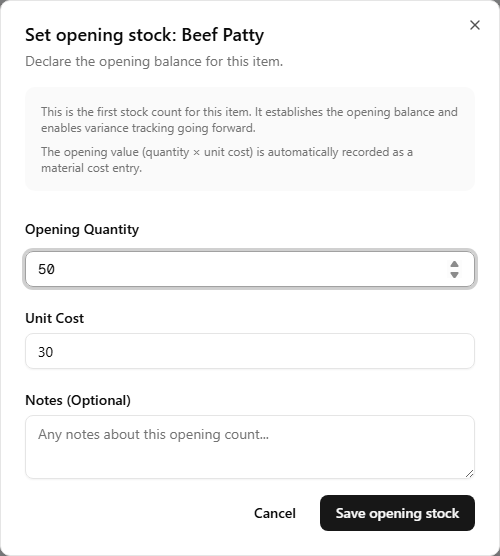
Fill in the dialog:
- Staff Member — who counted the stock.
- Opening Quantity — the amount physically on hand right now.
- Unit Cost — what the item costs per unit. It defaults to the master cost; adjust it if this store pays a different price. For HQ-managed preset items the cost is locked (Set by HQ) and you cannot change it.
- Notes — optional.
Click Save opening stock. The Not counted badge clears, the Expected Stock column shows your opening count, and the row records it under Last Report. From here on the item carries a running count and every later stocktake is measured against this baseline.
Setting opening stock also logs a material expense for the store — quantity × unit cost, described as Opening stock under Expenses. This books the value of the stock you started with without needing a fake order, which matters for Franchisor-exclusive items that can only restock through an order.
You do not always have to run an opening check by hand. The first time stock arrives through an order or an expense (step 6), that received quantity establishes the baseline too — the item leaves Not counted automatically.
6. Stock is now wired in
That is the full setup. Because steps 2 and 4 wired each ingredient to an expense item on both the master and the store, restocking the store can happen from either side of the app:
- Through Orders — receive a purchase order for the item and the received quantity is added to the store's stock. See Orders.
- Through Expenses — record an expense entry against the auto-created material item and the quantity flows into the store's stock automatically. See Expenses.
Either way, you record the purchase once and the count is right — no duplicate bookkeeping between Expenses and Inventory.
7. Register recipes so sales deduct stock
Everything up to here covers stock coming in. To make stock go out automatically at the POS, register a recipe for each menu item — its ingredients and how much of each, optionally per size.
A menu item without a recipe sells without touching inventory.
Recipes live on the master menu, alongside the items themselves. See Set up recipes for the full walkthrough.
Read next
Set up recipes
Link menu items to the ingredients they use, so sales deduct stock automatically.
How to stocktake
Reset the count to what you physically counted, and keep the variance on record.
Logging waste
Record spoilage and spills — stock drops and the value lands in expenses.
Everything below applies only once your store has joined a franchise. These features stay hidden until you connect, so a single, unconnected store can stop here. See Joining a franchise.
When your store is connected to a franchisor, the master-inventory groundwork (steps 1–2) is largely done for you. The rest of the walkthrough — registering items to a store and setting opening stock — runs exactly as above. What changes is where some of the items come from, and which of their fields you control.
Where preset items come from
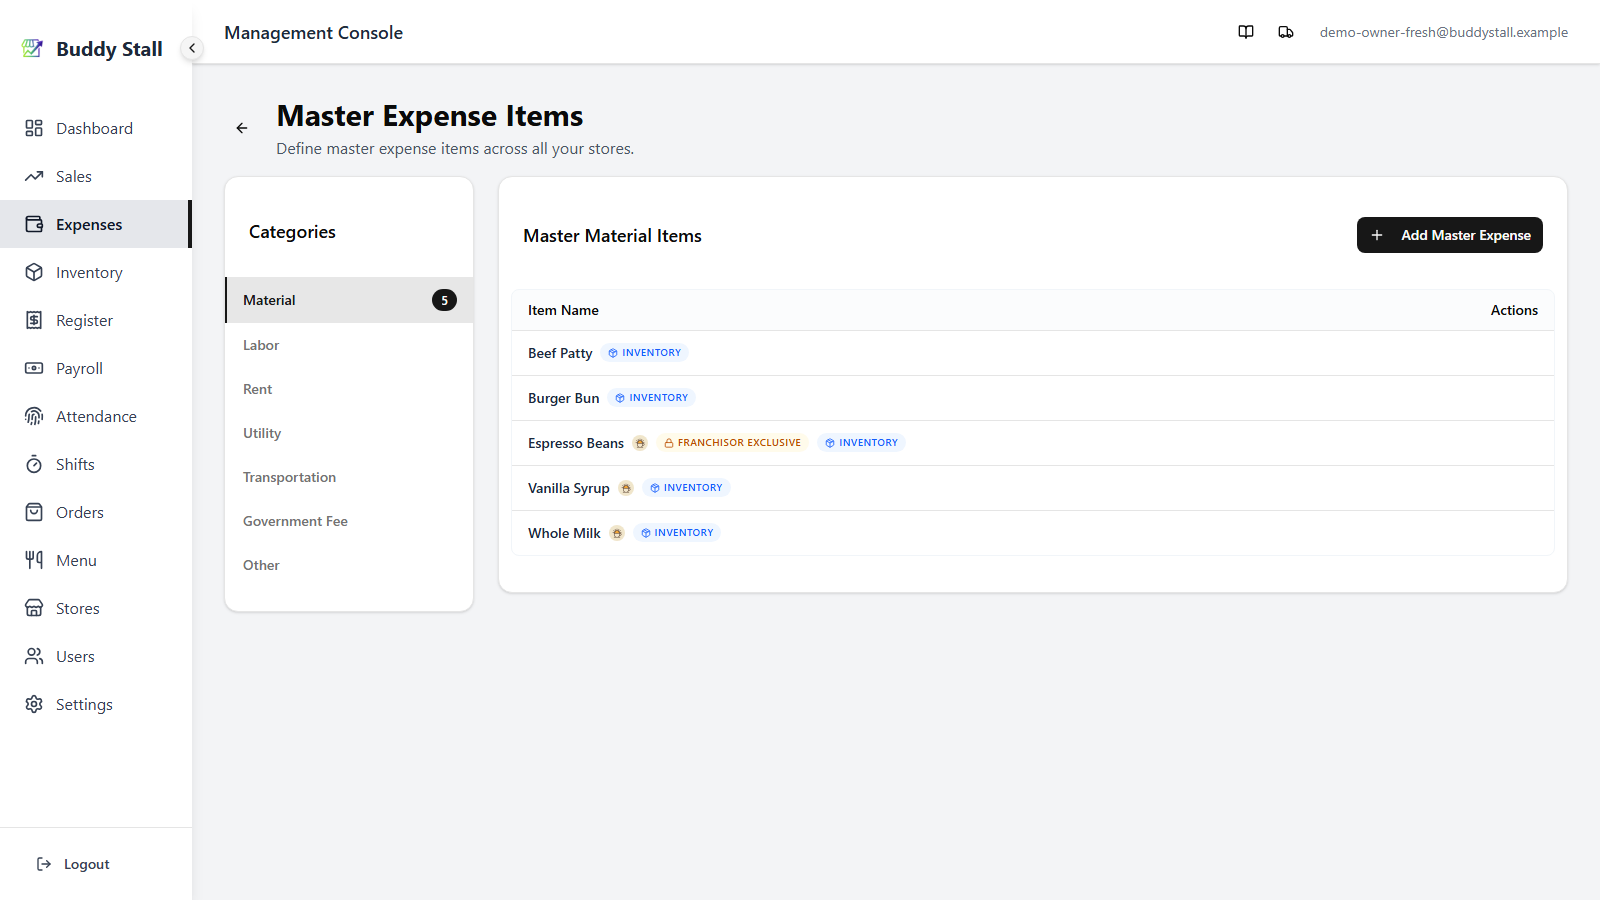
The ingredients in the franchisor's preset are brought into your master inventory from Settings → Franchise Connections. Each one carries the franchisor's logo badge so you can tell it apart from the items you created yourself, and — just like your own items — a paired master expense item is created for every preset ingredient. Your own items stay un-badged.

The pairing carries over to Expenses: each preset ingredient's master expense item appears under Expenses → Master Expense Items with the same franchisor badge (alongside the Inventory tag that marks it as linked to an inventory item), so you can tell at a glance which expense items belong to the franchise.
When the franchisor revises the catalog, re-run the compare-and-load step in Settings to pull the changes. See Joining a franchise for that flow.
What you can and can't change
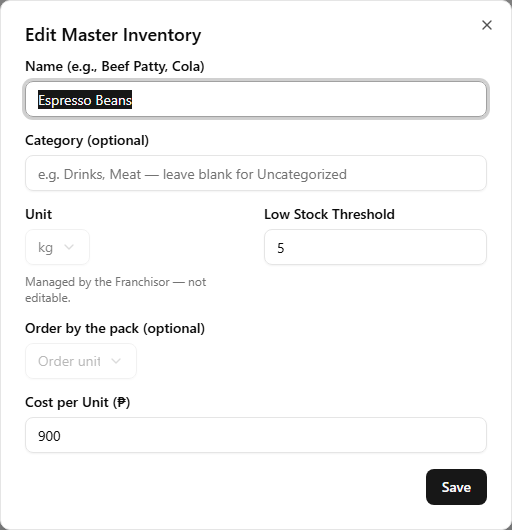
Most of a preset item stays yours to manage. You can freely edit its Name, Category, Low Stock Threshold, and Cost per Unit — and your store's running count is always your own, set by your opening check and every stocktake after it.
What the franchisor pins applies to its Franchisor Exclusive items (see below). On those, the structural fields — Unit, pack content, and order unit — are read-only in the edit dialog, marked Managed by the Franchisor.
Preset items can't be deleted
Because the franchisor owns them, items pulled from the preset can't be deleted from your master inventory — the trash icon on those rows is disabled. They leave only when the franchisor removes them from the preset and you pull the change. Your own items delete exactly as before (see the inventory master reference).
The "Franchisor Exclusive" badge
Some preset items carry an extra amber Franchisor Exclusive badge. These can only be restocked through Franchisor orders — recording a direct expense against them is disabled. Tap the badge for a one-line reminder.
You don't need the details here: how ordering from your franchisor works is covered in Orders. For now, it's enough to know that a Franchisor Exclusive item is restocked by ordering, not by logging an expense.