Shift management
Shifts are the planned work periods for each store — who is scheduled when, from when until when. They are also the base that payroll calculates against. This page covers creating shifts (single, bulk, recurring), saving presets, and editing existing ones.
1. Open the Shift Scheduler
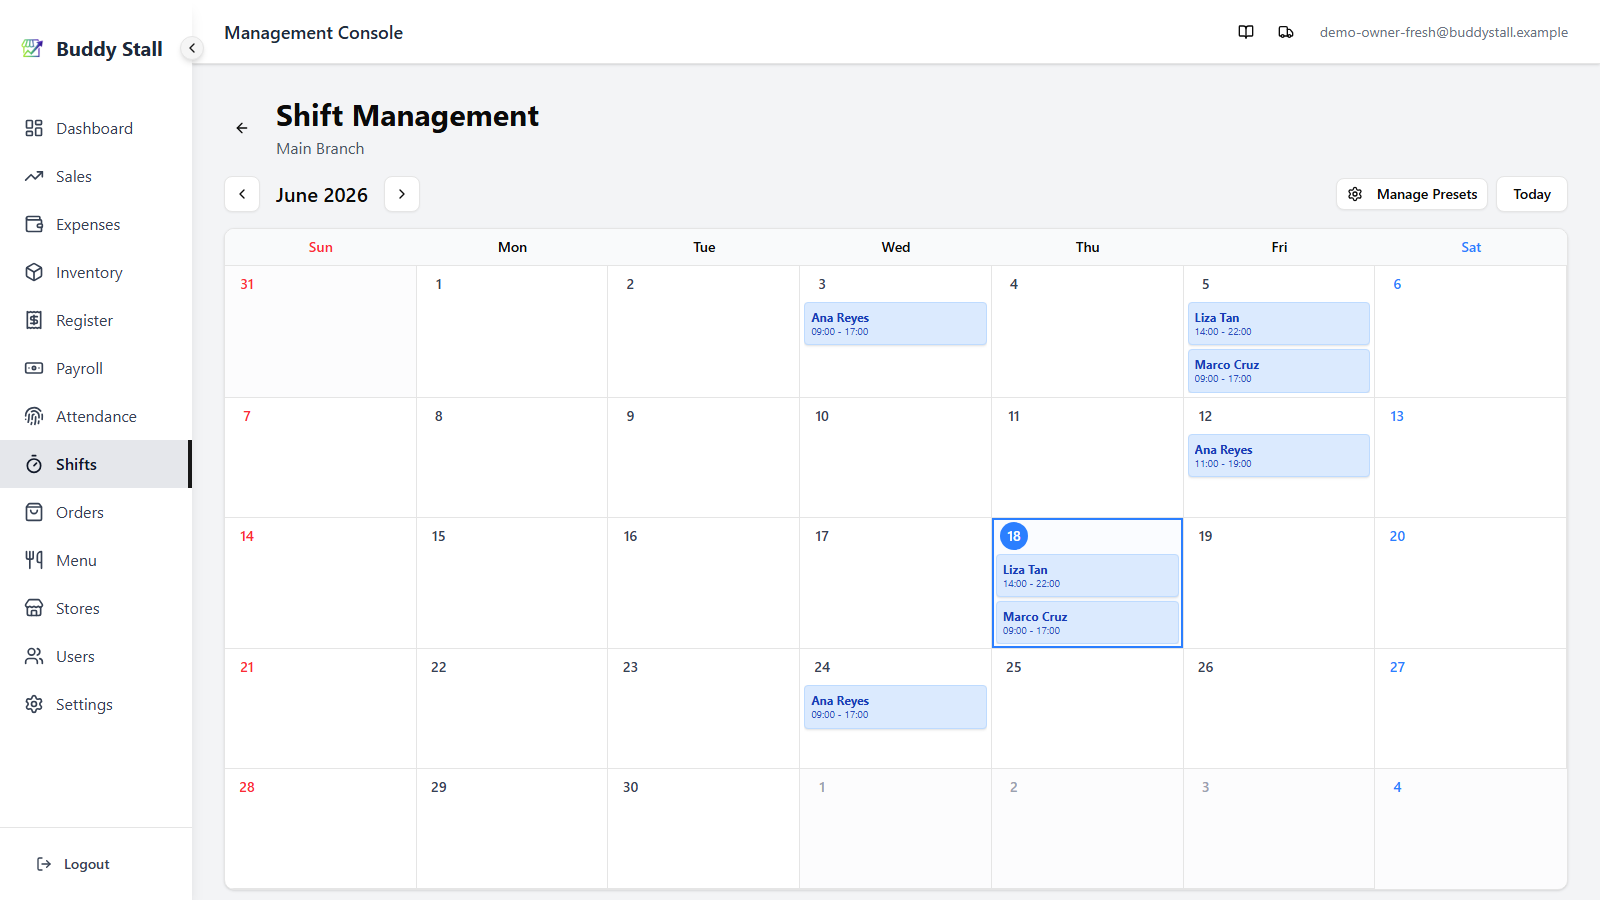
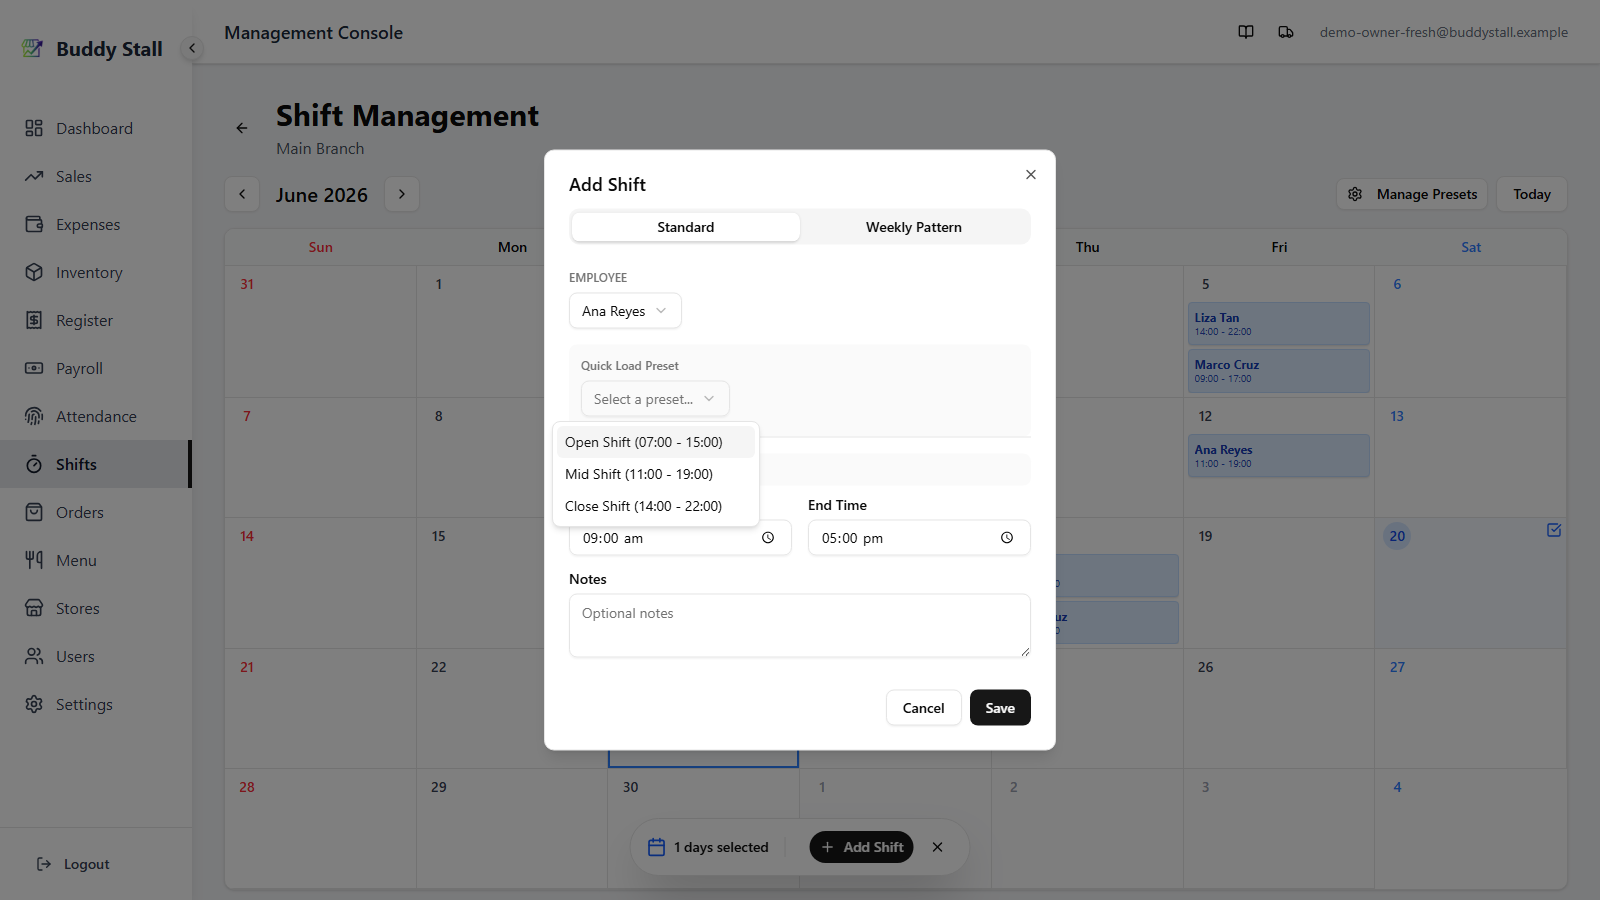
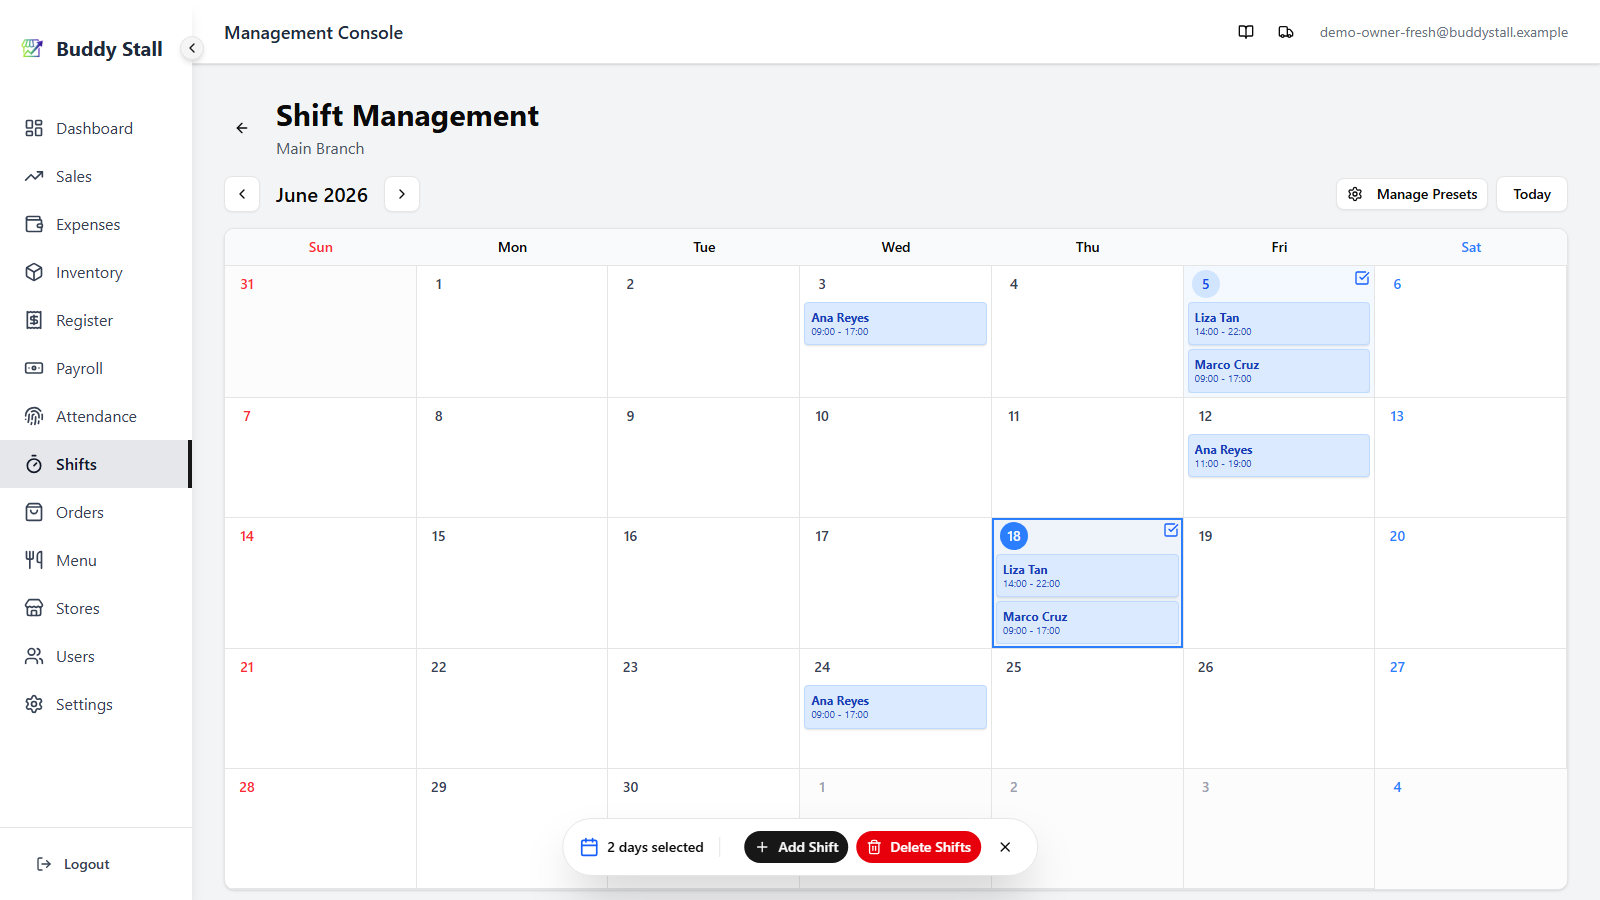
From the admin sidebar, open Shifts and pick the store you want to schedule. The scheduler opens on a month-view calendar with the current month centred, today's cell highlighted, and any existing shifts shown inside the day cells.
2. Add a single shift
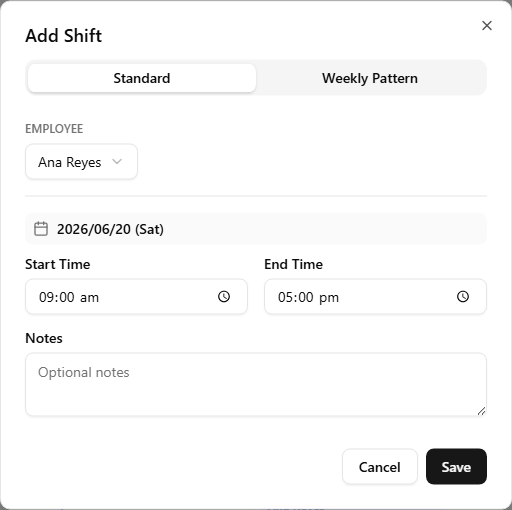
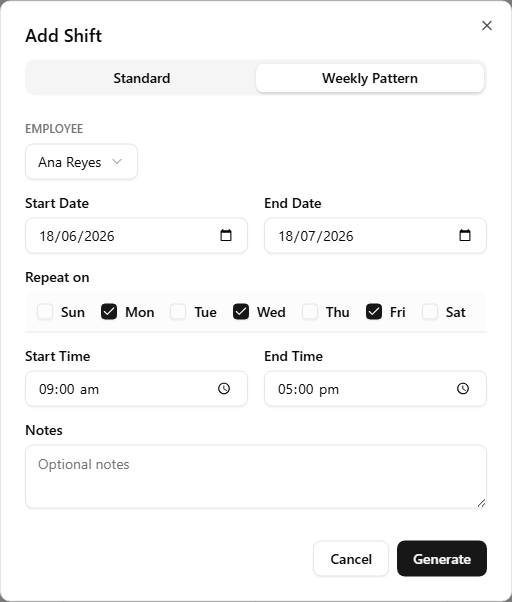
Click the day you want to schedule on. A check mark and a blue highlight mark it as selected. Click Add Shift in the action bar that appears at the bottom — the dialog opens on the Standard tab. Fill in:
- Employee — pick the staff member from the dropdown.
- Start and End — the planned shift times.
- Notes (optional) — anything the staff or admin should know (e.g. "training shift", "covering for X").
Click Save to add the shift. It appears in the day cell immediately.
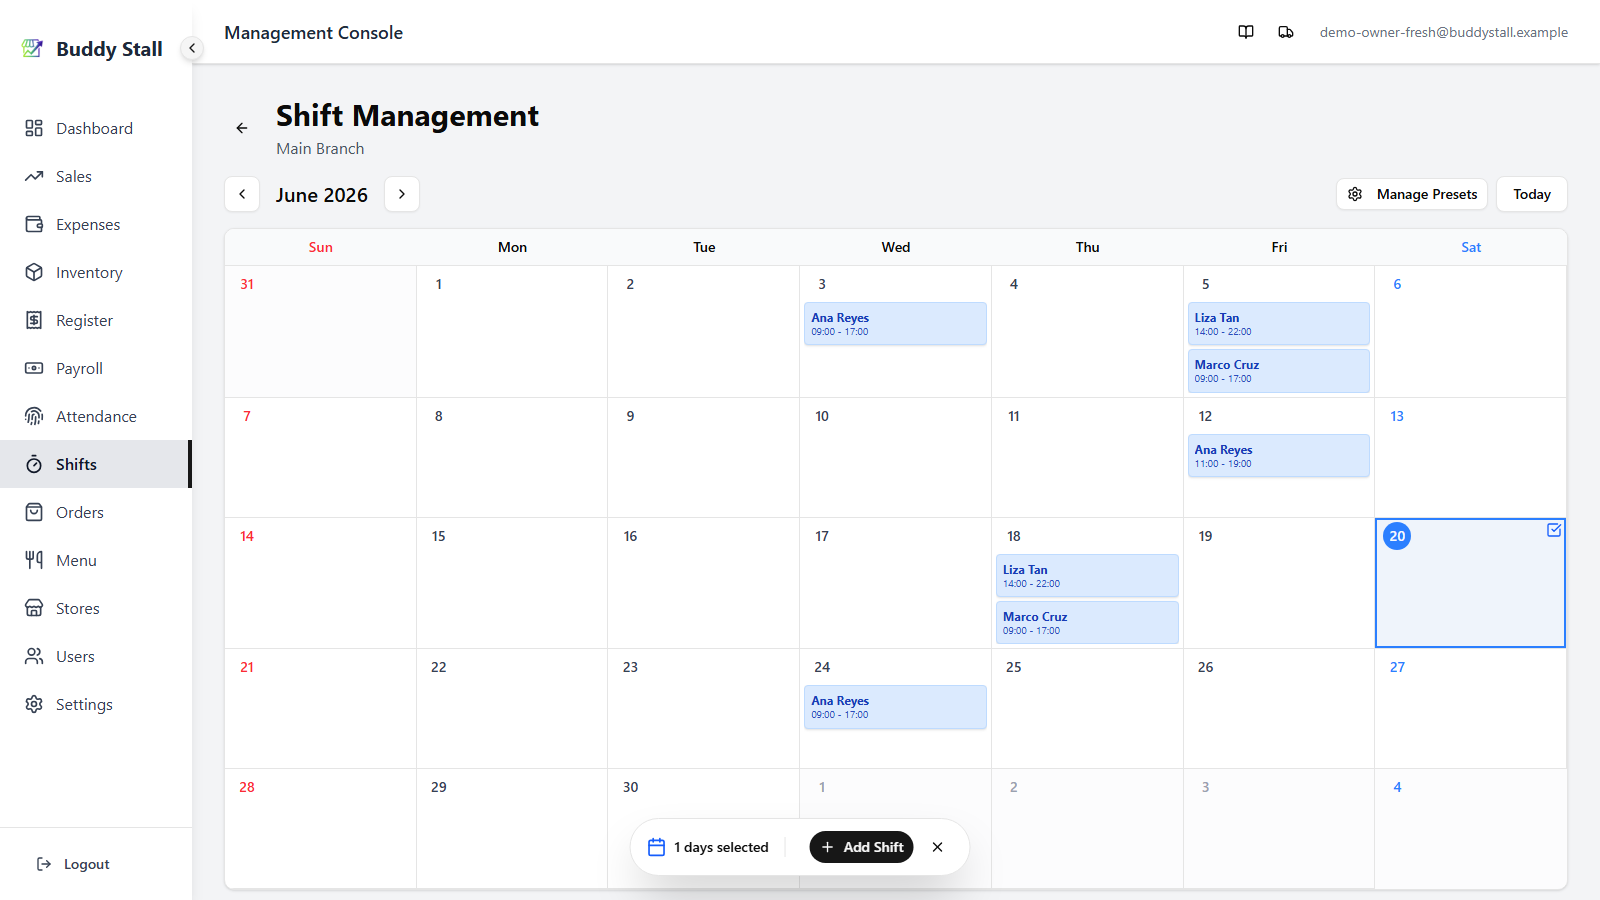
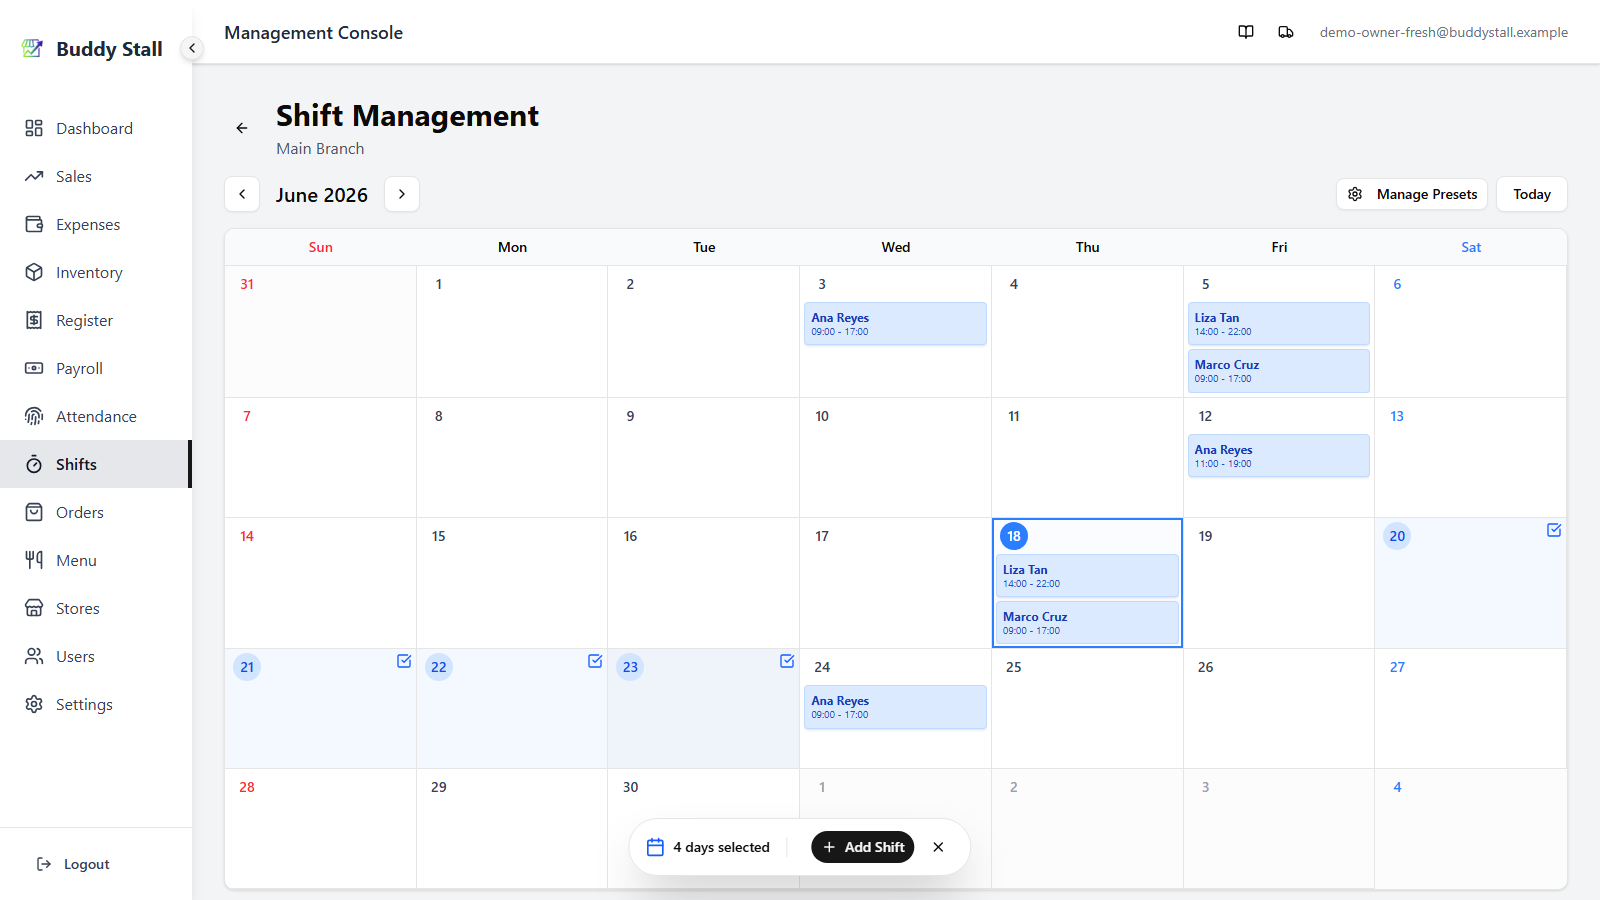
3. Add the same shift on several days
Click each day you want to schedule — selected cells stay highlighted and a counter appears in the bottom action bar. Click Add Shift with several days selected and the Standard tab creates the same shift on every selected day in one go.
4. Add a recurring weekly shift
For "every Mon / Wed / Fri for the next three months" style schedules, switch to the Weekly Pattern tab in the Add Shift dialog. Fill in:
- Employee, Start Time, End Time — same as the Standard tab.
- Repeat on — tick the days of the week the shift repeats on (Sun – Sat).
- Start Date and End Date — the date range to cover.
Click Generate to create one shift per matching weekday in the range.
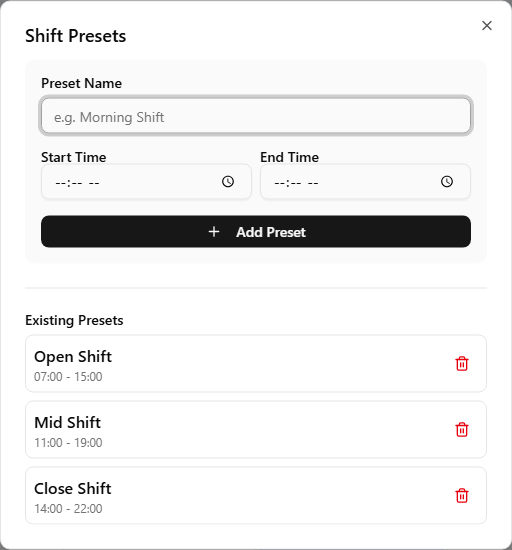
5. Save typing with shift presets
Most stores have a handful of recurring shift slots — e.g. "Open shift 7:00–15:00", "Mid shift 11:00–19:00", "Close shift 14:00–22:00". Saving them as presets lets you fill in start and end times with a single click.
Click Manage Presets in the scheduler header to open the Shift Presets dialog. Use the form at the top to add a preset with a name and start/end times, save, repeat for each slot you use regularly — saved presets are listed below the form. Presets are stored per store.
Back on the Add Shift dialog, presets appear in a Quick Load Preset dropdown above the time pickers. Picking one fills the Start Time and End Time fields in one tap.
6. Edit or delete a shift
Click an existing shift inside a day cell. The Edit Shift dialog opens with the saved values pre-filled — change the employee, times, or notes and Save to update, or click the trash icon to remove the shift.
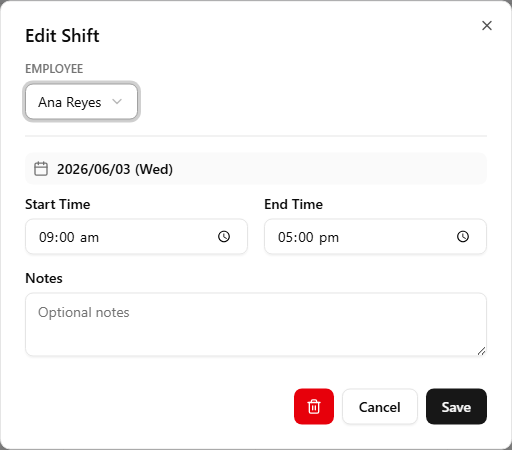
For removing many shifts at once, select multiple days first (same multi-select as step 3), then click the Delete Shifts button in the bottom action bar. Every shift on the selected days is removed in one action, with a confirmation prompt first.
Why shifts matter for payroll
A saved shift sits dormant until the period is registered. Payroll then diffs it against the day's attendance, trims by the break rule, and creates a Salary entry. The full calculation is in How time and pay work.
Read next
How time and pay work
The pay calculation model — shift as base, attendance as adjustment, break-time tip.
Clock in & out
The staff portal flow — how a shift gets clocked in, paused for a break, and clocked out.
Payroll
Review the period's records, then click Register as Expense to post the Salary entries to Expenses.