Master expenses
The master expenses catalog is the owner-wide list of expense items, organized by category. You define each item once and every store — including brand-new ones — inherits the whole catalog automatically; there is no per-store registration. This page is the reference for the screen and its parts. For the step-by-step setup, see Set up expense items.
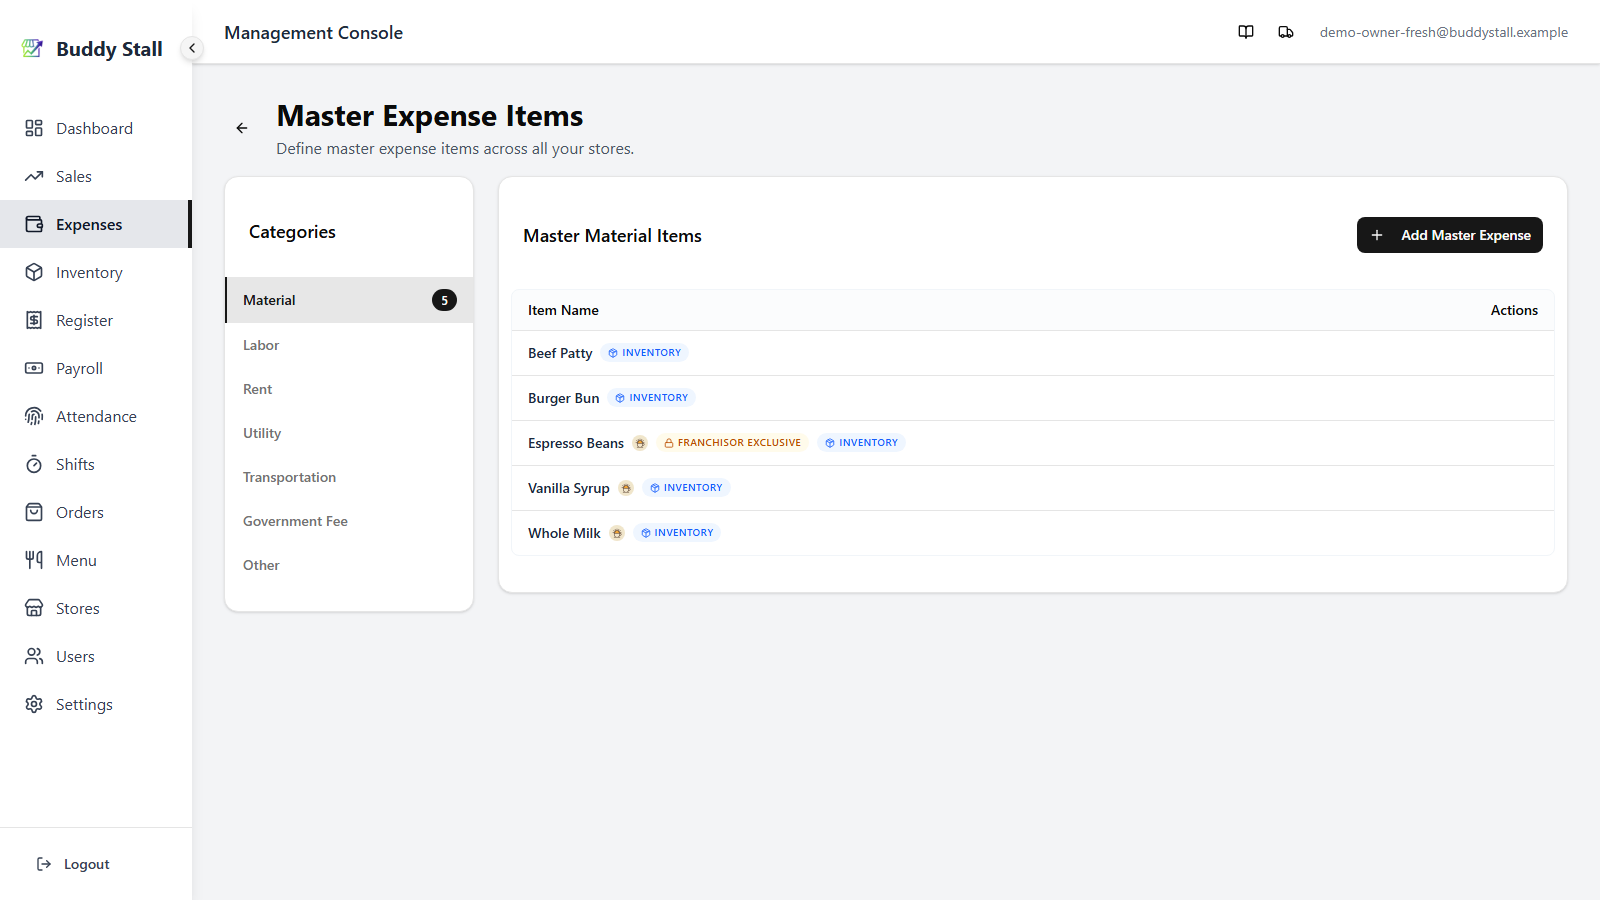
The screen
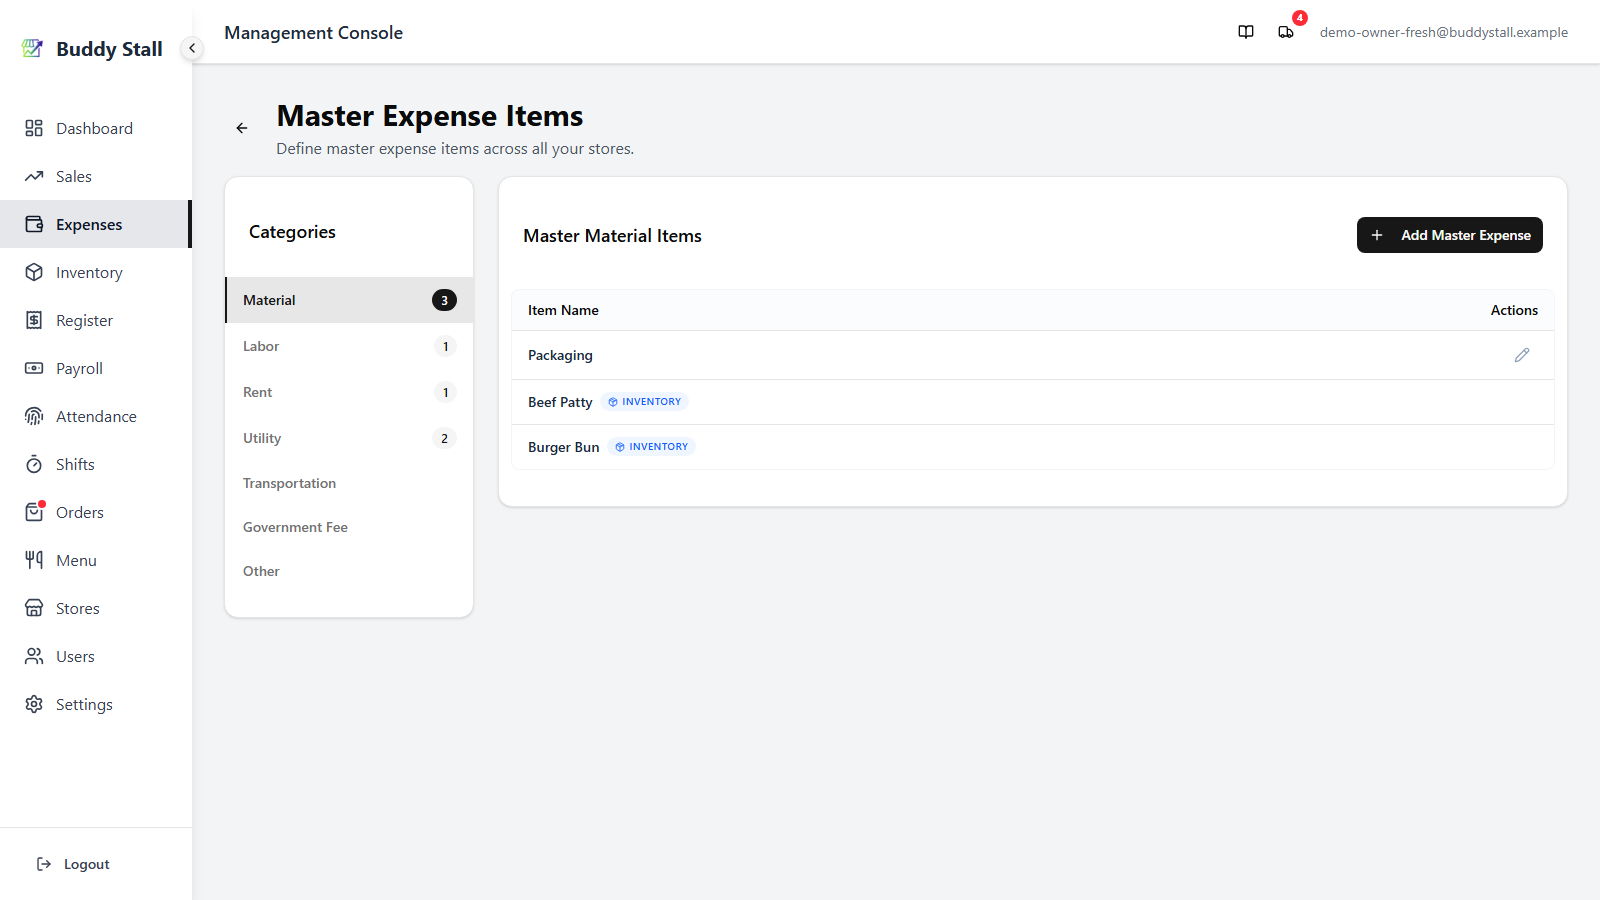
A Categories sidebar on the left and, on the right, the list of items in the selected category with a button to add a new one. Items are sorted by name. On a phone the sidebar becomes a dropdown above the list.
 12345
123451 Add Master Expense — opens a dialog to create a new item in the selected category. See Add or edit an item below.
2 Categories — the seven buckets a master item can live under. Click one to filter the list to it; the badge counts the items inside. See The categories below.
3 Item Name — how the item is referred to wherever you record spending against it (e.g. Packaging, Electricity, Beef Patty).
4 Badges — small markers next to a name flag items that behave differently: an Inventory pill, a Default lock, an Archived tag, and — for franchise-connected stores — a franchise badge. See Item badges below.
5 Actions — the per-row controls. An ordinary item (such as the standalone Packaging row) shows an edit pencil here; inventory-linked and locked items show nothing or a lock instead (see Item badges and Add or edit an item).
The categories
A category groups items by the kind of spending they cover. The sidebar holds the seven categories you manage items under:
- Material — ingredients and supplies. These usually come paired with an inventory item (see Item badges).
- Labor — wages and staff pay.
- Rent — stall space, equipment, or server rent.
- Utility — electricity, water, internet.
- Transportation — fuel, delivery, and travel costs.
- Government Fee — permits, taxes, licenses.
- Other — anything that doesn't fit the rest.
Two categories are deliberately not in this list because they aren't managed here: Waste is created automatically from inventory and menu item, and Initial Investment entries are typed freely when you record them. Both are explained on the Expenses overview.
Item badges
A row's name can carry markers that change how the item works:
- Inventory Inventory — the item is paired with a master inventory item. These are created and edited from the inventory catalog, not here, so they have no edit action on this screen. Recording an entry against one restocks the linked ingredient.
- Default Default — Salary and Inventory Delivery Fee are seeded into every catalog and wired into automatic flows (payroll posts to Salary, order delivery charges post to Inventory Delivery Fee) by their exact name. They can't be renamed, recategorised, archived, or deleted, so their row shows a disabled lock instead of an edit pencil.
- Archived Archived — the item has been archived and is hidden from selection; it only appears here while Show Archived is on. See below.
Add or edit an item
Add Master Expense and the per-row edit pencil open the same dialog. It asks for just two things — a Category (pre-filled from your selection) and a Master Item Name. Fill them in and save.
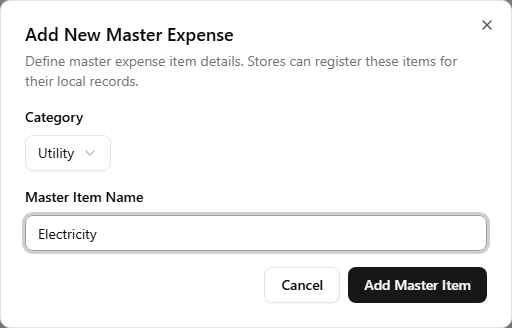
Editing reuses the same dialog and lets you change both the name and the category. The new item — and any rename — fans out to every store immediately. Material items linked to inventory and the locked Default items are the exceptions: they can't be edited from this screen (see Item badges).
Archiving and deleting
To remove an item, open its edit dialog and click Delete. The app first checks whether the item has any expense history:
- Never used — it can be permanently deleted. The dialog confirms, and the item is gone for good.
- Used in past records — a full delete would break those records, so the dialog offers Archive instead. Archiving hides the item from selection going forward without touching any past entry.
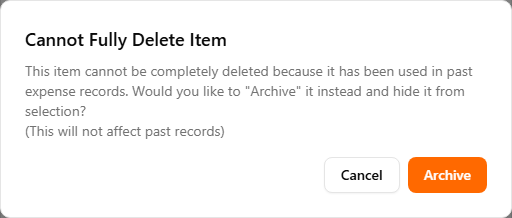
Archiving is the safe choice for anything that has ever been recorded against — past expenses, dashboard totals, and trends all stay intact. An archived item simply stops appearing in the Add Expense pickers.
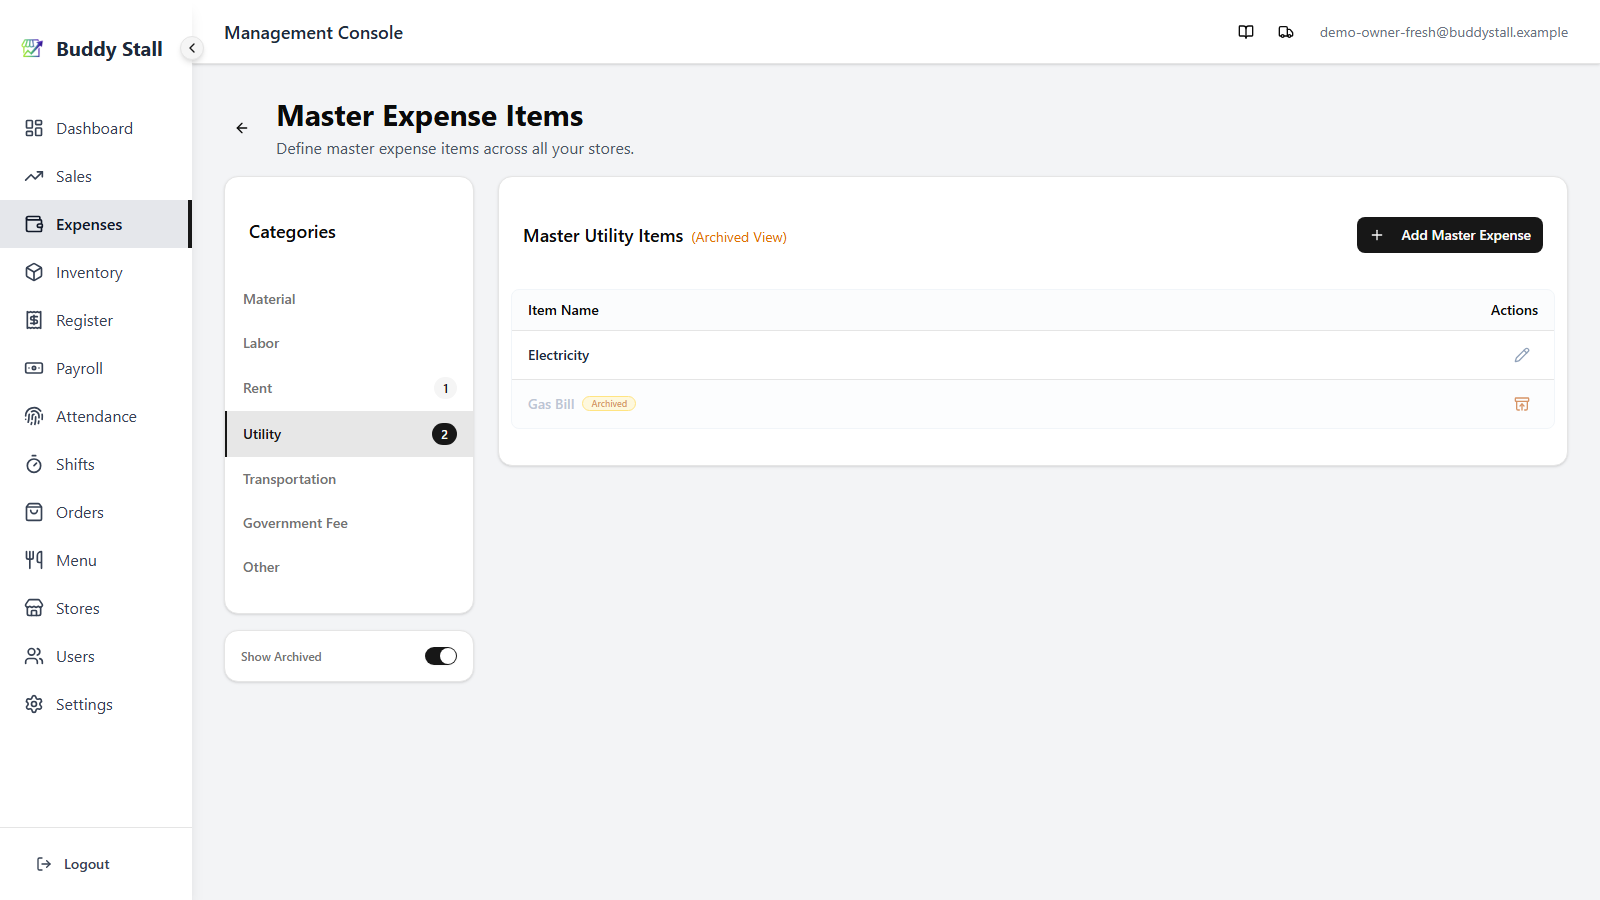
Once anything is archived, the Show Archived toggle appears under the sidebar. Flip it on to see archived rows mixed in; each one then offers a restore action in place of the edit pencil to bring it back.
 123
1231 Show Archived — the toggle under the Categories sidebar. It appears only once at least one item is archived.
2 Archived badge — the amber tag marking a soft-removed item, shown beside its name while the toggle is on.
3 Restore — replaces the edit pencil on an archived row; click it to bring the item back to active.
Everything below applies only once your store has joined a franchise. These features stay hidden until you connect, so a single, unconnected store can stop here. See Joining a franchise.
Items from a franchise preset
When your store is connected to a franchisor, part of this catalog can come from its preset — items loaded in from Settings → Franchise Connections. Preset rows carry a franchise badge, and because the franchisor owns them, they cannot be deleted here; re-pull the franchisor's updates from Settings instead.
A franchise item linked to a franchisor-exclusive ingredient also shows a Franchisor Exclusive marker. Those can only be restocked through franchisor orders, so direct expense entry against them is disabled — see Joining a franchise for the full flow.
 12
121 Franchise badge — the franchisor's logo marks every preset row. These items come from the preset; you can't delete them here.
2 Franchisor Exclusive — marks a preset item tied to a franchisor-exclusive ingredient. It can only be restocked through franchisor orders, so direct expense entry against it is disabled.
Read next
Set up expense items
The walkthrough for this screen — define your items by category and tune per-store staff visibility.
Store expenses
The per-store view — which items each store carries and shows to staff.
Expenses overview
The structure behind the catalog — categories, the two-tier model, and the automatic links.