Store menu
A store menu is one store's view of the master menu. The store does not re-create categories or items — it starts from the master and decides two things: what to show, and what to charge.
Open it from Menu, then pick a store.
A store menu has nothing to show until the master menu exists. Open a store with no master categories yet and the screen prompts you to create the master menu first.
The screen
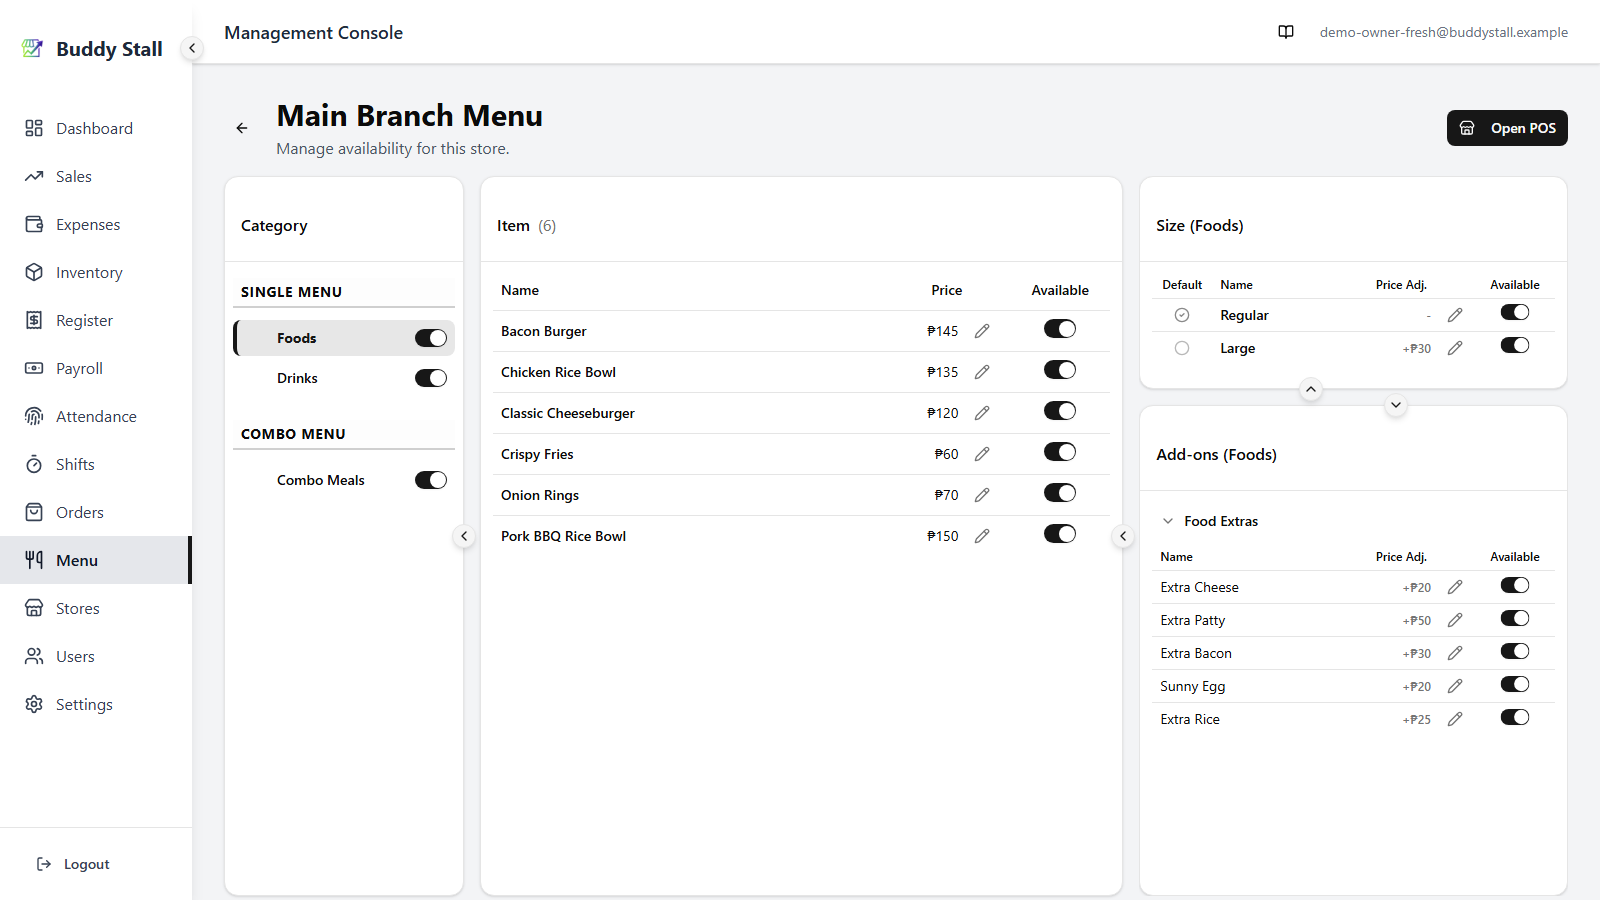
The store menu mirrors the master's three-column layout — Categories on the left, Items in the centre, Sizes and Add-ons on the right. The store-specific additions are availability toggles on every row, a per-store price column with an edit pencil, and an Open POS shortcut at the top-right.
 1234
12341 Open POS — jumps straight into this store's POS, useful for previewing how the menu looks to a cashier (see Open POS preview below).
2 Available toggle — hides a row from this store's POS when off. It appears on every Category, Item, Size, and Add-on option row. Turning a category off hides everything inside it; turning a single item, size, or option off hides just that row.
3 Price — the price the POS charges for this item at this store. By default it follows the master base price. When a store-specific override is in effect, the price reads with a small (Override) label underneath (see Price overrides below).
4 Edit price — opens the Edit Item Price dialog to set or clear a store-specific override. The same pattern applies to sizes and add-on options — edit a row in those panels to override its price adjustment for this store.
Price & B1T1 overrides
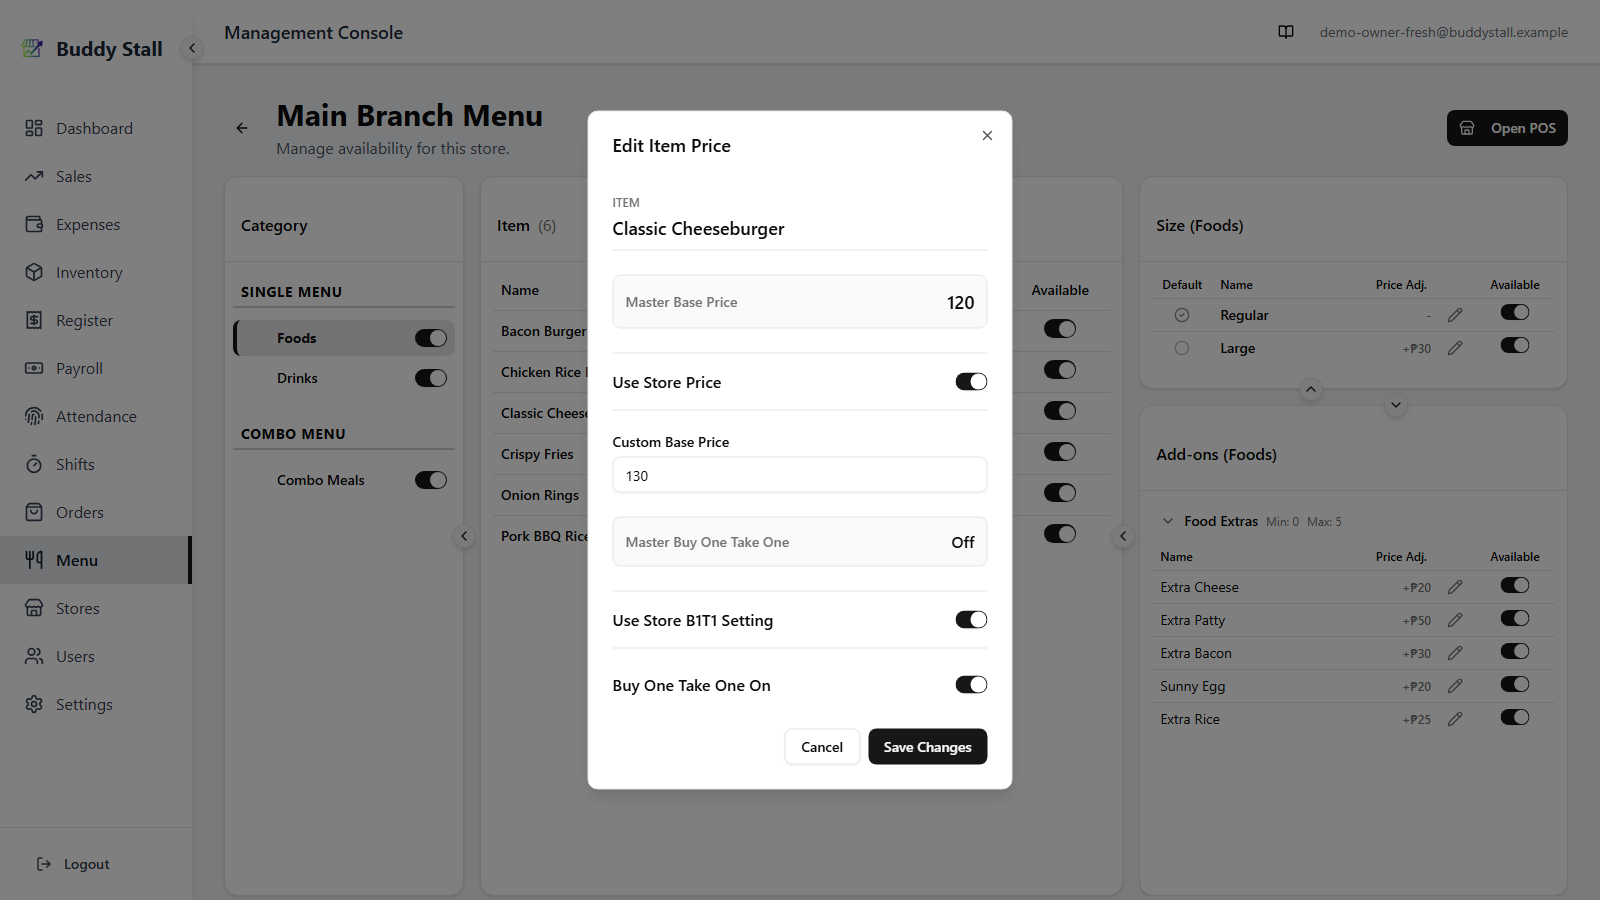
Each item keeps the master's price — and its Buy One Take One setting — by default, so a change to the master cascades to every store automatically. When a single store needs its own price or its own promo choice, switch on the matching override in the item's Edit Item Price dialog (the pencil on an item row). Both controls live in the same dialog: price at the top, Buy One Take One below.
 123456
1 Master Base Price — read-only reference: what the item would charge without an override.
2 Use Store Price — flip on to charge a custom price at this store; flip off to follow the master.
3 Custom Base Price — editable only when Use Store Price is on. Save Changes to apply.
4 Master Buy One Take One — read-only: whether the master runs the promo on this item.
5 Use Store B1T1 Setting — off by default, so the store follows the master. Switch it on to make this store's own choice.
6 Buy One Take One — editable only when Use Store B1T1 Setting is on; run the promo at this store or not, regardless of the master.
Once saved, each override reads back on the item's row. A price override shows the custom price with a small (Override) label underneath; a Buy One Take One override shows a green B1T1 badge with an (Override) tag next to the name:
 12
121 Price override — the custom price (₱130) with an (Override) label underneath, a reminder that this row no longer tracks the master price.
2 Buy One Take One override — a green B1T1 badge marks the promo as active for this store, and the (Override) tag flags that the store differs from the master. An override that turns the promo off instead shows the badge struck through — so any deviation is obvious at a glance.
Open POS preview
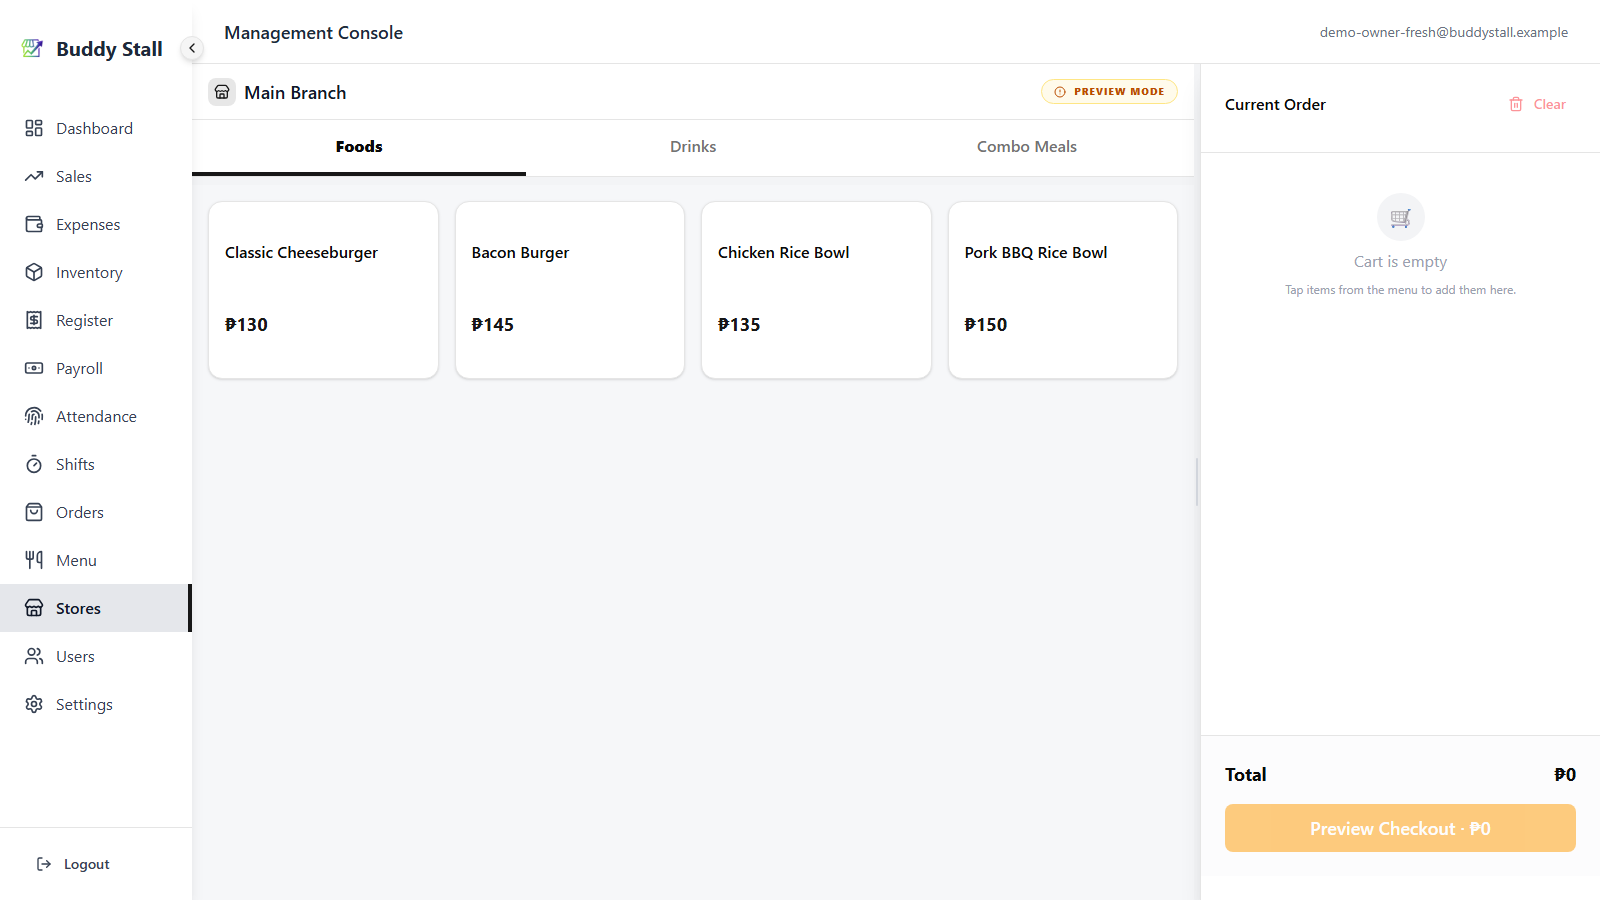
The Open POS button at the top-right of the store menu opens this store's POS in a new tab. It is the fastest way to see how your availability toggles and price overrides actually look to a cashier before opening the store for business.
What you cannot change here
Names, descriptions, photos, the category and item structure, the default size, the combo set contents, and recipes all belong to the master menu. To change any of those, edit the master menu — every store picks up the change automatically.