Users & permissions
User Management is where the owner creates and maintains the login accounts that the rest of the team uses to sign in. It is also where you set what each manager can see and what they can change.
Only the owner can open this page; manager and staff accounts cannot. The accounts created here are sign‑in credentials — separate from the employees registered per store on the Stores & employees page. An employee is a name attached to attendance, register open/close, and shift records; an account is a username and password used to log in. Staff accounts are device accounts (one per store) — the people working there are tracked as employees instead.
1. Open User Management
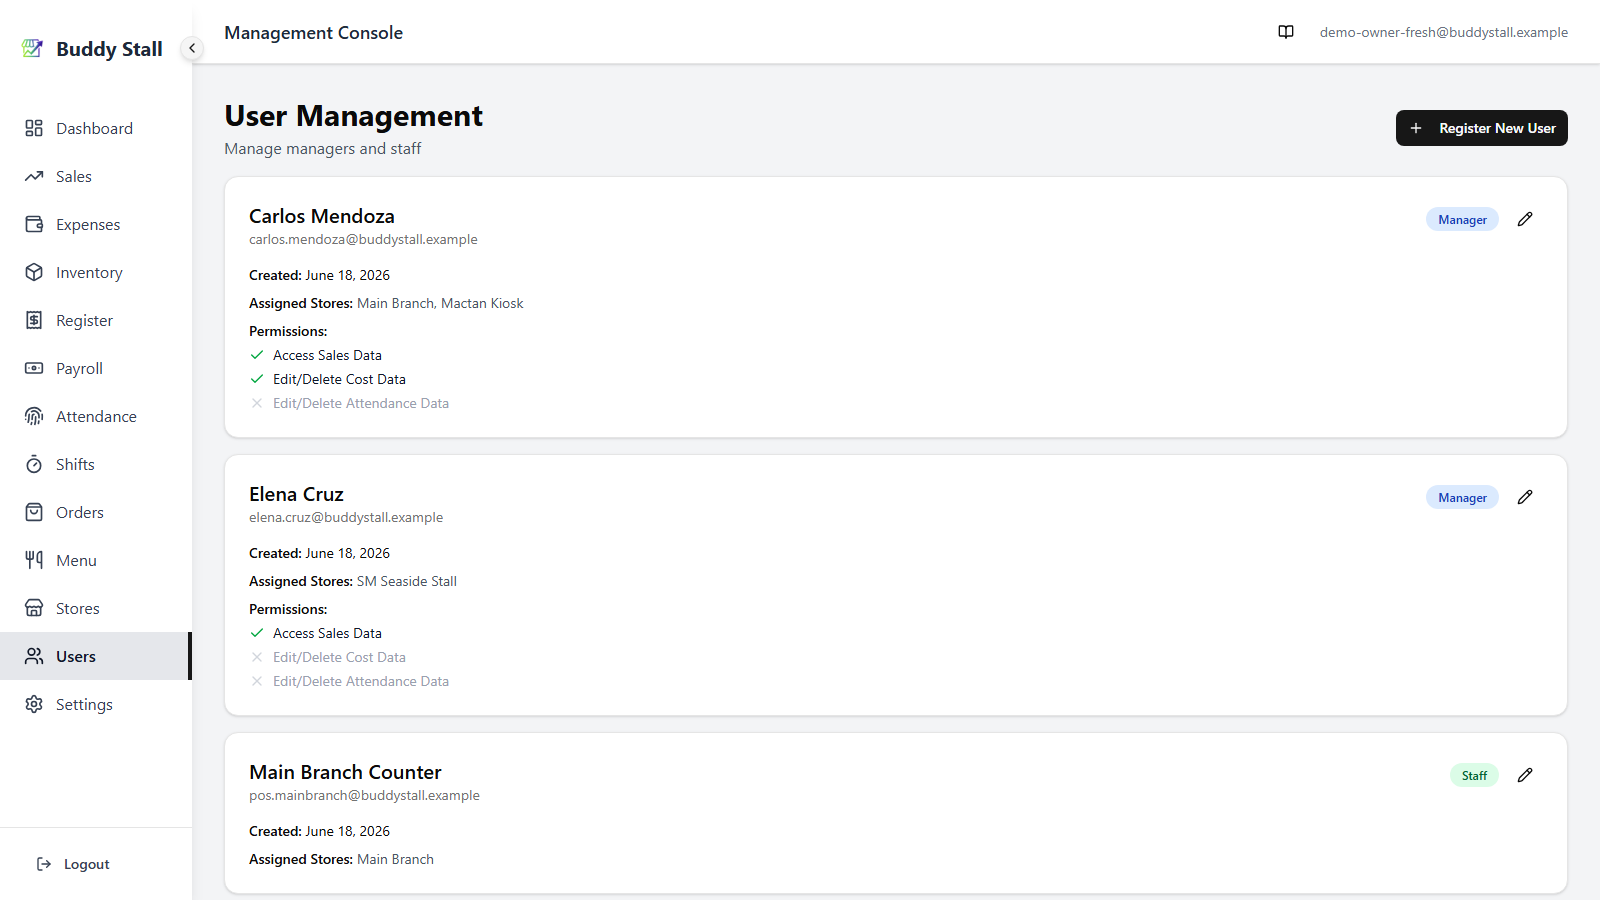
From the admin sidebar, open User Management. The page lists every manager and staff account created under your ownership, each on its own card showing role, assigned stores, and (for managers) granted permissions.
2. Create a user
Click Register New User in the top right. One dialog covers both manager and staff — the fields adapt to the role you pick.
2.1 Pick a role
- Manager — admin access, scoped to assigned stores. Can be assigned to multiple stores. Permissions decide what they can see and change.
- Staff — POS‑device account, one store only. No permission toggles — staff actions are scoped by the open register session, not by per‑user grants.
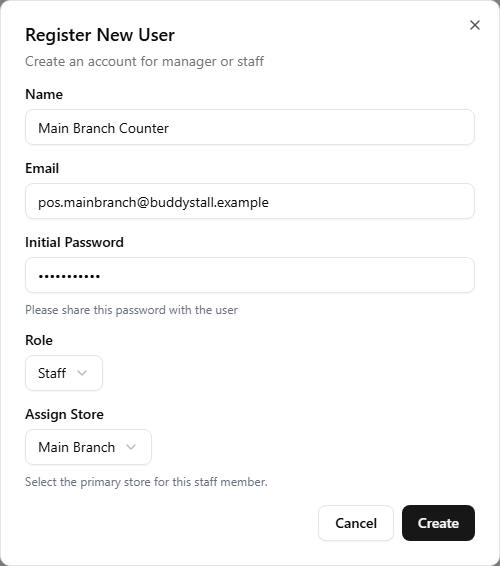
2.2 Name, email, initial password
- Name — display name on the user list and elsewhere in the admin UI.
- Email — the address used to log in. Must be unique.
- Initial Password — minimum 8 characters. You set it here and share it with the user out of band; they can change it themselves later from Login & password.
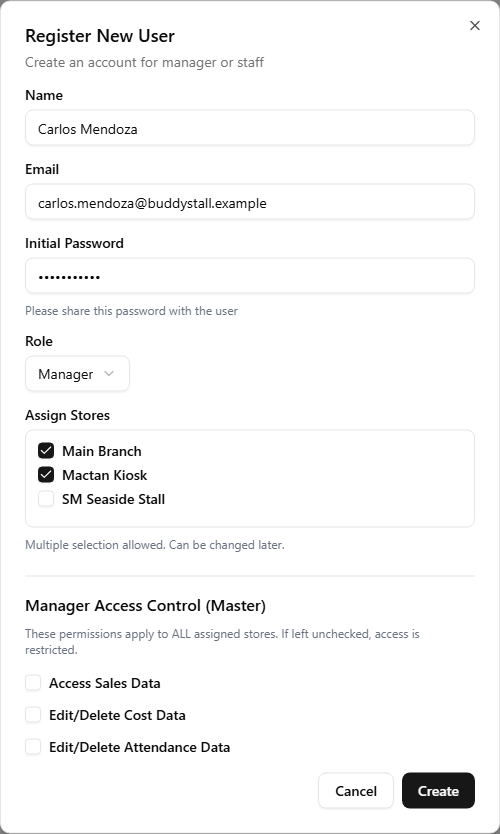
2.3 Assign stores
- Staff role: a single‑select dropdown — pick the one store this account belongs to.
- Manager role: a checkbox list of all your stores. Tick any number of them; the manager will see exactly those stores.
2.4 Manager permissions
Shown only when the role is Manager — the Manager Access Control section in the dialog above. Three toggles, all off by default. Detail on what each one actually unlocks is in section 4.
Click Create. The account appears in the list and can log in immediately.
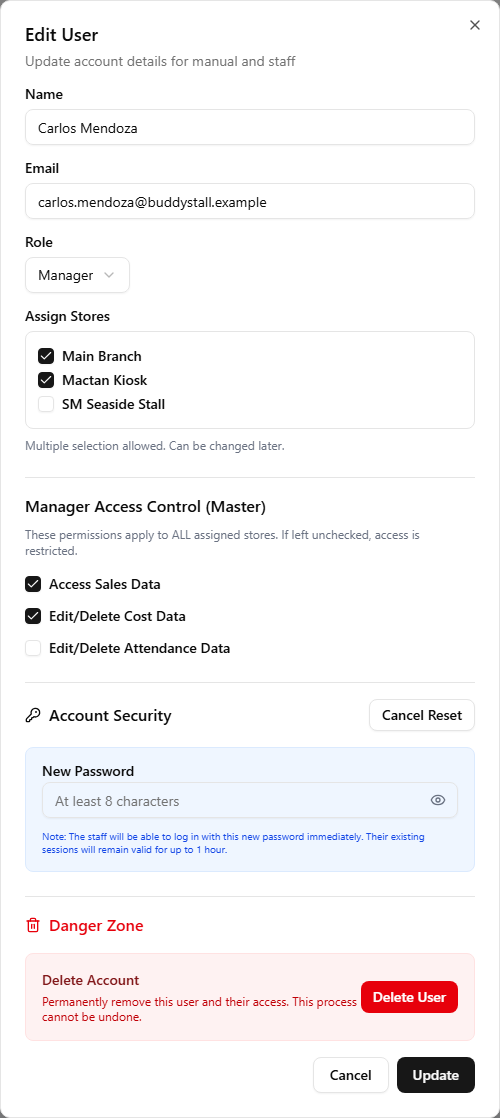
3. Edit a user
Each non‑owner card has a pencil button on the right. The Edit dialog lets you:
- Change name, role (manager ↔ staff), assigned stores, and manager permissions.
- Reset password — opens an extra field; type the new password (at least 8 characters) and submit. Share it with the user out of band.
- Delete user — opens a confirmation; deleting removes the account permanently.
The owner account itself does not show an Edit button — owner profile changes happen on the account settings page, not here.
4. What each permission actually controls
For manager accounts only. Each toggle is independent.
- Access Sales Data — turns on the Sales view in the admin sidebar and unlocks the manager's view of dashboards, sales lists, and store comparisons. Without it, those screens are hidden or empty.
- Edit/Delete Cost Data — the manager can always view and create cost entries. This permission additionally lets them edit or delete past entries on the Expenses pages.
- Edit/Delete Attendance Data — the manager can always view attendance. This permission additionally lets them edit or delete past attendance records.
The three permissions apply to all stores the manager is assigned to — there is no per‑store override. If you grant Access Sales Data to a manager assigned to three stores, they see sales for all three. Scope a manager by trimming their store list, not by trying to grant permissions only on some stores.
5. Where each role logs in
- Owner / Manager → admin console (Dashboard, Menu, Inventory, Sales, and the rest). Same URL; the sidebar is filtered to what the role can reach.
- Staff → staff portal on the POS device. Lands on the register screen (open or take orders) and never sees the admin console.