
Preset menu
The preset menu is the brand's menu standard — every category, item, size, and add-on, defined once for the franchise. Connected stores load it as the starting point for their own menus, so what you build here is what every franchisee starts selling from.
This walkthrough takes the preset from empty to a complete brand catalog: categories first, then items, sizes, and add-ons, and finally combos and per-item exceptions.
1. Open the preset menu
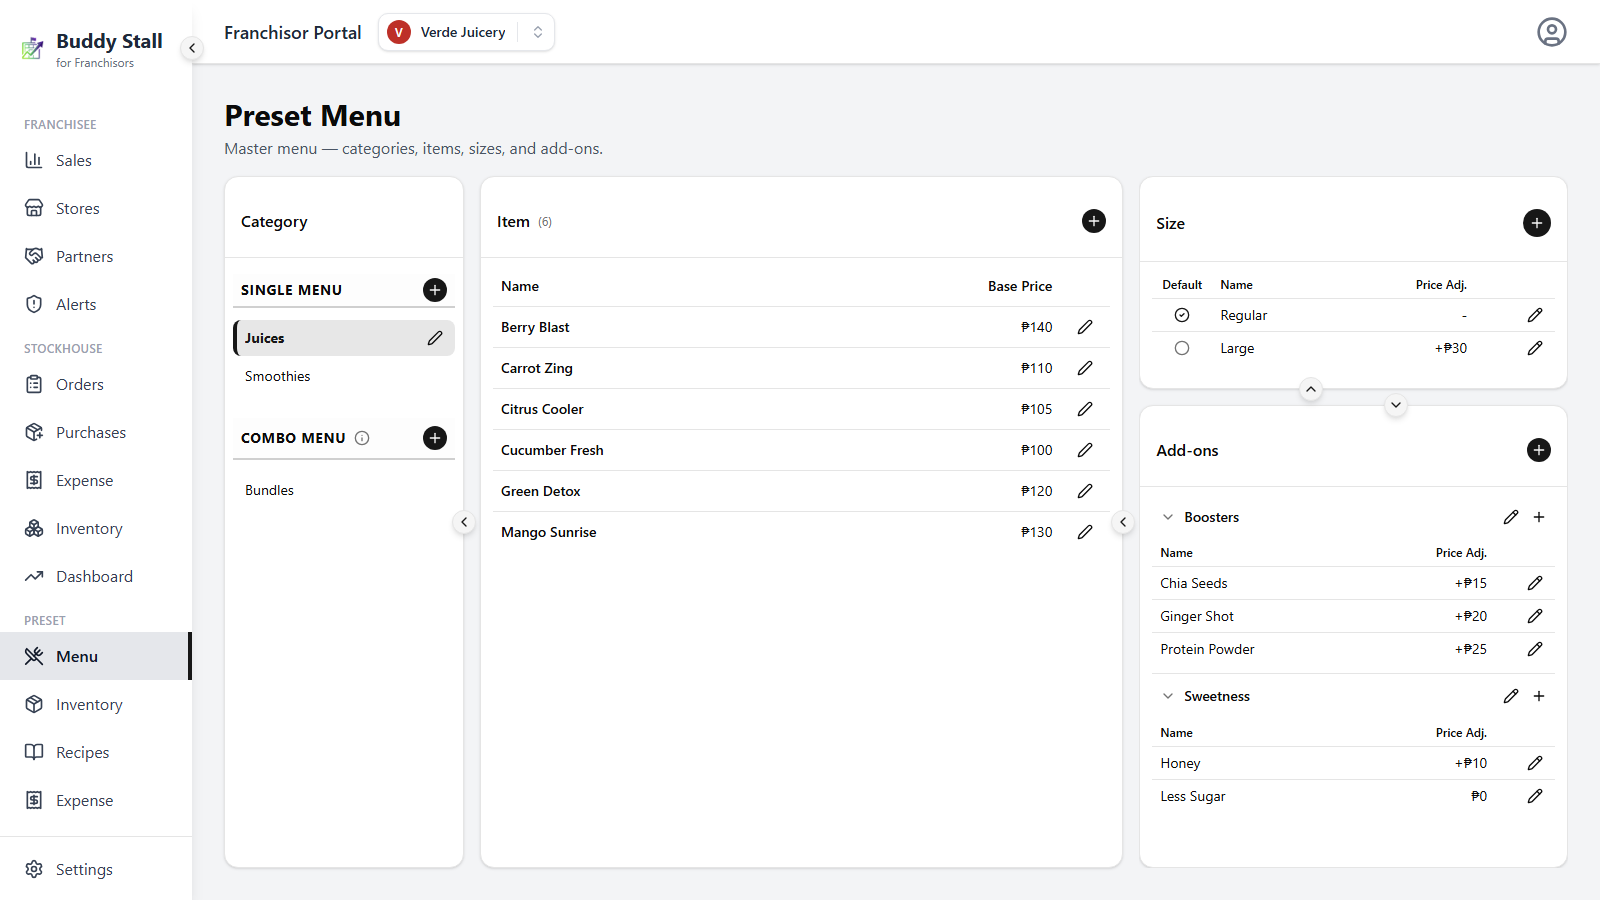
Open the franchise you want to work on. In the sidebar, under the Preset group, click Menu. The Preset Menu screen spans three columns: Category on the left, the selected category's Items in the centre, and the right column stacking the category's Sizes on top of its Add-ons. Selecting a category on the left updates everything to the right. The POS Preview switch in the page header turns those three panels into the POS grid — see Preview the POS.
2. Create a category
In the Category panel, categories are grouped into two sections — Single Menu and Combo Menu — each with its own + button:
- Single — ordinary items, each sold on its own.
- Combo — set meals built from items across single categories. The Combo + stays gated until two or more single categories exist.
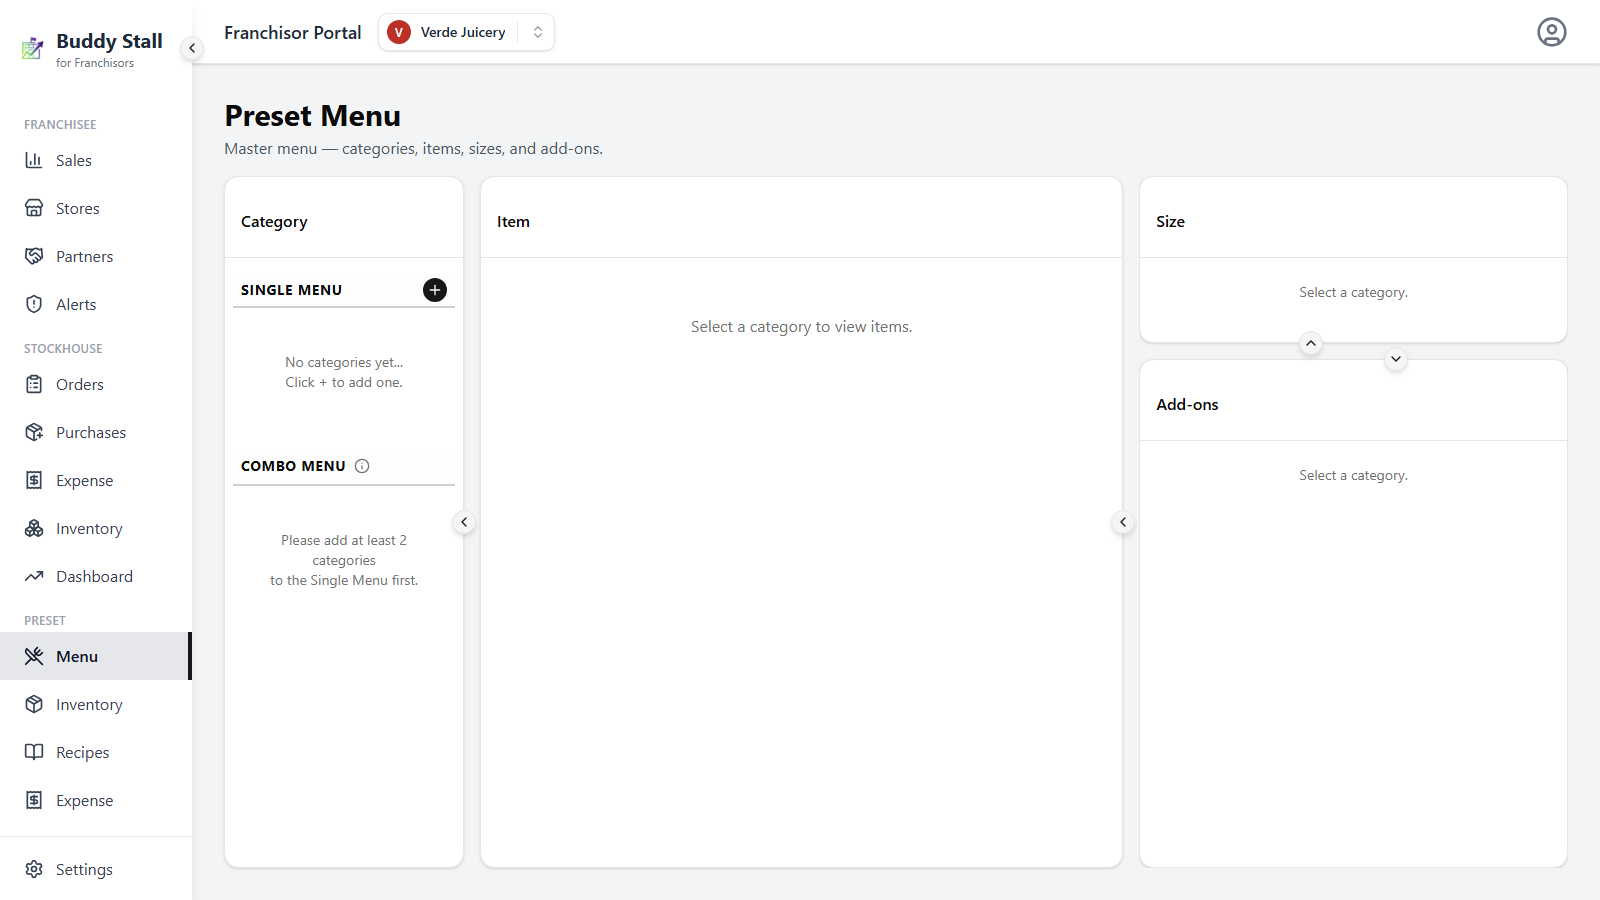
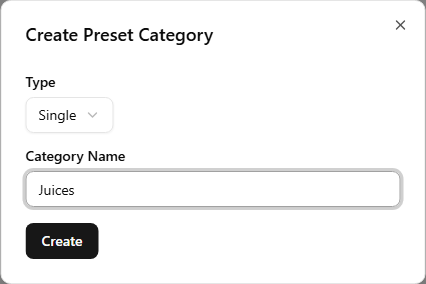
Click the + next to Single Menu. The Create Preset Category dialog asks for the Type (Single or Combo — fixed once created) and the Category Name (e.g. "Ramen", "Drinks", "Sides").
3. Add items
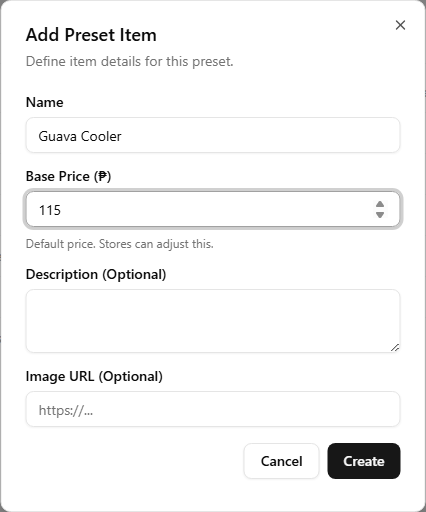
Select the category you just created, then click the + at the top of the Item panel. The Add Preset Item dialog asks for:
- Name — the item as it will appear on every store's menu and POS.
- Base Price — the brand default price.
- Description — optional.
- Image (Optional) — one photo for the item. Choose image uploads a file from your device, Replace swaps it, Remove clears it. PNG, JPEG and WebP are accepted, and large files are resized on upload.
Repeat for every item the category carries.
4. Set sizes
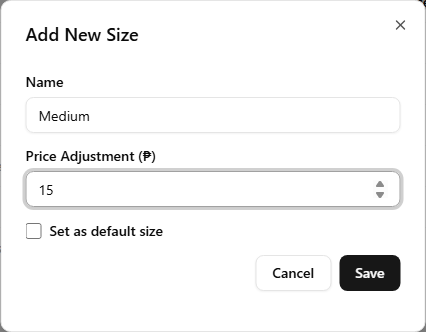
If the category needs sizes — Small / Medium / Large, for example — add them in the Sizes panel on the right. Each size in the Add New Size dialog carries:
- Name — free-form (e.g. "Small", "Medium", "Large").
- Price Adjustment — added on top of an item's base price at that size.
- Set as default size — the size a store's POS pre-selects. Normally this is the size with no price adjustment, so the base price is what the default sells at.
Sizes are defined per category, so every item in the category offers the same set.
5. Add add-ons
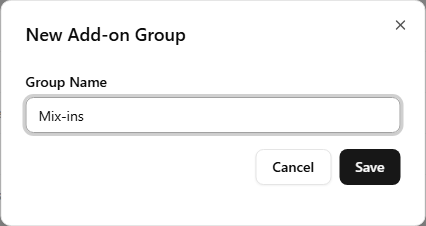
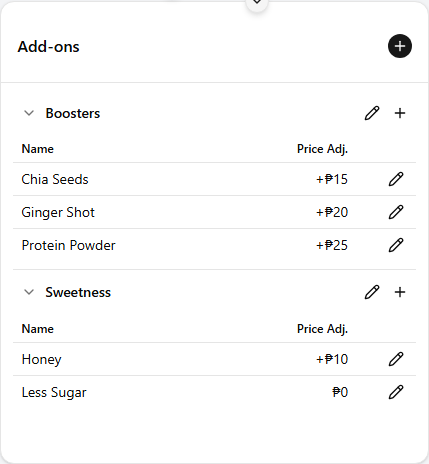
Use the Add-ons panel in two steps: first create a group — a named set of related choices — then add the options inside it.
- Add Group opens the New Add-on Group dialog, which just needs a Group Name (e.g. "Sugar Level", "Toppings").
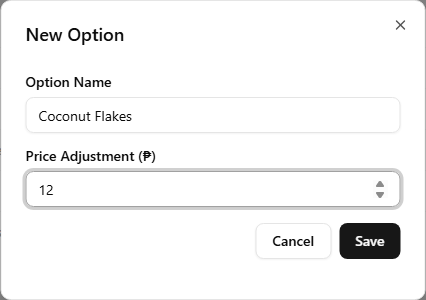
- Each group row has its own + for options. The New Option dialog asks for the Option Name (e.g. "Cheese", "Extra Shot") and its Price Adjustment.
6. Customize sizes or add-ons for a single item if needed
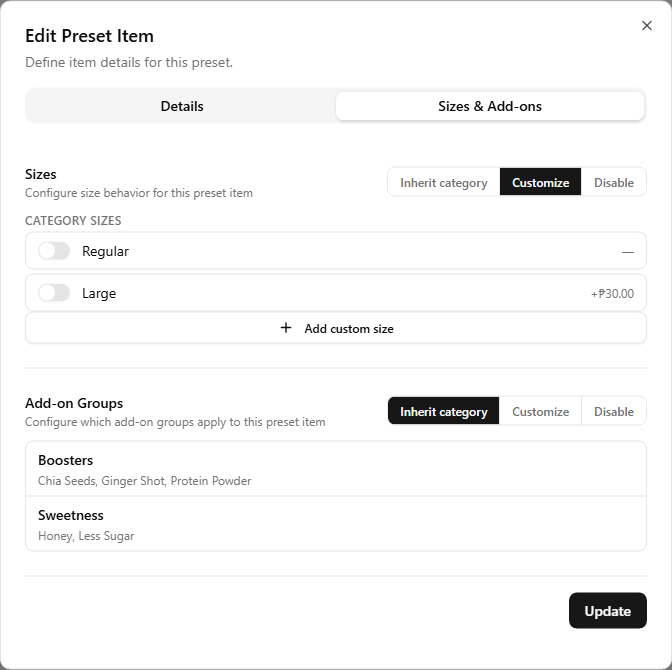
The sizes and add-ons above apply to every item in the category. If one item needs to differ, open that item's edit dialog from the Item panel (the pencil on its row) and switch to the Sizes & Add-ons tab.
Sizes and add-ons each take a mode of their own:
- Inherit category — use the category's set (the default).
- Customize — turn category sizes or add-on groups on or off for this item, and add item-only sizes, groups, or options that belong to this item alone.
- Disable — the item has no sizes / no add-ons at all.
7. Build combo menus
A combo bundles items from across your single categories and sells them as one priced product — a juice, a snack, and a drink as a single "Value Duo", for example. The Combo Menu + only becomes available once two or more single categories exist.
Create a combo category
Click the + next to Combo Menu in the Category panel. The Create Preset Category dialog opens with the Type set to Combo — just name the category (e.g. "Bundles") and create it.
Add a combo item
With the combo category selected, click the + at the top of the Item panel.
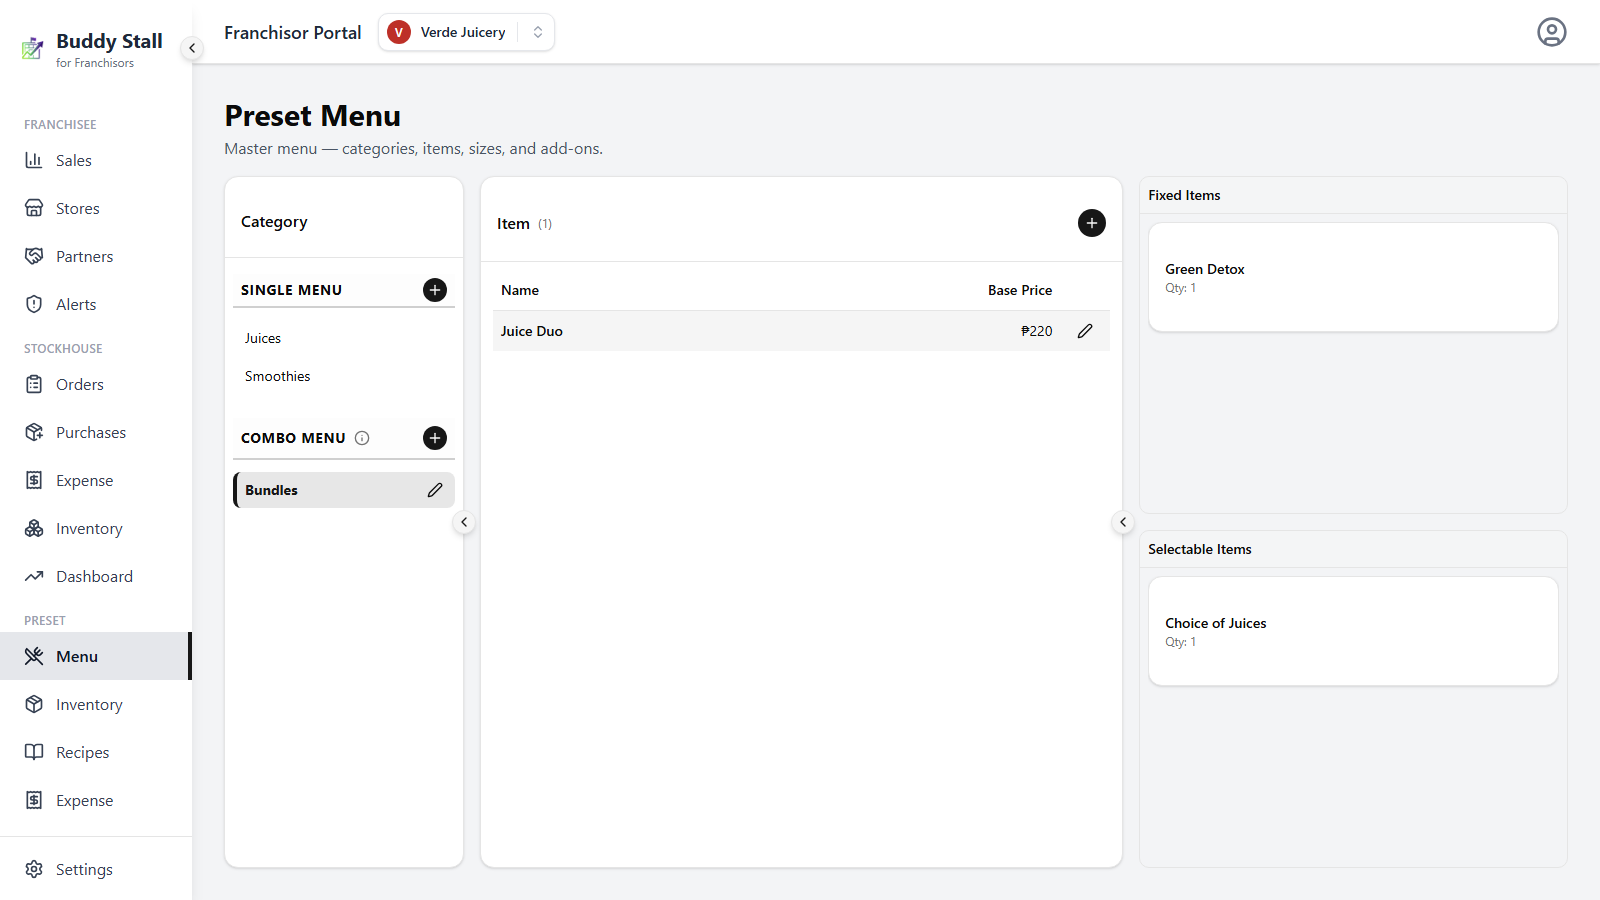
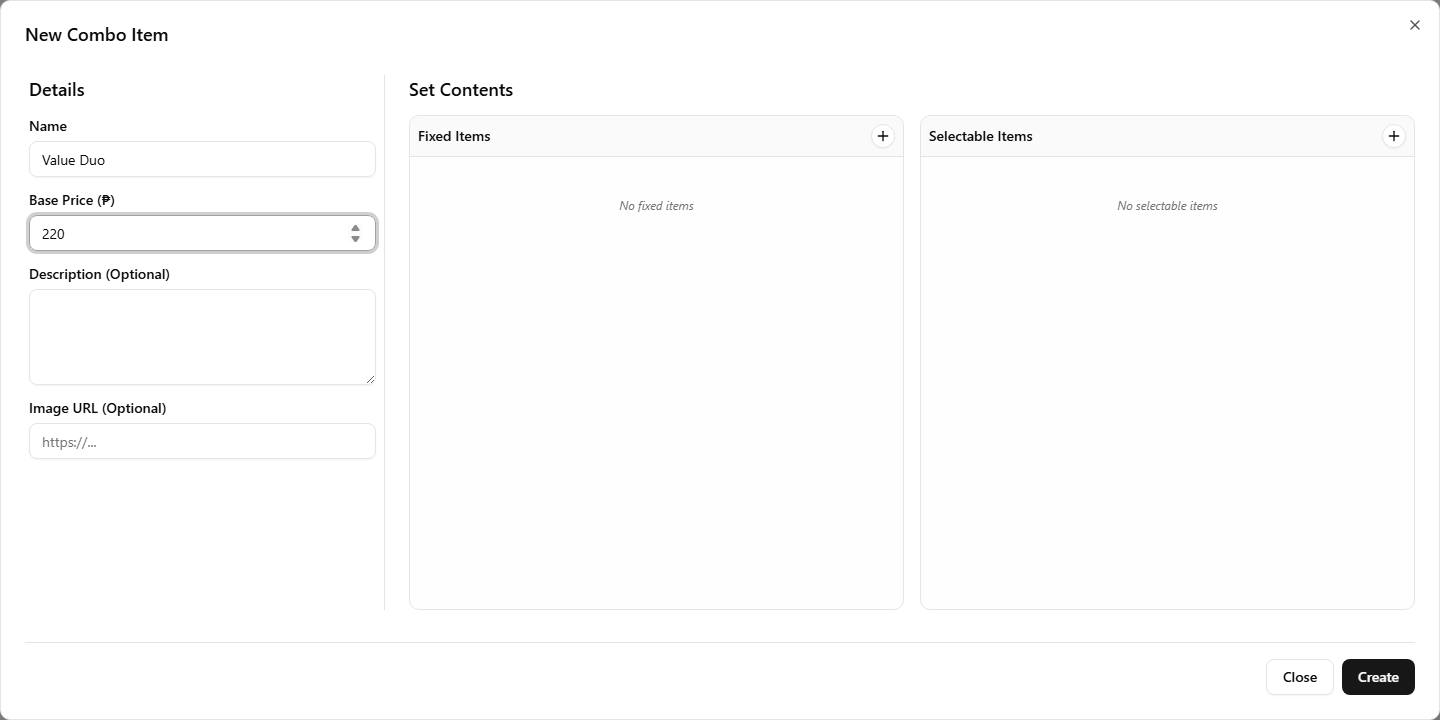
The New Combo Item dialog is a wider workspace with two halves: the usual item details on the left — Name, Base Price (the price of the whole set), an optional Description and an optional Image — and a Set Contents panel on the right with two columns:
- Fixed Items — the items that are always part of the combo.
- Selectable Items — a category the customer picks an item from at order time.
Add fixed items
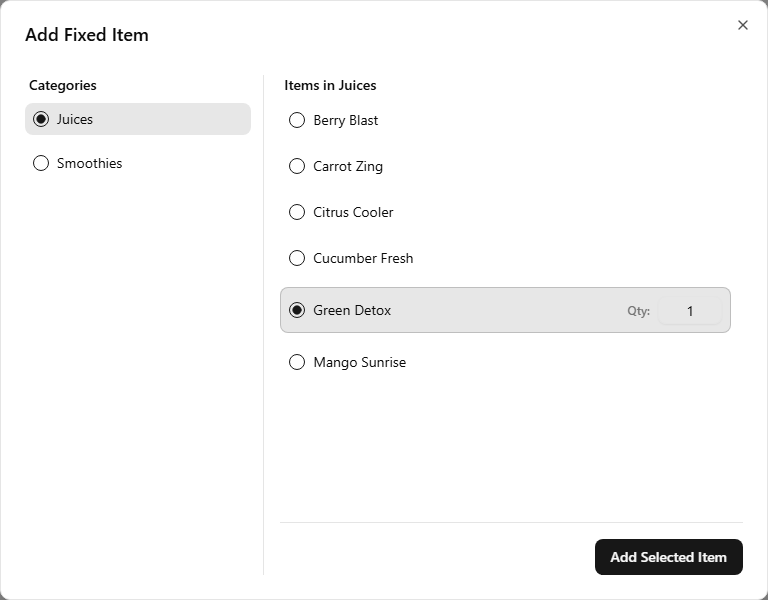
Click the + at the top of the Fixed Items column. The Add Fixed Item dialog asks you to pick a category, then the specific item from it, and set the Qty — how many copies the combo includes (e.g. "1× Green Detox").
Add selectable choices
Click the + at the top of the Selectable Items column. The Add Selectable Item (Category) dialog asks for the category and the Qty, and lists every item in that category under Allowed items as a checklist. All of them start ticked, so the customer can choose any item in the category.
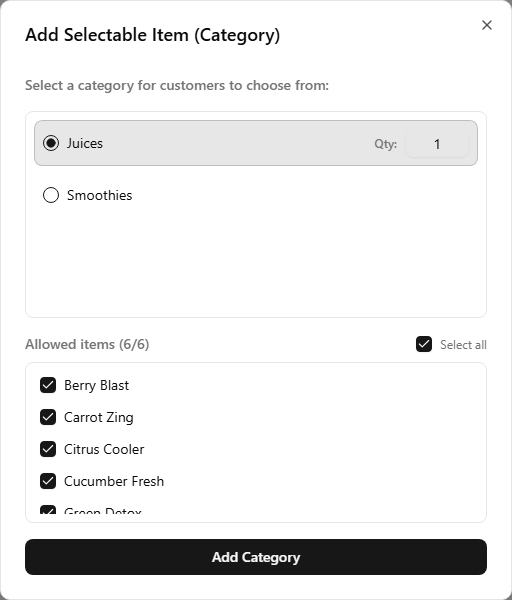
To offer only some of the category, untick the items you don't want — the card is then labelled "Limited to N of M items" so the narrowed choice is visible at a glance. Leave at least one item ticked.
Create the combo
With both columns reflecting the bundle, click Create.
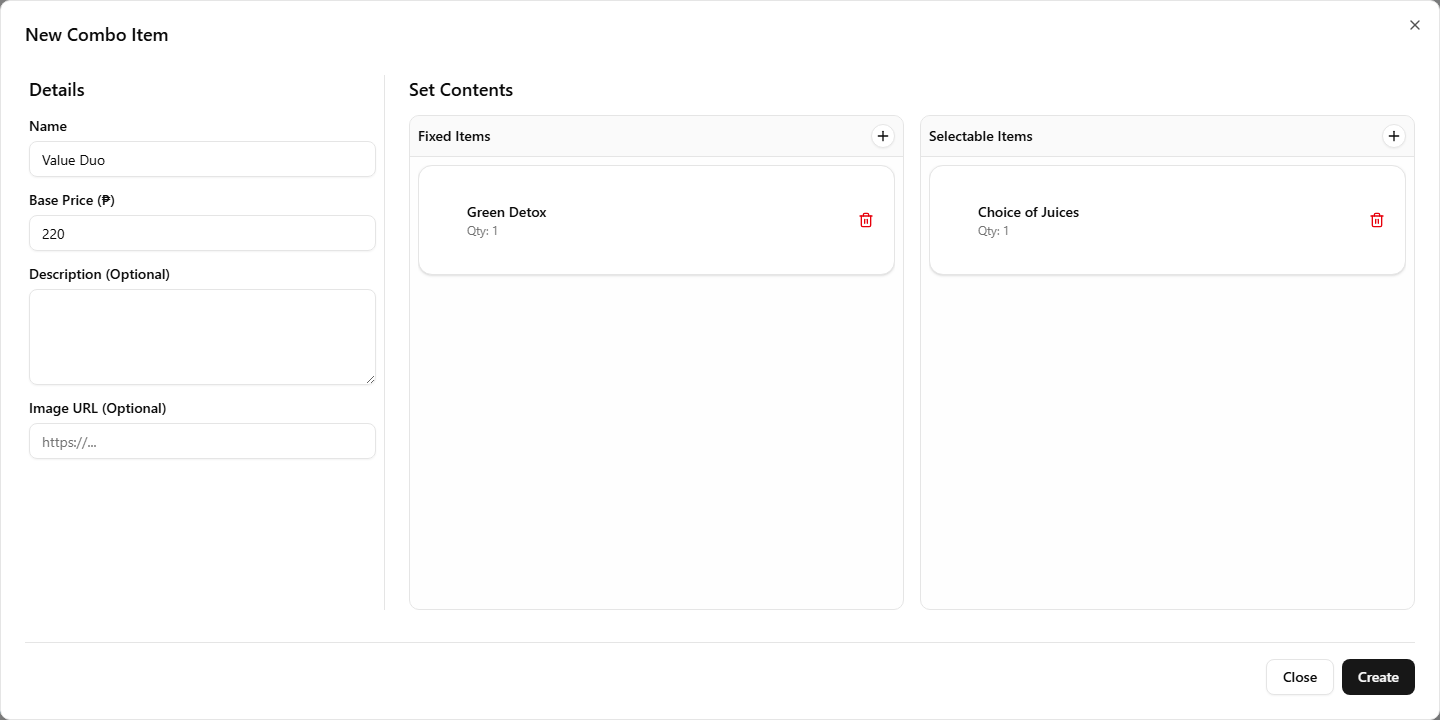
The combo item now lives under its combo category, and selecting it surfaces its set components in the right column — fixed items first, then the selectable choices, in the order customers will see at the store's POS.
To adjust a combo later, reopen it with the pencil on its row — Edit Combo Item carries the same Set Contents panel, and clicking a selectable card there reopens its Edit Allowed Items checklist. Stores that pull the preset get the whole combo, components and all.
Preview the POS
POS Preview, the switch at the top-right of the page, replaces the three editing panels with the POS grid rendered from the preset you are building — the fastest way to check that the brand's menu reads well before a single store loads it.
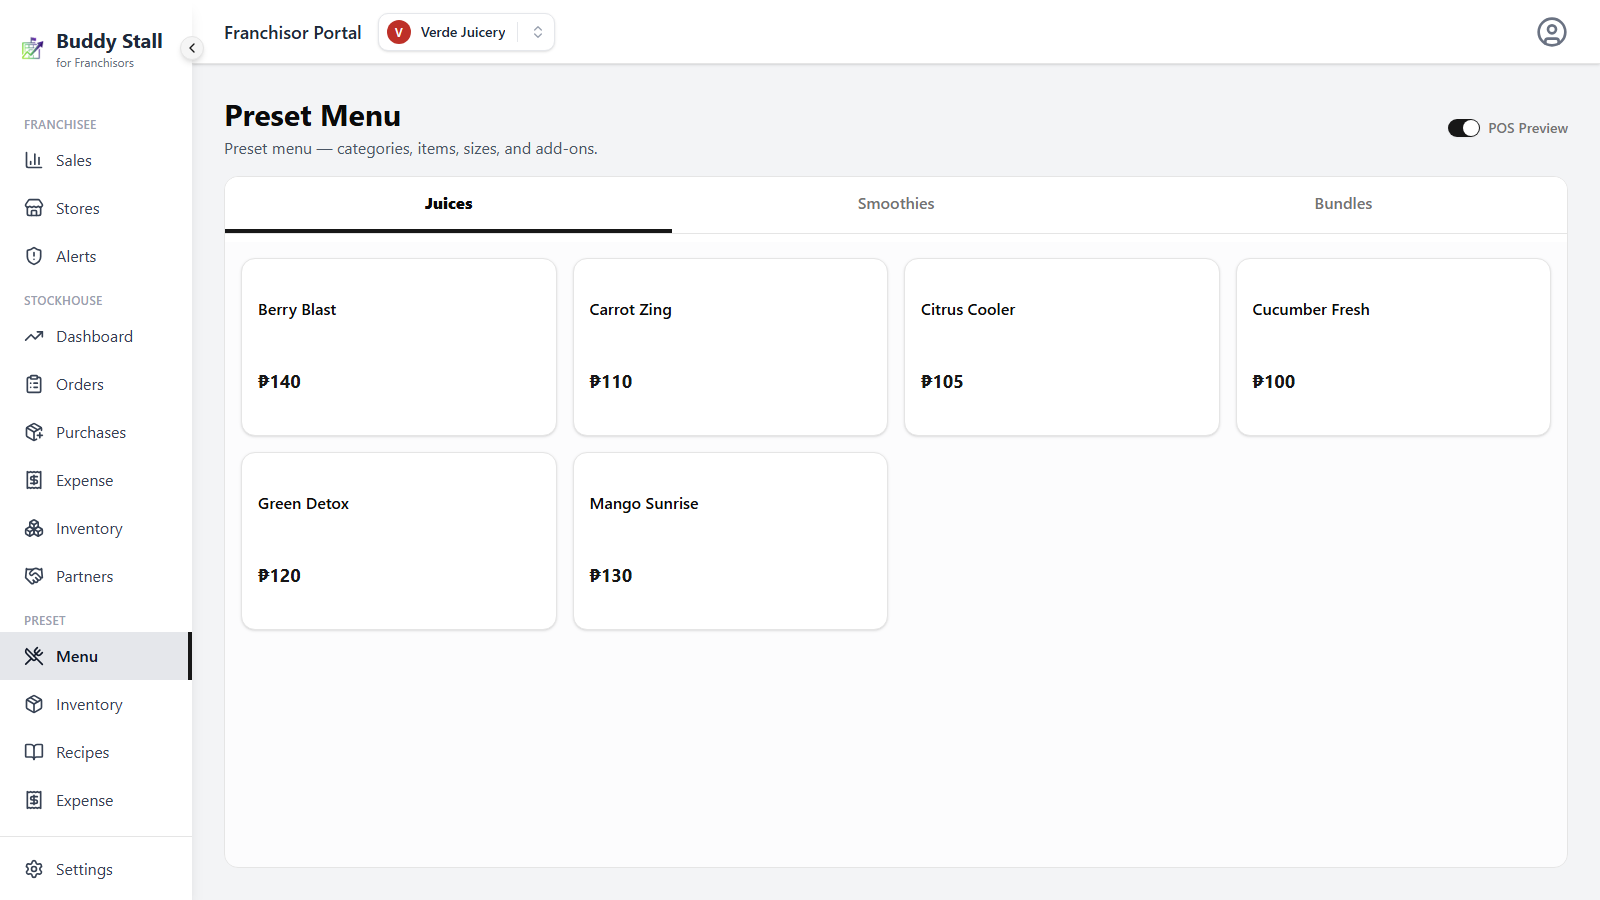
Tapping a tile opens the same size / add-on and combo dialogs the POS uses, so a size list or a combo's choices behave exactly as they will at the counter. There is no cart and no checkout — the preview shows the menu, not a sale. Switch it off and your category and item selection are exactly where you left them.
What you see is the preset itself, so it is the brand standard rather than any one store's screen — a store that has overridden a price, or hidden an item it does not carry, will differ by that much.
Removing something from the menu
The red trash icon on a row checks whether any connected store still carries it before doing anything.
- No store has it — the row is deleted outright, together with everything nested under it.
- A store has it — the row is archived instead and the confirm names how many stores still use it, so the id survives for those stores to be asked about the removal on their next reload.
Archived rows do not vanish from this screen. Turn on the Show Archived switch in the header and they come back inline in the list they belong to — an archived item still sitting under its category, an archived option still under its group — each with a Restore control. That is on purpose: menu rows nest, and pulling them out into a separate box would hide which parent an archived row would return to. (Preset inventory and expenses do use a separate Archived card, because those catalogs are flat.)
What the store sees, and how it approves or declines the removal, is covered in How updates reach stores.